How to reinstall macOS from macOS Recovery | Apple Support

I’ll show you how to reinstall macOS using macOS Recovery. First, make sure your Mac is plugged in, connected to the Internet, and turned off; if possible, use a wired keyboard.

For Apple silicon Macs, press and hold the power button until startup options appear, then choose Options → Continue.

For Intel-based Macs, turn on the Mac and immediately hold Command‑R (or other recovery keys) until recovery utilities load.

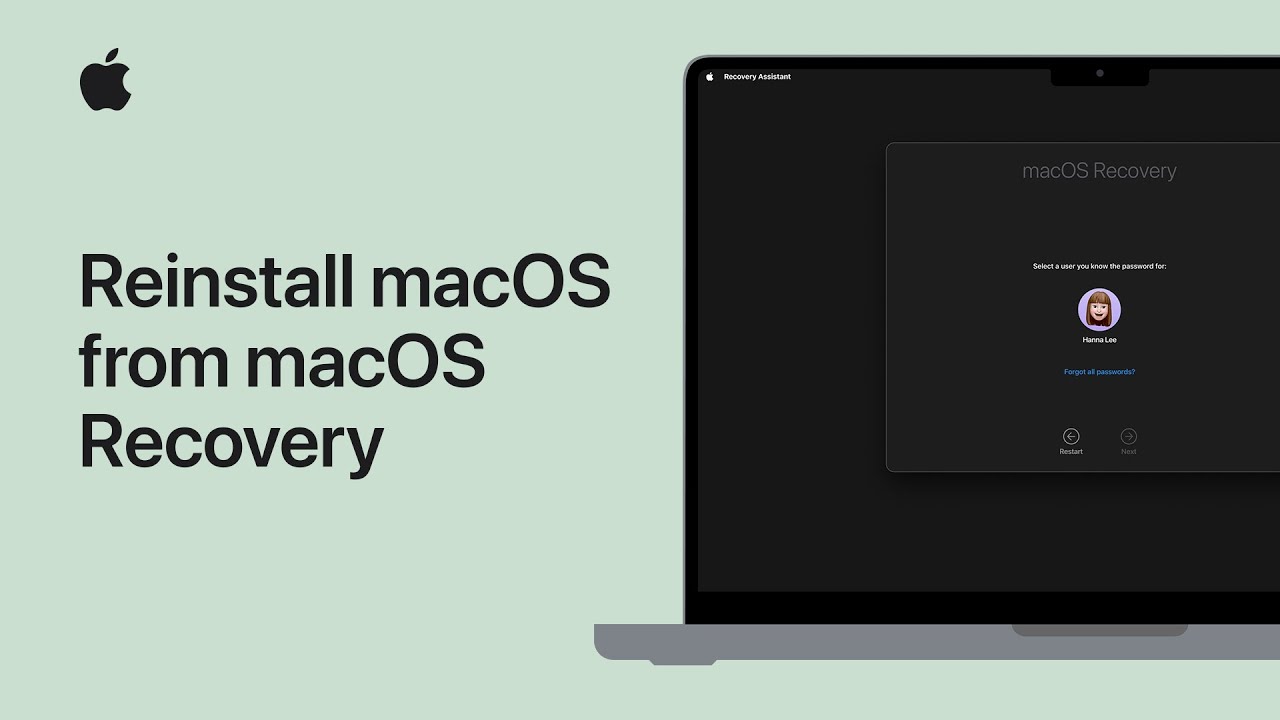
When Recovery opens, choose Reinstall macOS, follow the on‑screen prompts, wait for installation to finish, then restart and sign in to your account.

Back up important files beforehand if possible.

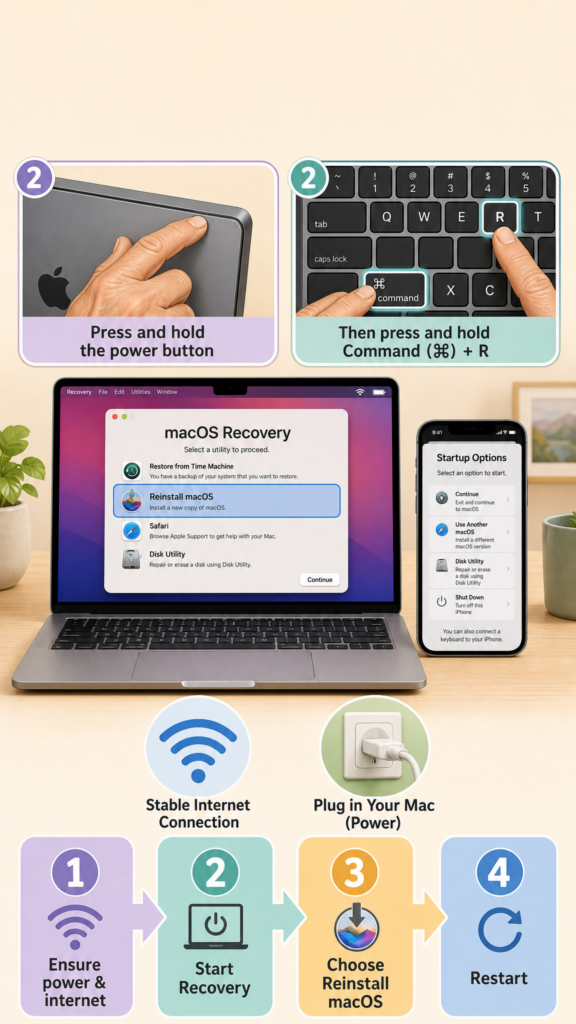
  • Ensure power and an Internet connection; use a wired keyboard if available.
  • For Apple silicon: press and hold the power button until startup options, then choose Options → Continue.
  • For Intel Macs: start up and hold Command‑R (or the appropriate recovery key) until Recovery loads.
  • In Recovery, choose Reinstall macOS and follow the on‑screen prompts.
  • When installation completes, restart, sign in, and restore from backup if needed.

How to use categories in Mail on iPhone, iPad, and Mac | Apple Support

100-word first-person summary (step-by-step, no timestamps)
I’ll walk you through Mail categories so you can find important email faster. First, open Mail on your iPhone, iPad, or Mac.

Tap or click Primary, Transactions, Updates, or Promotions to switch views, or open All Mail to see every message.

To move a sender, swipe (or control‑click) a message, choose More → Categorize Sender, pick a category for that sender, and confirm.

To change behavior, open More → About Categories to learn how Mail sorts messages, or turn off Show Mail Categories to use List View.

To undo changes, scroll to Reset Manual Categorization at the bottom and confirm.

  • Open Mail on iPhone, iPad, or Mac and view category tabs.
  • Tap Primary, Transactions, Updates, or Promotions (or open All Mail).
  • To recategorize a sender, swipe/control‑click → More → Categorize Sender → choose category.
  • Use More → About Categories for details or turn off Show Mail Categories to use List View.
  • Undo changes with Reset Manual Categorization at the bottom.

How to personalize your Contact Poster on iPhone | Apple Support

I’ll guide you through making a Contact Poster on your iPhone. First, open Messages (or Contacts) and tap Edit, then Name & Photo.

Next, tap Add or Customize, choose Photos or Memoji, select and crop a circular image, then pick a color filter and tap

Next. After that, tap your name to choose a font, adjust weight and color with the sliders, and preview styles by swiping.

When satisfied, tap Update, enable Name & Photo Sharing, choose Share Automatically or Ask Each Time, and finally tap Done to save and share your Contact Poster, then preview it across your apps.

  • Open Messages (or Contacts) → Edit → Name & Photo.
  • Tap Add or Customize, choose Photos or Memoji, then crop and apply a color filter.
  • Select a font, adjust weight and color with sliders, and preview poster styles.
  • Tap Update, enable Name & Photo Sharing, and choose Share Automatically or Ask Each Time.
  • Tap Done to save and preview the Contact Poster across your apps.

How to use Apple Invites | Apple Support

I’ll show you how to create and send an event with Apple Invites. First, open the Apple Invites app or visit iCloud.com and tap Add or Create Event.

Next, tap Add Background and choose a photo, use the Camera, or try Image Playground. Then enter an Event Title, pick a font, and press Return on the keyboard. After that, set the Date and Time and tap Done.

Next, add a Location or choose your current place and give it a custom name.

Finally, review the details, invite guests, and send the invitation — anyone can join, even without an Apple device right away.

  • Open Apple Invites or iCloud.com and tap Add/Create Event.
  • Add a background (photo, Camera, or Image Playground) and set an event title and font.
  • Choose the date and time, then confirm with Done.
  • Add or name a location and save it.
  • Review details, invite guests, and send — invites work for Apple and non‑Apple devices.

How to use Ambient Music in Control Center on iPhone and iPad | Apple Support

I’ll show you how to add Ambient Music to Control Center so you can relax or focus.

Open Control Center, tap the Add button at top-left, then tap “Add a Control” and scroll to Ambient Music. Choose one mode — Sleep, Chill, Productivity, or Wellbeing — and tap it to add.

To pick or change a playlist, tap the Ambient Music control, then tap the playlist name and select your favorite, like Laidback Lo‑Fi.

Tap outside the menu to save, then tap an empty spot in Control Center to finish. Now tap the control anytime to play your chosen ambient.

  • Open Control Center, tap Add → Add a Control, and scroll to Ambient Music.
  • Choose one of four modes: Sleep, Chill, Productivity, or Wellbeing.
  • Tap the Ambient Music control to view or switch playlists.
  • Select a playlist (e.g., Laidback Lo‑Fi), then tap outside to save.
  • Tap the Ambient Music control anytime to play your chosen ambient playlist.

How to reset your Mac login password | Apple Support

I’ll walk you now through resetting your Mac login password. First, restart your Mac and try signing in again, checking Caps Lock and any on-screen lockout message.

If FileVault is enabled and you still can’t sign in, click the question mark beside the password field and choose the reset message to launch Recovery Assistant.

Enter your Apple ID email and password, then type the verification code sent to a trusted device.

Select the user account to reset, create a new password (remember case sensitivity), re-enter it to confirm, and follow the prompts to restart and sign in with your new password.

  • Restart your Mac, check Caps Lock, and watch for any temporary lockout message.
  • If needed, click the question mark and the reset message to start Recovery Assistant.
  • In Recovery Assistant, enter your Apple ID email and password.
  • Type the verification code sent to a trusted device and select the user account to reset.
  • Create and confirm a new case-sensitive password, then restart and sign in.

How to change your Apple Account primary email address on your iPhone or iPad | Apple Support

I’ll walk you through changing your Apple Account primary email on your iPhone or iPad. Open Settings and tap your name, then choose Sign In & Security.

Tap the current primary email, then turn off Primary Email to keep it associated while choosing a different primary address, or tap Remove from Account to delete it.

If only an iCloud email is linked, choose Change Email Address instead. Confirm by tapping Remove from Account, enter your iPhone passcode, and follow prompts to add a new primary email.

Finish by verifying the new address — that’s all, and you’re done. Expect confirmation email.

  • Open Settings > tap your name > Sign In & Security.
  • Tap the primary email and choose Remove from Account or turn off Primary Email.
  • If only an iCloud email is present, use Change Email Address.
  • Confirm removal, enter your iPhone passcode, then follow prompts to add a new primary email.
  • Verify the new address to finish.

How to change your passcode and turn on Stolen Device Protection on iPhone | Apple Support

I’ll show you how to change your iPhone passcode and enable Stolen Device Protection. Open Settings, then tap Face ID & Passcode on Face ID devices or Touch ID & Passcode on Touch ID devices.

Enter your current passcode, scroll to Change Passcode, enter the new passcode, and re-enter it to confirm.

Next tap Review Access to check apps and permissions that may allow access to your data, use Reset All to clear those settings if needed, or choose More Options to adjust individual items.

Finally, enable Stolen Device Protection in Security settings for extra peace of mind.

  • Open Settings → Face ID & Passcode (or Touch ID & Passcode).
  • Enter your current passcode, then tap Change Passcode.
  • Enter and re-enter the new passcode to confirm.
  • Tap Review Access, use Reset All or More Options to manage access.
  • Enable Stolen Device Protection in Security settings for added protection.

How to add or remove a device from AppleCare One | Apple Support

I’ll show you how to add or remove a device from AppleCare One on iPhone or iPad. First open Settings and tap AppleCare & Warranty, then follow the prompts to subscribe or sign in to your AppleCare One plan.

Next, choose Manage Plan, tap Add Device to include an eligible iPhone, iPad, or Apple Watch (you can have up to three covered) or tap a device and choose Remove to free a slot.

If you trade in a covered device and upgrade with Apple, the new device usually joins your plan automatically. Finish by confirming changes and checking your plan details.

  • Open Settings → AppleCare & Warranty and sign in.
  • Subscribe or open Manage Plan to view covered devices.
  • Tap Add Device to include an eligible iPhone, iPad, or Apple Watch (up to three).
  • Tap a listed device and choose Remove to take it off the plan.
  • Trade-ins upgraded with Apple are added automatically; you can add more devices for a fee.

What is two-factor authentication for Apple Account? | Apple Support

I enable two‑factor authentication on my Apple Account to add extra security: when I sign in on a new device I enter my password, then I get a six‑digit verification code sent to my trusted devices or phone number.

I tap Allow on a trusted device or view the code sent by SMS, type the six‑digit code into the new device to verify it, and confirm the sign-in. I only need to do this once per device.

If I lose access to trusted devices, I update my trusted phone number immediately to avoid lockout and keep account recovery contacts too.

  • Turn on two‑factor authentication for your Apple Account.
  • Sign in on a new device with your password; a six‑digit code is sent.
  • Code is delivered to trusted devices or a trusted phone number.
  • Tap Allow on a trusted device or enter the SMS code to verify.
  • You only need to verify once per device; update trusted contacts if you lose access.