Planning Your Day With AI: Simple Routines for Morning, Afternoon, and Evening

Hello! If you’ve ever felt like there are just too many small things to remember—like when to take a pill, when to start dinner, or when to call a friend—you are in the right place. Technology has come a long way, and today’s “AI assistants” (like the ones on your phone or sitting on your kitchen counter) are designed to be your personal helpers.

In this guide, we will walk through how to set up a simple daily routine using these tools. It’s much easier than it sounds, and once you try it, you’ll wonder how you ever managed without it. Let’s dive in and see how a little bit of tech can bring a lot of peace of mind.

Table of Contents

Key Takeaways

  • Voice Commands are Key: You can set reminders just by speaking to your device.
  • Medication Safety: Use recurring alerts so you never miss a dose.
  • Social Connection: Schedule regular “dates” for calls or hobbies to stay active.
  • Simple Setup: You only need to set these routines once, and they work every day.

Morning: Starting Your Day on the Right Foot

The morning is the best time to set the tone for your day. Instead of trying to remember everything as soon as you wake up, let your AI assistant handle the heavy lifting.

Setting Medication Reminders
One of the most helpful things AI can do is remind you to take your medicine. You can simply say to your phone or smart speaker, “Remind me to take my heart medication every morning at 8:00 AM.” Your device will then chime at that exact time every single day until you tell it to stop.

Checking Your Schedule
While you have your morning coffee, you can ask, “What’s on my calendar today?” Your assistant will read out any appointments or lunch dates you’ve saved, so you don’t have to go hunting for a paper planner.

Afternoon: Staying Active and Nourished

As the day moves along, it’s easy to get caught up in a book or a TV show and forget to move around or eat a healthy meal.

Meal and Hydration Prompts
If you find yourself forgetting to drink enough water or skipping lunch, set a “gentle nudge.” A simple reminder like “Time for a glass of water” at 2:00 PM can make a big difference in how you feel.

Scheduling Your Hobbies
Whether you enjoy gardening, knitting, or doing crosswords, you can block out “Me Time” on your digital calendar. This ensures you prioritize the things you love. For example, you can set a recurring event every Tuesday at 3:00 PM called “Garden Time.”

Evening: Winding Down and Connecting

The evening is for relaxing and catching up with the people who matter most.

Never Miss a Phone Call
We all mean to call our kids or grandkids more often, but life gets in the way. You can set a reminder that says, “Remind me to call Sarah every Thursday at 6:00 PM.” It takes the pressure off your memory and ensures you stay in the loop with family.

Preparing for Tomorrow
Before you head to bed, you can ask your assistant to set an alarm for the next morning or check the weather forecast. Knowing if it’s going to rain tomorrow helps you plan your outfit and your errands without any surprises.

Final Thoughts

Using AI and digital calendars isn’t about being a “tech expert”—it’s about making your life a little bit easier. By letting these tools remember the small details, you free up your mind to focus on enjoying your day.

Start small by setting just one reminder today, perhaps for a glass of water or a favorite hobby. You’ll likely find that having a “digital helper” gives you more confidence and keeps your day running exactly the way you want it to. Happy planning.

Categories AI

How to view Live Activities in the Dynamic Island on iPhone | Apple Support

On iPhone 14 Pro and later, you can monitor activities in progress using the Dynamic Island. First, unlock your iPhone and touch and hold the activity in the Dynamic Island to expand it and view more details.

To shrink the Dynamic Island, simply swipe up on your screen. You can switch between activities by swiping left or right on the Dynamic Island. Tap the activity to open its corresponding app, and swipe up to return it.

To hide the activity, swipe left or right until it disappears, and repeat the swipe to show it again. For more tips, check Apple Support.

Summary:
– Unlock your iPhone and touch and hold an activity in the Dynamic Island to expand it for more details.
– Swipe up to collapse the Dynamic Island and make it smaller.
– Switch between activities by swiping left or right on the Dynamic Island.
– Tap the activity to open the corresponding app and swipe up to return it to the Dynamic Island.
– Swipe left or right to hide or show the activity in the Dynamic Island.

How to merge duplicate contacts on your iPhone or iPad | Apple Support

To merge duplicate contacts on your iPhone, start by opening Contacts where you’ll see an alert if duplicates are detected. Tap “View Duplicates” to view a list of contacts with multiple entries.

You can either review and merge duplicates individually or tap “Merge All” to consolidate all duplicate contacts at once. Confirm the merge by tapping “Merge Duplicates.”

This process will tidy up your contact list and make it more organized.

Summary:
– Open Contacts and look for a duplicate alert.
– Tap “View Duplicates” to see a list of duplicate contacts.
– Review and merge duplicates individually or tap “Merge All.”
– Confirm the merge by tapping “Merge Duplicates.”
– Your contacts will now be organized and free of duplicates.

How AI Can Help You Stay Active: Gentle Exercise and Walking Plans

Staying active is one of the best ways to keep our bodies feeling strong and our minds sharp. However, finding the right exercise routine can sometimes feel a bit overwhelming, especially if you aren’t sure where to start. The good news is that you don’t need a personal trainer or a fancy gym membership to get moving.

Today, simple tools called “AI fitness apps” can act like a supportive friend in your pocket. These apps are designed to listen to your needs and suggest gentle ways to stay active that fit your lifestyle. In this guide, we’ll show you how these tools work and why they are a wonderful, beginner-friendly way to boost your health.

Table of Contents

Key Takeaways

  • Personalized for You: AI apps create exercise plans based on your current fitness level and goals.
  • Gentle Movement: Focus on low-impact activities like walking and stretching that are easy on the joints.
  • Progress Tracking: Automatically count your steps and celebrate every small win to keep you motivated.
  • Safety First: Many apps offer step-by-step videos to ensure you are moving safely and correctly.

How AI Makes Exercise Easier

When we talk about AI (Artificial Intelligence) in fitness, it simply means the app learns what you like and what you are capable of doing. Instead of a “one size fits all” workout, the app adjusts to you. If you had a busy day and only want a five-minute stretch, the app can suggest exactly that.

Personalized Walking Plans

Walking is one of the best exercises for overall health. AI apps can help you set a daily step goal that feels achievable, not exhausting.

  • Starting Small: The app might suggest a 10-minute walk around the block to start.
  • Building Up: As you get stronger, the app gently suggests adding a few more minutes each week.
  • Weather Alerts: Some apps even check the local weather and suggest the best time of day for your walk so you stay comfortable.

Low-Impact Exercises at Home

If it’s too cold outside or you prefer to stay indoors, AI apps offer a variety of “low-impact” routines. These are movements that don’t put stress on your knees or back.

  • Chair Yoga: Gentle stretching while seated to improve flexibility.
  • Balance Drills: Simple movements to help you feel more steady on your feet.
  • Strength Building: Using light weights or even just your own body weight to keep muscles toned.

Celebrating Your Success

One of the best parts of using these apps is the encouragement. Every time you reach a goal—whether it’s walking 500 steps or finishing a short stretching session—the app will send you a friendly notification or a “digital badge.” These small celebrations make a big difference in staying consistent and feeling proud of your progress.

Final Thoughts

Taking the first step toward a more active lifestyle is a wonderful gift to yourself. With the help of AI-powered apps, you have a guide that moves at your pace, respects your limits, and cheers you on every step of the way. You don’t need to be a “tech expert” to use these tools; they are built to be simple, clear, and helpful.

Why not try downloading a walking app today? You might be surprised at how much fun it is to see those steps add up and how much better you feel after just a little bit of gentle movement.

Categories AI

How to share your Apple Vision Pro with Guest User | Apple Support

To enable Guest User on your Apple Vision Pro, start by accessing the Control Center by looking at the small arrow icon at the top of your view and tapping your fingers together. Open the controls and find the Guest User option, which appears as a head inside a dotted circle. In the Setup window, choose whether to allow access to Opened Apps Only or All Your Apps and Data.

You can also enable View Mirroring to see what your guest sees. Tap Start to activate Guest User, then hand over the device and battery. Remember to remove any Zeiss Optical Inserts and avoid pressing the top button or Digital Crown during the handoff. Your guest can use the device until they remove it, which will automatically end Guest User and return the settings to your own. For more details, check out the Apple Support YouTube channel or Apple Vision Pro playlist.

Summary:
– Access Control Center by looking at the arrow icon and tapping your fingers together.
– Select Guest User and choose access level: Opened Apps Only or All Your Apps and Data.
– Enable View Mirroring if desired, then tap Start to activate Guest User.
– Hand over the device, removing any Zeiss Optical Inserts and avoiding pressing the top button or Digital Crown.
– Guest User session ends automatically when the device is removed, reverting to your settings.

AI for Hearing Support: Turning Speech and Sounds Into Clear Text

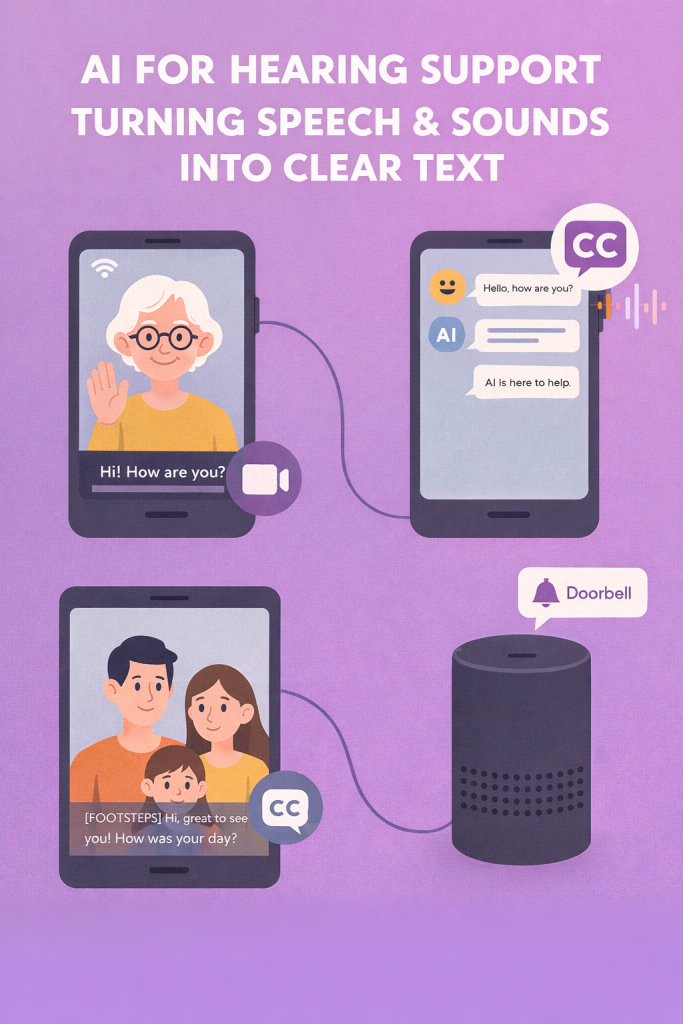
If you sometimes struggle to hear people clearly—on the phone, on TV, or in a busy room—you are not alone. The good news is that today’s technology can take spoken words and show them as text on a screen, almost like “subtitles for life.”

This article will walk you through simple tools that:

  • Show live captions while someone is speaking
  • Transcribe (write out) conversations or meetings
  • Turn voice messages into text you can easily read

You don’t need to be “good with computers.” We’ll keep it slow, clear, and practical.

Table of Contents

Key Takeaways

  • Live captions show spoken words as text on your phone, tablet, or computer in real time—like subtitles during a movie, but for everyday speech.
  • Many devices (Android phones, iPhones, Windows PCs, Macs) already include built‑in caption and transcription tools at no extra cost.
  • Transcription apps can write out phone calls, doctor visits, and family chats so you can read along and review later.
  • AI tools can turn voice messages into text, so you don’t have to replay or strain to hear them.
  • Most tools are easy to turn on with a few taps in Settings; you can adjust text size, color, and speed to your comfort.
  • You can start small: try captions for one thing—like TV or phone calls—and add more tools only if they’re helpful.

Understanding the Basics: Captions, Transcription, and AI

Before we look at specific tools, it helps to understand a few simple ideas.

What are live captions?

Live captions are text that appears on the screen while someone is talking. For example:

  • A friend speaks into your phone’s microphone
  • Your phone listens and shows their words as text
  • You can read along, even if the sound is hard to hear

Think of it as real‑time subtitles for life, not just for movies.

What is transcription?

Transcription means turning speech into written text, usually for something that already happened:

  • A recording of a doctor’s visit → written notes
  • A voice memo → a typed version you can read
  • A meeting recording → a written summary

Some tools do this automatically using AI (artificial intelligence), which is just a smart computer program that “listens” and writes down what it hears.

Why this matters for hard-of-hearing seniors

These tools can:

  • Help you follow conversations without constantly asking “What did you say?”
  • Make phone calls and video calls less stressful
  • Let you save important information, like instructions from the doctor, in writing
  • Give you more independence and confidence in daily life

You don’t have to stop using hearing aids or other support. Think of this as an extra pair of ears—and eyes—helping you out.

1. Live Captions on Your Phone or Tablet

Many modern smartphones and tablets can show captions for speech around you, calls, and videos.

On Android phones and tablets (Live Caption & Live Transcribe)

Most newer Android devices (Samsung, Google Pixel, etc.) include helpful features:

  1. Live Caption
  2. Live Transcribe (sometimes called “Sound Notifications” or “Transcribe”)
    • Listens through the microphone and shows everything being said around you as text.
    • Useful for conversations in person.

How to turn on Live Caption (typical steps):

Steps may vary slightly by brand, but in general:

  1. Open Settings on your phone.
  2. Tap Accessibility.
  3. Look for Live Caption.
  4. Turn the switch On.

After that, you may be able to quickly turn it on or off using the volume button or the small icon that appears when playing a video.

How to use Live Transcribe:

  1. Open Settings.
  2. Tap Accessibility.
  3. Look for Live Transcribe or Hearing options.
  4. Turn it on or download it if your phone offers it as a separate app.

Then you usually tap the Live Transcribe icon on your home screen to start. Your phone will listen and show what it hears as text.

Real‑life example:

  • You’re at the pharmacy, and the pharmacist is explaining when to take your pills.
  • You open Live Transcribe and place the phone near them.
  • As they talk, the words appear on the screen.
  • You can scroll back later to double‑check.

On iPhones and iPads (Live Captions & Transcription)

Apple has added more hearing‑friendly tools in recent years.

Live Captions (beta on some devices):

  1. Open Settings.
  2. Tap Accessibility.
  3. Find Live Captions (sometimes under Hearing).
  4. Turn it On.

Your iPhone or iPad will begin showing captions for:

  • FaceTime calls
  • Some media (videos, podcasts)
  • Sounds picked up by the microphone in certain apps

Audio transcription apps on iPhone/iPad:

If Live Captions isn’t available on your model, you can still use transcription apps from the App Store (we’ll cover those in the next section).

Real‑life example:

  • Your grandchild calls you on FaceTime.
  • With Live Captions turned on, you see their words at the bottom of the screen as they speak.
  • If the connection is fuzzy or their voice is soft, you can still follow along by reading.

2. Transcription Apps That Help You Follow and Remember

Transcription apps are programs you can download that specialize in turning speech into text. Many use AI to make the text more accurate and organized.

What these apps can do

  • Listen live and show what’s being said
  • Save the text so you can read it later
  • Sometimes separate speakers (“Speaker 1”, “Speaker 2”)
  • Let you search your text—helpful for finding what the doctor said about a specific medicine

Some well‑known categories to look for in your app store:

  • “Live transcription,” “speech to text,” or “AI transcription”
  • Apps that mention hard‑of‑hearing support or live captions

(Your family or a trusted friend can help you pick an app with good reviews.)

How to use a transcription app (general steps)

On both Android and iPhone, using these apps is usually similar:

  1. Install the app from the app store (search for “live transcription” or “speech to text”).
  2. Open the app.
  3. Tap a Microphone or Start button.
  4. Place the phone near the person speaking.
  5. Watch as the text appears on the screen.
  6. Tap Save or Export to keep the notes if you want.

Helpful everyday uses

  • Doctor’s appointments
    • Turn on transcription while the doctor talks.
    • Ask the doctor’s office if this is okay—they usually understand and agree.
    • After the visit, you or a family member can review the notes.
  • Family gatherings
    • Place the phone in the middle of the table.
    • You may not catch every word, but it can help you follow most of the conversation.
  • Church services or community meetings
    • Use transcription to follow along with the speaker.
    • Some buildings even provide Wi‑Fi and are used to people using phones for accessibility.

3. Turning Voice Messages into Easy-to-Read Text

Many people now send voice messages instead of typing. These can be hard to hear, especially if:

  • The speaker is far from the microphone
  • There is background noise
  • You listen in a noisy place (bus, waiting room, etc.)

AI can help by taking these voice messages and turning them into clear text.

Voice messages in messaging apps

Some messaging apps already include built‑in transcription:

  • You tap a small “Transcript”, “Caption”, or “Read” button under a voice message.
  • The app listens and shows the words as text.

If your app doesn’t offer this, you can still use a separate transcription app:

  1. Play the voice message on speaker (turn the volume up).
  2. Open your transcription app on the same phone or another device.
  3. Let the app “listen” to the message.
  4. It will show the words in text form.

This may feel a bit clumsy at first, but after a few tries, it becomes easier.

Voice memos and personal notes

You can also speak into your phone and let AI create written notes for you.

For example:

  • You record a quick voice memo: “Pick up prescription on Tuesday at 3 p.m.”
  • The app turns that into text and saves it as a note or reminder.
  • Some apps can even connect to your calendar or reminder list.

This can help if:

  • You get tired typing on a small screen
  • You think better when speaking than when writing

4. Making Text Comfortable for Your Eyes

Hearing support is only helpful if you can easily read what appears on the screen. Most phones and apps let you adjust how the text looks.

Adjusting text size

On both Android and iPhone:

  1. Open Settings.
  2. Tap Display or Accessibility.
  3. Look for Text Size, Font Size, or Display Size.
  4. Move the slider until the text is large and clear, not crowded.

Many caption or transcription apps also have their own text size settings inside the app. Look for:

  • A small “A A” icon
  • A Settings or Gear icon

Changing colors and contrast

If light text on a bright screen is hard on your eyes, you can:

  • Turn on Dark Mode (light text on a dark background)
  • Increase contrast so the letters stand out more
  • Use Bold Text so letters are thicker

You can usually find these in Accessibility → Display or Accessibility → Vision.

Using headphones or hearing aids together with captions

Captions don’t replace sound. Sometimes, using both sound and text together works best:

  • Turn on captions
  • Use your hearing aids or headphones
  • Follow along by both listening and reading

Many people find this combination much less tiring.

5. Safety, Privacy, and Comfort

Because these tools “listen” to speech, it’s wise to think about privacy and safety, especially with sensitive information.

Things to keep in mind

  • Ask first: If you’re recording or transcribing a conversation with another person (like a doctor or lawyer), let them know. Most will say yes if it helps you understand.
  • Check what’s being saved: Some apps save audio and text online (in “the cloud”). Others keep it only on your device.
    • If you’re worried, read the Privacy section in the app’s description or ask a tech‑savvy family member to help.
  • Use a screen lock: Make sure your phone or tablet has a PIN, password, or fingerprint lock so that personal notes stay private.

Respecting your comfort level

You do not have to use every new feature at once. It’s okay to:

  • Use transcription only for medical visits
  • Use captions just for video calls with family
  • Ignore tools that feel too complicated

The goal is to support you, not to overwhelm you.

6. Getting Help from Family, Friends, or Caregivers

If you feel unsure about setting all this up, you don’t have to do it alone.

Here are some ways to get help:

  • Ask a family member or friend to:
    • Turn on Live Captions or a transcription app
    • Adjust the text size and colors
    • Show you how to start and stop captions
  • Ask your audiologist, hearing specialist, or doctor if they know about hearing‑assistive apps. Many clinics are familiar with these tools.
  • Look for senior centers or community tech help sessions.
    • Many libraries and senior centers now have volunteers who help older adults with smartphones and accessibility features.

When someone helps you set things up, ask them to:

  • Write down simple step‑by‑step instructions on paper
  • Use big writing and simple words (“Tap here, then tap the blue button”)
  • Show you a few times, slowly, and let you try yourself

Final Thoughts

Technology can feel intimidating, especially when it changes so quickly. But tools like live captions, transcription apps, and AI for voice messages are designed to make life easier, not harder—especially for people who are hard of hearing.You don’t need to learn everything at once. Even turning on one helpful feature, like captions during calls with your family or transcription at doctor visits, can make a big difference in your day‑to‑day comfort and confidence.

Categories AI

How to attach the power cable and turn on your Apple Vision Pro | Apple Support

To attach and power on your Apple Vision Pro, first place the device on a stable surface like a table. Align the dot on the power cable with the circle next to the power connector on your device, ensuring the cord is angled slightly upward. Press the cable onto the connector until it latches and the grooves align. Rotate the cable clockwise until the dot on the cable matches the dot next to the connector. You will hear a click as the cable locks in place and the LED will pulse. Once you hear the startup tone, your Apple Vision Pro is ready to use.

Summary:
– Place the Apple Vision Pro on a stable surface like a table.
– Align the dot on the power cable with the circle next to the power connector.
– Press and rotate the power cable until it clicks into place and the LED pulses.
– Wait for the startup tone to indicate that the device is ready to use.
– For more information, check the Apple Support YouTube channel or Apple Vision Pro playlist.

Get to know accessibility features on Apple Vision Pro | Apple Support

To personalize accessibility features on your Apple Vision Pro, start by accessing Settings from Home View, then navigate to Accessibility. In the Accessibility menu, scroll to the Physical and Motor section and explore options like Dwell Control, which allows interaction without hand gestures, and Pointer Control, using head position or hand movements. For quick access, go to Accessibility Shortcut in Settings, select the features you want to add such as Assistive Touch or Pointer Control, and close Settings. You can then triple-click the Digital Crown to activate these features easily. Explore further settings to address various vision, motor, hearing, and learning needs.

Summary:
Access Accessibility settings from Home View by opening Settings.
– Enable features like Dwell Control and Pointer Control in the Physical and Motor section.
– Add Assistive Touch and Pointer Control to your Accessibility Shortcut.
– Triple-click the Digital Crown to quickly access these features.
– Explore additional settings to support vision, motor, hearing, and learning needs.

Using AI Translation to Talk With Family Around the World

Staying in touch with family is one of life’s greatest joys, but it can feel challenging when younger generations or relatives abroad speak a different language. You might worry about misunderstandings or feel left out of the conversation. The good news is that new, beginner-friendly technology called “AI translation” is here to help.

In this article, we will show you how simple apps and features can translate your words in real-time. Whether you are sending a text message or seeing a grandchild’s face on a video call, these tools act like a friendly interpreter sitting right next to you. It is easier than you might think, and we are here to walk you through it step-by-step.

Table of Contents

Key Takeaways

  • Instant Messaging: Many popular apps can now automatically translate text messages as you type or receive them.
  • Video Call Captions: You can see live “subtitles” on your screen during video calls to understand what is being said.
  • Voice Translation: Simple apps allow you to speak into your phone and have it play back your words in another language.
  • No Jargon Needed: You don’t need to be a tech expert; most of these features are just a button-press away.

How AI Translation Works for You

Technology has come a long way from the bulky translation books of the past. Today, “Artificial Intelligence” (AI) works behind the scenes to recognize patterns in language and swap words instantly. For you, this means you can speak or type naturally, and the person on the other end hears or reads it in their own language.

1. Translating Text Messages

If you use apps like WhatsApp or Google Messages to text your family, you can often translate messages with a single tap.

  • How to do it: When you receive a message in another language, you can usually press and hold your finger on the text. A menu will pop up—look for the word “Translate.”
  • Real-life example: If your grandson in Italy sends you a message saying “Ti voglio bene,” your phone can instantly show you that it means “I love you.”

2. Seeing Words During Video Calls

Video calls are wonderful for seeing faces, but the language barrier can still be tricky. Apps like Skype or Zoom now offer “Live Captions.”

  • How to do it: During a call, look for a button labeled “CC” or “Captions.” When you turn this on, the app will listen to the person speaking and display their words in English (or your preferred language) at the bottom of the screen.
  • Why it helps: It’s like watching a foreign movie with subtitles, making it much easier to follow the story your niece is telling about her day.

3. Using Your Phone as a Translator

There are dedicated apps, such as Google Translate, that act like a handheld interpreter. These are perfect for when you are visiting family or having a live conversation.

  • The “Conversation Mode”: You can tap a microphone icon, speak a sentence, and the phone will speak it back in the other language. Then, your relative can speak, and the phone will tell you what they said in English.
  • Simple Steps: Open the app, pick the two languages (like English and Spanish), and tap the microphone. It’s that simple!

Final Thoughts

Technology should never be a barrier to love. While learning a new language is a wonderful goal, AI translation tools provide a helpful bridge right now. They allow you to share stories, offer advice, and say “I love you” without anything getting lost in translation.

Don’t be afraid to experiment with these tools during your next family chat. Your relatives will likely be thrilled to communicate more deeply with you, and you might find that a little bit of tech goes a long way in bringing your family closer together. If you enjoyed this guide, you might also like our article on “Setting Up Your First Video Call” to get started

Categories AI

How to set up ZEISS Optical Inserts for Apple Vision Pro | Apple Support

To set up ZEISS Optical Inserts with your Apple Vision Pro, first place a cover on the device to protect the glass and gather your optical inserts along with the pairing code from the card in the box. If the card is missing, generate a recovery code at myzeissvision.zeiss.com. Place the Apple Vision Pro on a stable surface and optionally remove the Light Seal and Solo Knit Band for easier setup. Attach the left and right optical inserts by aligning and snapping them into place magnetically. After removing the cover and connecting the battery, wear the device, adjust the fit, and follow the prompts to pair the inserts by pressing and holding the Digital Crown until you see a green check mark. If the pairing prompt doesn’t appear, press the top button four times and use the Digital Crown to select.

Summary:
– Place the cover on the Apple Vision Pro and gather the optical inserts and pairing code.
– Optionally remove the Light Seal and Solo Knit Band for easier setup.
– Attach the left and right optical inserts by aligning and snapping them into place.
– Remove the cover, connect the battery, and adjust the fit while wearing the device.
– Follow on-screen prompts to pair the inserts by pressing and holding the Digital Crown until a green check mark appears.