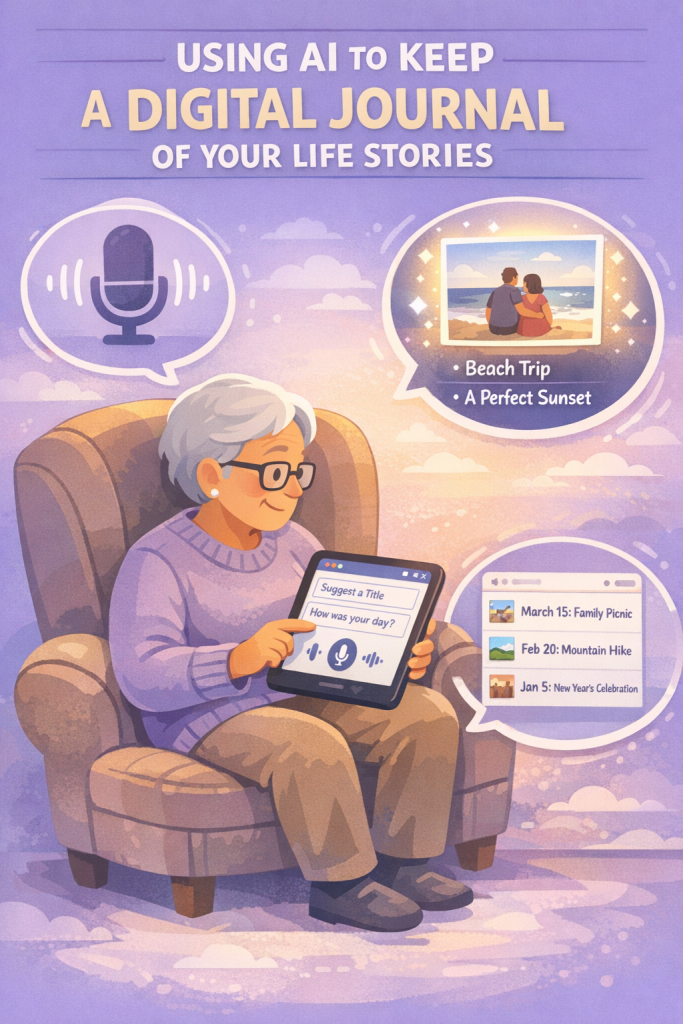
You’ve lived through moments your children and grandchildren will never see—yet.
The challenge is getting those memories out of your head and into a form your family can enjoy.
Writing can feel tiring or overwhelming. Typing on a phone or computer may not be comfortable. That’s where AI can quietly help in the background.
In this guide, you’ll see how to:
- Simply 1 into an AI app
- Let the AI turn your voice into written stories
- Ask it to organize, tidy up, and polish those stories for your family
No heavy tech skills needed—just your voice and a bit of curiosity.
Table of Contents
Key Takeaways
- You can talk instead of type: use your phone, tablet, or computer to record your voice.
- AI tools can transcribe (write down) what you say, even if you speak naturally or pause often.
- Once your words are written, AI can clean up grammar, spelling, and structure while keeping your own style and voice.
- You can ask AI to group stories by topic, time, or people (for example, “childhood,” “military service,” “raising kids”).
- It’s easy to share your stories as printed pages, emails, or digital files with children and grandchildren.
- You stay in control: you choose what to keep, change, or delete before anyone else sees it.
Step 1: Get Comfortable With the Idea
If technology sometimes makes you nervous, you’re not alone. Many older adults feel the same at first.
Think of AI as:
- A patient note‑taker, writing down what you say
- A gentle editor, helping you clean things up, not changing who you are
- A helpful organizer, sorting your memories into neat folders
You don’t need to understand how AI works on the inside. You only need to know how to:
- Open an app or website
- Press a button to start speaking
- Press again to stop
- Read and approve what it wrote for you
That’s it.
Step 2: Choose How You’ll Talk to AI
There are three common ways to get your voice into an AI tool:
- Use the microphone in a chat app (like this one)
- Many AI chat tools have a small microphone icon near the typing area.
- You tap or click it, speak, and the app turns your words into text automatically.
- Use your phone’s built‑in voice‑to‑text
- On most smartphones and tablets, the keyboard has a microphone key.
- You tap it, talk, and your words appear on the screen as text.
- You can then copy that text into your AI chat to clean and organize.
- Record your voice as audio (optional, a bit more advanced)
- You use a voice recorder app to record your story.
- Some AI tools allow you to upload the audio and turn it into text.
- This can be helpful if you like to talk for longer stretches.
If you’re just starting, the microphone in your AI chat app is usually the simplest.
Step 3: Start With One Simple Memory
You don’t have to write your whole life story at once. Start with one short moment.
Here are some easy prompts to get you going:
- “Tell the story of the house you grew up in.”
- “Describe a favorite holiday from your childhood.”
- “Share how you met your spouse or partner.”
- “Talk about a lesson you learned the hard way.”
- “Tell the story behind a favorite family tradition.”
How to do it (step‑by‑step)
- Open your AI chat app.
- Tap the microphone icon.
- Take a breath. Imagine you’re talking to a grandchild.
- Speak for 3–5 minutes about one memory. It’s fine to pause, say “uh,” or start over.
- When you’re done, tap the microphone again to stop.
The app will turn your speech into written words on the screen.
Step 4: Ask AI to Clean Up Your Story (Without Changing the Meaning)
Now you’ll see your words written down—often with pauses and messy bits. That’s normal.
You can now ask the AI to tidy it up. Here’s a simple message you can type:
“Please clean up this story. Fix the grammar and spelling, make the sentences smoother, but keep my voice and personality. Don’t add new details.”
Paste or select your transcribed text and send that request.
The AI will return a neater version of your story. It should:
- Keep your meaning
- Remove repeated words or filler sounds (“um,” “you know”)
- Make the story easier to read
If something feels wrong or not quite “you,” you can say:
“This part doesn’t sound like me: [paste sentence]. Please rewrite it in a simpler, more casual way.”
You stay in charge at all times.
Step 5: Organize Your Stories Into Categories
As you record more memories, things can start to feel scattered. AI can help you sort and label:
Common categories:
- Childhood (school, friends, neighborhood games)
- Young adulthood (first job, early travels, military service)
- Family life (meeting your partner, weddings, raising children)
- Work and career (stories from your job or business)
- Life lessons and advice (what you wish younger people knew)
- Funny stories and mishaps (the things you laugh about now)
How to let AI organize for you
Once you have several stories, you can say:
“Here are several stories from my life. Please group them into sections with clear headings like ‘Childhood,’ ‘Family,’ ‘Work,’ and ‘Life Lessons.’ List each story under the right heading with a short title.”
Paste in the stories (or send them one at a time and reference them), and the AI can:
- Create headings like “Childhood Memories” or “Stories from My Working Years”
- Suggest short titles for each story (for example, “The Blizzard of ’62” or “The Day We Bought Our First Car”)
- Put everything into a clear order
You can always ask:
“Please put these stories in roughly chronological order, from earliest in my life to most recent.”
Step 6: Add Little Details That Families Love
AI can help you flesh out a story while still using your memories. It should not make things up, but it can gently ask you to think of more details.
To get help with this, you could say:
“Please read this story and suggest gentle questions that might help me add detail—things like smells, sounds, feelings, or what the world was like then.”
The AI might suggest questions like:
- “What did your neighborhood look like at that time?”
- “What music or radio shows do you remember hearing?”
- “What were you wearing, or what did people typically wear?”
- “How did you feel in that moment—scared, proud, excited?”
You can then use the microphone again and answer those questions, adding to your story.
This makes your stories richer and more vivid for your family.
Step 7: Create Versions for Different Family Members
You may want different versions of your stories:
- A long version for children and grandchildren who love detail
- A short version for quick reading or for younger kids
- A collection focused on advice for teenagers and young adults
You can ask the AI:
“Please create a shorter version of this story (about one paragraph) that is suitable for my teenage grandchildren. Keep the main lesson, but use simple, modern language.”
Or:
“Please make a bedtime‑story style version of this memory for young children, using gentle, simple language and leaving out any scary parts.”
Again, read what it creates and adjust anything that doesn’t feel right.
Step 8: Save and Back Up Your Stories Safely
Your stories are precious. Treat them like family photos.
Here are simple ways to keep them safe:
- Save in a document
- Copy your stories into a single document (for example, in Word, Google Docs, or another writing app).
- Use headings like “Part 1: Childhood,” “Part 2: Family Life,” and so on.
- Email them to yourself
- Send the document or each story as an email to your own address.
- This creates an extra copy in your email account.
- Share with a trusted family member
- Email the document to an adult child or grandchild.
- Ask them to save it on their computer or in cloud storage (like Google Drive or similar services).
You can ask AI for help too:
“Please organize these stories into a book‑like structure with a table of contents and clear chapter titles so I can share it with my family.”
It can create a neat outline that feels like the beginning of a family book.
Step 9: Make This a Gentle Habit, Not a Big Project
You don’t have to do everything in one sitting. In fact, it’s better if you don’t.
Try this simple routine:
- One story per day or per week
- Choose a small memory.
- Talk for just 3–10 minutes.
- Let AI clean and save it.
- Use prompts to get unstuck
When you’re not sure what to talk about, ask the AI:
“Please give me five memory prompts about childhood holidays.”
“Give me some prompts about times I felt proud or accomplished.”
Pick one and start speaking.
Over time, you’ll build a library of stories without feeling overwhelmed.
Privacy and Comfort: You Stay in Control
It’s natural to wonder, “Who sees this?” or “Is this safe?”
Some simple guidelines:
- Only share what you’re comfortable sharing.
- You can leave out names, locations, or sensitive details if you prefer.
- You can delete any story you don’t like or that feels too personal.
- If you’re unsure, ask a trusted family member to help you review what you’ve saved.
You can also tell the AI:
“Please remove or disguise any specific names and addresses in this story before I share it with my family.”
It can replace “Jones Street” with “our old street,” and so on.
Example: From Voice to Finished Story
Here’s how one memory might move through the process:
- You press the microphone and say:
- “I want to tell you about the blizzard we had when I was ten. School was closed for a week…”
- The AI writes down your words, including any pauses.
- You say:
- “Please clean up this story while keeping my voice.”
- It returns a smoother version in clear paragraphs.
- You add:
- “Please suggest a short title and a one‑sentence summary for this story.”
- It might reply:
- Title: “The Week the World Turned White”
- Summary: “When a surprise blizzard shut down my town, my family learned how to make the most of a week snowed in together.”
Now you have a complete, readable story for your children and grandchildren.
Final Thoughts
Your memories are a gift that no one else can give your family. AI can’t replace your life experience—but it can help you capture it with less effort and frustration.
By speaking instead of typing, letting AI tidy your words, and organizing your stories into simple sections, you can gradually create a digital journal of your life that your family will treasure for years.