How to have your iPhone or iPad read text to you | Apple Support

practhumb40.2

With Spoken Content on iOS devices, text can be read aloud and customized for various apps. First, enable Speak Selection in Accessibility settings. Then, in compatible apps, select text and tap “Speak” to hear it read aloud. For full-screen reading, enable Speak Screen and the Speech Controller. Swipe down with two fingers or ask Siri to read. Customize the Speech Controller for playback, speed, and navigation options. Adjust spoken content settings for highlighting, typing feedback, voices, language detection, rate, and pronunciations. Explore further in Accessibility settings or via Apple’s accessibility resources.

Summary:
– Enable Speak Selection in Accessibility settings.
– Select text in compatible apps and tap “Speak” for it to be read aloud.
– Activate Speak Screen for full-screen reading and access Speech Controller.
Customize Speech Controller for playback options, speed, and navigation.
Adjust spoken content settings for highlighting, typing feedback, voices, language detection, rate, and pronunciations.

Emergency Alerts on iPhone

Have you ever heard a loud, sudden sound from your iPhone—like a siren—and wondered what it was? That’s likely an emergency alert, a helpful feature that notifies you about urgent safety situations. These alerts can seem alarming, especially if you’re not familiar with them, but they’re designed to keep you safe.

Table of Contents

In this guide, we’ll walk you through:

  • What emergency alerts are
  • The different types of alerts
  • How they work
  • How to turn them on or off
  • How to customize them to suit your needs

What Are Emergency Alerts?

Emergency alerts are important safety messages sent by government agencies to warn you about serious situations in your area.

These can include:

  • Dangerous weather (like hurricanes or flash floods)
  • AMBER Alerts (for missing children)
  • Emergency situations (like natural disasters or public safety threats)

You don’t need to install anything—these alerts come built into your iPhone.

Types of Emergency Alerts on iPhone

There are a few types you might receive:

  1. Presidential Alerts
    • Sent during a national emergency
    • Cannot be turned off
  2. Emergency Alerts
    • Includes severe weather, natural disasters, or other threats
    • Can be turned off if you prefer
  3. Public Safety Alerts
    • Warnings about less urgent events, like a nearby fire or evacuation
    • Optional
  4. AMBER Alerts
    • Help find missing children in your area
    • Include a loud sound and detailed information

How Do Emergency Alerts Work?

  • These alerts use your location to send messages relevant to your area.
  • They appear as notifications on your screen and often come with a loud sound to catch your attention—even if your phone is on silent.
  • You don’t need an app or internet connection to receive them.

How to Manage Emergency Alerts on Your iPhone

If you’d like to adjust which alerts you receive, here’s how to do it:

Step-by-Step: Turn Emergency Alerts On or Off

  1. Open the Settings app on your iPhone.
  2. Scroll down and tap Notifications.
  3. Scroll all the way to the bottom.
  4. You’ll see switches for:
    • AMBER Alerts
    • Emergency Alerts
    • Public Safety Alerts
  5. Tap the switch to turn each alert on (green) or off (gray).

Note: You cannot turn off Presidential Alerts.

Should You Keep Alerts On?

It’s usually a good idea to keep them turned on, especially:

  • If you live in an area with bad weather
  • If you want to be aware of nearby emergencies
  • If you want to help in AMBER Alert situations

But if the sound startles you at night or causes stress, it’s okay to turn off certain types and keep only the most important ones.

Final Tips for iPhone Users

  • Keep your phone updated to make sure alerts work correctly.
  • Test alerts may happen occasionally—these are just practice and not real emergencies.
  • Ask a family member for help if you’re unsure. It’s okay to need support!

You’re in Control

Emergency alerts are there to help, not to scare. Now that you understand what they are and how to manage them, you’re in control of how you stay informed. Don’t hesitate to adjust the settings to make your iPhone work best for you.

How to create and use Live Stickers on your iPhone | Apple Support

practhumb39.2

You can personalize messages, notes, and documents with live stickers made from your photos in iOS 17. Select a subject in Photos, then add it as a sticker with effects like shiny or puffy. Stickers sync with iCloud across devices, accessible in supported apps. In Messages, tap the plus button, choose stickers, and add or use existing ones. Peel and stick stickers onto message bubbles or images. Subscribe to Apple Support for more device tips.

Summary:
– iOS 17 introduces the ability to create live stickers from photos.
– Users can select a subject in Photos and add it as a sticker with various effects like shiny or puffy.
– Stickers sync with iCloud and are accessible across devices with the latest software.
In Messages, users can add these stickers to conversations by tapping the plus button and selecting stickers.
– Stickers can be peeled and stuck onto message bubbles or images.

How to Set Up Fall Detection (Important for Seniors)

Your iPhone and Apple Watch can do more than tell time or make calls—they can help keep you safe. One of the most important safety features for older adults is Fall Detection. If you fall and don’t respond, your Apple Watch can call emergency services for you.

This guide will walk you through how to set it up, how it works, and why it matters—no tech experience needed!

Table of Contents

🔑 Key Takeaway

Fall Detection is a simple, powerful safety tool built into your Apple Watch.
It’s designed to recognize when you take a hard fall and get you help fast—especially if you’re unable to respond yourself.

What Is Fall Detection:

  • Detects hard falls using motion sensors.
  • Taps your wrist and sounds an alert.
  • Shows options to call emergency services or say you’re OK.
  • If you don’t move or respond after about a minute, it automatically calls 911 and shares your location.

Why it matters:

  • For older adults and people with health concerns, falls can happen unexpectedly and lead to serious injuries.
  • Having Fall Detection turned on means emergency help can reach you quickly, even if you can’t call for it.

📱 What You’ll Need

  • An iPhone (running iOS 12 or later).
  • An Apple Watch Series 4 or later (running the latest watchOS).
  • The Watch app on your iPhone.

✅ How to Turn On Fall Detection (Step-by-Step)

Follow these easy steps to turn on Fall Detection:

  1. Open the Watch app on your iPhone.
  2. Tap on the “My Watch” tab at the bottom.
  3. Scroll down and tap Emergency SOS.
  4. Find the Fall Detection switch.
  5. Toggle it ON (it will turn green).
  6. Choose when it should be active:
    • Always On – recommended for seniors.
    • Only during workouts – for younger, more active users.
  7. Make sure your Medical ID and Emergency Contacts are set up (more on that below).

This helps emergency services know important health info. Here’s how:

  1. Open the Health app on your iPhone.
  2. Tap your profile picture in the top right.
  3. Tap Medical ID.
  4. Tap Edit.
  5. Add details like medical conditions, medications, and emergency contacts.
  6. Turn on “Show When Locked” so others can see it in an emergency.
  7. Tap Done.

🙋 Tips for Using Fall Detection

  • Wear your watch snugly for accurate detection.
  • If you fall but are okay, tap “I’m OK” on the watch screen.
  • Update your Medical ID regularly with any health changes.
  • Test it by gently simulating a fall (not recommended often!) or asking someone to help you understand what the alert looks like.

❤️ Final Thoughts

Fall Detection is more than a feature—it’s a safety net. With just a few taps, your Apple Watch becomes a lifeline in emergencies. Whether you’re staying active or just going about your day, knowing help is just a fall away can make all the difference.

You’re not alone—and technology is here to support you.

How to use Roadside Assistance via satellite on iPhone | Apple Support

practhumb38.2

If you’re stranded without cellular or Wi-Fi, use Roadside Assistance via satellite on iPhone 14 or 15 in the US. Start a new message, enter “roadside,” and tap “Roadside Assistance” to request help. Select the service needed and confirm contact info. Move to a clear sky view for satellite connection, guided by your iPhone. You’ll be informed of satellite gaps and automatically connected with the provider, facilitating text communication about assistance and payment. The service is free for two years with device activation.

Summary:
– Outside cellular/Wi-Fi? Use Roadside Assistance via satellite.
Start a new message, enter “roadside,” and tap “Roadside Assistance.”
– Choose service needed and confirm contact info.
– Move to a clear sky view for satellite connection.
– Provider contacts you for assistance and payment discussion; free for two years with device activation.

How to Convert Live Photos to GIFs on Your iPhone

Live Photos capture a few seconds of motion and sound before and after you take a picture. While they add life to your photos, they are not as easy to share as GIFs. Converting Live Photos into GIFs makes sharing these dynamic images simpler. This guide will walk you through how to do it using the Photos app and third-party tools.

Table of Contents

Method 1: Convert Live Photos to GIFs Using the Photos App

Your iPhone’s Photos app has built-in options to turn Live Photos into GIF-like animations. Follow these steps:

  1. Open the Photos app on your iPhone.
  2. Find your Live Photo by going to the “Albums” tab and selecting “Live Photos.”
  3. Swipe up on the Live Photo to reveal effects.
  4. Choose “Loop” or “Bounce.”
    • Loop: Plays the Live Photo continuously.
    • Bounce: Plays the Live Photo forward and backward repeatedly.
  5. Save and share your GIF using the Share button.

💡 Note: This method does not create a true GIF file but makes your Live Photo behave like a GIF.

Method 2: Use a Third-Party App for More Control

For full control over GIF creation, you can use a free app like GIPHY or Lively from the App Store. Here’s how:

Using GIPHY

  1. Download and install GIPHY from the App Store.
  2. Open GIPHY and tap the “Create” button.
  3. Select your Live Photo from your camera roll.
  4. Customize your GIF (add stickers, text, or adjust speed if desired).
  5. Tap “Next” and save your GIF to your Photos app or share it instantly.

Using Lively

  1. Download and install Lively from the App Store.
  2. Open Lively and allow access to your Live Photos.
  3. Select the Live Photo you want to convert.
  4. Tap “GIF” to generate the animation.
  5. Save or share your new GIF.

Final Thoughts

Converting Live Photos into GIFs is a simple way to make your moving pictures easier to share. Whether you use the Photos app for quick conversions or a third-party tool for more options, you can turn your favorite Live Photos into shareable GIFs in just a few steps.

Try it out and start sharing your favorite moments with friends and family today! 🎉

How to use AirDrop on your iPhone or iPad | Apple Support

practhumb37.2

With AirDrop, users can swiftly share photos, videos, and large files between nearby Apple devices. Ensure Bluetooth and Wi-Fi are enabled, then select the content to share and tap “AirDrop.” Nearby devices will appear, and recipients can adjust their AirDrop settings if needed. Files continue to transfer even if devices move out of range, provided both sender and recipient are signed into iCloud. For iOS 17 users, AirDrop activates automatically when devices are near. In apps like Keynote and Photos, sharing is as simple as selecting content and tapping “Share” then “AirDrop.” The recipient’s app will open automatically upon completion.

Summary:
– AirDrop enables quick sharing of various files between nearby Apple devices.
Ensure Bluetooth and Wi-Fi are activated, then select content and tap “AirDrop” to share.
– Recipients can adjust AirDrop settings to allow connections from everyone or contacts only.
– Files continue transferring even if devices move out of range, provided both parties are signed into iCloud.
– In iOS 17, AirDrop activates automatically when devices are nearby, streamlining the sharing process further.

How to create and share guides in Maps on iPhone and iPad | Apple Support

practhumb36.2

In Maps on iPhone or iPad, users can create and share themed collections of places called guides. They select a location, tap “Add to Guides,” then either create a new guide or add to an existing one with a custom name and image. Guides can be accessed by swiping up on the search card and shared via messaging. Guides facilitate organizing and sharing favorite places for various purposes, enhancing navigation and exploration experiences.

Summary:
– Users can create themed collections of places called guides in Maps on iPhone or iPad.
– They select a location, tap “Add to Guides,” then either create a new guide or add to an existing one with a custom name and image.
– Guides can be accessed by swiping up on the search card and shared via messaging.
– This feature enhances navigation and exploration experiences by facilitating organization and sharing of favorite places.
– Guides streamline the process of saving and accessing curated lists of locations for various purposes.

Best Practices for Organizing iPhone Photos by Albums and Tags

Keeping your iPhone photos organized makes it easier to find special memories when you need them. With albums, tags, and the search feature, you can manage your pictures efficiently. This guide will walk you through the best ways to organize your iPhone photos, step by step.

Table of Contents

1. Creating and Using Albums

Albums help you group photos by events, people, or themes. Here’s how to create and manage them:

  1. Open the Photos app.
  2. Tap on “Albums” at the bottom of the screen.
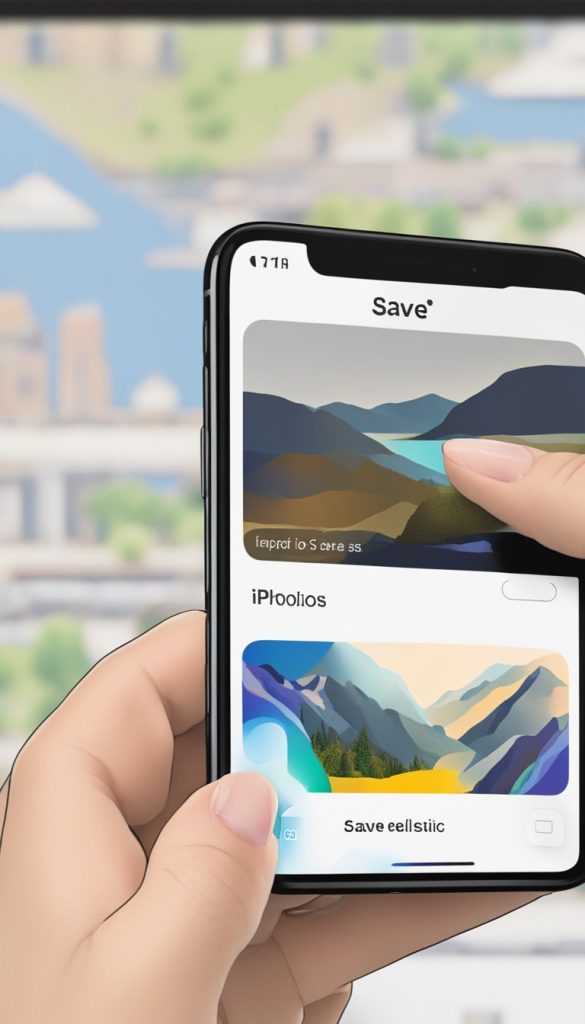
  3. Tap the “+” sign in the top left corner and select “New Album.”
  4. Name your album (e.g., “Family Trip 2024”).
  5. Tap “Save,” then select the photos you want to add.
  6. Tap “Done.”

Tip: You can also move photos to an album by selecting a picture, tapping the share icon (a square with an arrow), and choosing “Add to Album.”

2. Using Tags to Find Photos Faster

While the iPhone doesn’t have manual tagging, it automatically detects faces, objects, and locations. Here’s how to use these features:

  • People & Places:
    • Open the Photos app and go to the “Albums” tab.
    • Scroll down to the “People & Places” section.
    • Tap on a person’s face or a location to see related photos.
  • Adding a Name to a Recognized Face:
    1. Open a photo with a person’s face.
    2. Swipe up or tap the info (i) button.
    3. Tap “Add Name” and type in their name.
    4. Tap “Done.”

3. Searching for Photos Easily

The Search feature helps you find photos quickly without scrolling through thousands of images.

  • To search for a specific photo:
    1. Open the Photos app.
    2. Tap the Search icon (magnifying glass) at the bottom.
    3. Type keywords like “beach,” “birthday,” or a person’s name.
    4. Browse the results and select your photo.

Tip: You can also search using dates (e.g., “March 2023”) or objects (e.g., “dog,” “flower”).

4. Using Favorites for Quick Access

If you frequently access certain photos, marking them as favorites saves time.

  1. Open the Photos app and find the picture.
  2. Tap the heart icon below the photo.
  3. Your photo will now appear in the Favorites album.

5. Keeping Your Albums Organized

Once you’ve created albums, maintaining them is essential.

  • Rename or Delete Albums:
    • Go to Albums and tap “See All” (if needed).
    • Tap “Edit” (top right corner).
    • Rename or delete albums by tapping the appropriate options.
  • Move Photos Between Albums:
    • Open an album, tap “Select,” choose the photos, and add them to a new album.

Final Thoughts

Organizing your iPhone photos with albums, tags, and search makes it easier to enjoy and share your memories. Start small—create a few albums today, and soon, finding your favorite pictures will be effortless!

How to set up and use Personal Voice and Live Speech on iPhone and iPad | Apple Support

practhumb35.2

You can create a personal voice on iPhone or iPad, recording phrases for authentication, stored securely on your device. Use Live Speech to type and speak in real-time, helpful for assistive communication apps and calls. Set up Live Speech in settings, choosing your personal voice or preset voices, then initiate by triple-clicking the side button. During conversations, type messages, use preset phrases, and easily communicate. Personal voice is for non-commercial use and available on devices with Apple silicon, enhancing accessibility and communication options.

Summary:
– Users can create a personal voice on iPhone or iPad for authenticating and speaking.
– The personal voice is recorded by the user, securely stored on the device for future use.
– Live Speech feature allows typing messages to be spoken out loud in real-time.
– Live Speech can be activated by triple-clicking the side button during conversations.
– This functionality enhances accessibility and communication options for users, particularly those with assistive needs.