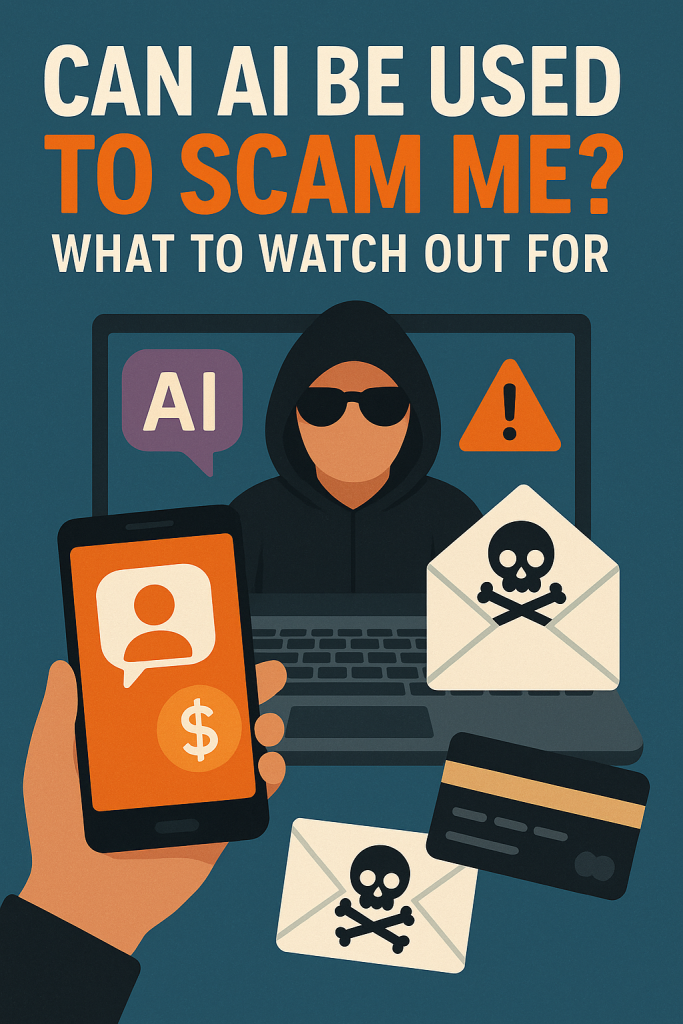
5 Best To-Do List Apps for Keeping Your Day Organized

Staying organized can be a challenge, but with the right tools, it can be simple and even enjoyable! To-Do list apps can help you keep track of your tasks and make your day more manageable. Here’s a list of five fantastic to-do list apps that are user-friendly and perfect for anyone looking to stay organized.

Table of Contents

1. Microsoft To Do

Overview: Microsoft To Do is a free app that helps you create simple to-do lists. You can break tasks into smaller steps, set due dates, and even share your lists with others.

Features:

  • Create different lists for various tasks, like groceries, household chores, or work projects.
  • Set reminders for important deadlines.
  • Add notes to tasks for extra details.

How to Download:

2. Todoist

Overview: Todoist is a versatile app that allows you to manage your tasks easily. Its clean interface makes it simple to add, organize, and complete tasks.

Features:

  • Organize tasks into projects and assign due dates.
  • Use labels to categorize tasks (like “urgent” or “personal”).
  • Collaborate with others on shared tasks.

How to Download:

3. Any.do

Overview: Any.do is a popular app that combines your to-do list with a calendar. This makes it easy to see your tasks alongside your schedule.

Features:

  • Create tasks and add them to your daily planner.
  • Set reminders that notify you when a task is due.
  • Share tasks with family or friends to work together.

How to Download:

4. Google Keep

Overview: Google Keep is not just a to-do list app; it’s also a note-taking tool. It’s great for jotting down quick ideas and organizing your tasks.

Features:

  • Create color-coded lists to make it visually appealing.
  • Add images or voice notes to your tasks.
  • Access your lists from any device with your Google account.

How to Download:

5. Apple Reminders

Overview: If you have an iPhone, you already have access to Apple Reminders. This app is built into your device and offers a straightforward way to keep track of tasks.

Features:

  • Create simple lists and add tasks with due dates.
  • Set location-based reminders that alert you when you arrive at a place.
  • Organize your tasks into different lists for better management.

How to Access:

  • Apple Reminders comes pre-installed on all iPhones. Just search for “Reminders” in your apps.

Getting Started

To make the most of these apps, start by downloading one or two that catch your interest. Here are some simple steps to get started:

  1. Choose an App: Select one of the apps from the list above and download it from the App Store.
  2. Create an Account (if needed): Some apps may require you to create an account. Follow the prompts to set it up.
  3. Add Your Tasks: Begin by entering a few tasks you need to complete. Don’t worry about making it perfect; just get started!
  4. Set Reminders: If your app allows, set reminders for important tasks so you don’t forget them.
  5. Check Off Completed Tasks: As you complete tasks, check them off. This will give you a sense of accomplishment!

Conclusion

Using a to-do list app can transform how you manage your daily tasks. With these five user-friendly apps, you can choose the one that fits your style and needs best. Remember, staying organized is all about finding what works for you. Happy organizing!

Using iPhone Voice Memos: How to Record, Edit, and Share Audio

Voice Memos is a handy app on the iPhone that lets you capture audio, whether it’s recording a reminder, preserving a memory, or sharing thoughts with someone. In this guide, we’ll go through how to use Voice Memos to record, edit, and share audio, step-by-step. So let’s dive in—no tech experience needed!

Table of Contents

Step 1: Open the Voice Memos App

  1. Find the App: Look for the Voice Memos app, which usually looks like a white square with black lines representing audio waves. You can find it by swiping down from the middle of your Home screen and typing “Voice Memos” into the search bar.
  2. Tap to Open: Once you see it, tap to open the app.

Step 2: Start Recording

  1. Prepare to Record: When the app opens, you’ll see a big red Record button at the bottom. Before you start recording, make sure you’re in a quiet place if you want clear audio.
  2. Press Record: Tap the red Record button to start recording. Speak clearly and keep the iPhone’s microphone (located near the bottom edge of your phone) pointed toward you for the best quality.
  3. Pause or Stop:
    • If you need to pause, tap the Pause button (two small lines) that appears in place of the record button. Tap it again to continue recording.
    • When you’re done, tap the Stop button (a square inside a circle) to finish your recording.

Your recording will automatically save with the name New Recording or the location name. You can rename it later to make it easier to find.

Step 3: Rename Your Recording (Optional)

  1. Find Your Recording: You’ll see your recording appear in a list under the main screen. Tap on it to select.
  2. Rename It: Tap on the title (for example, New Recording) to edit it. Type a new name that makes it easy to remember and then tap Done on the keyboard.

Step 4: Edit Your Recording

If you’d like to make your recording shorter or delete any extra bits, here’s how to edit it:

  1. Select the Recording: Tap on your recording in the list.
  2. Tap the Three Dots: Look for three dots (⋯) next to the recording’s name and tap it, then choose Edit Recording from the menu.
  3. Trim or Cut Parts:
    • To Trim the Ends: Slide the small yellow lines at the beginning or end of the sound wave to choose the start and end points.
    • To Delete a Section: Tap Trim and choose the part you want to keep. Then, tap Save to save the changes.
  4. Save Your Edits: When you’re happy with the edited version, tap Save.

Step 5: Share Your Recording

Once you’re ready to share, you can easily send your Voice Memo to others through text, email, or other apps.

  1. Select the Recording: Tap on the recording you’d like to share.
  2. Tap the Share Button: You’ll see a square with an arrow pointing up (the share icon). Tap on it to open the sharing options.
  3. Choose How to Share: A list of apps and methods will appear—select your preferred option, like Messages, Mail, or AirDrop (if sharing to another iPhone nearby). Just follow the instructions for that option, and your recording will be sent.

Tips for Using Voice Memos

  • Keep Recordings Organized: Give each recording a specific name, especially if you’re making lots of recordings.
  • Backup Important Recordings: Consider saving important recordings to iCloud or Files to keep a copy in case you delete them by accident.
  • Use Voice Memos for Reminders: You can make quick reminders for yourself. Just record and label them to play back when needed.

Final Thoughts

Using Voice Memos on your iPhone is an easy and effective way to record anything you want to remember, share, or save for later. With these simple steps, you’re well on your way to mastering this handy app. Enjoy capturing your thoughts, memories, and more with ease!

How to Use the iPhone Measure App to Take Quick Measurements

Have you ever needed a quick way to measure something but didn’t have a tape measure on hand? The iPhone Measure app is here to help! With just a few taps, you can measure objects, furniture, or even the space in a room using your phone’s camera. Follow these simple steps to learn how to use this handy tool, and you’ll be measuring in no time.

Table of Contents

Step 1: Open the Measure App

  1. Locate the Measure App: Find the Measure app on your iPhone. If you’re not sure where it is, swipe down from the middle of your screen and type “Measure” in the search bar.
  2. Tap to Open: Once you find the app, tap on it to open. You’ll see a screen with your camera view, which is where the measuring magic happens.

Step 2: Position the iPhone

  1. Stand Steady: Hold your iPhone steady in front of the object you want to measure. Make sure there’s enough light and a clear view of the object.
  2. Move Slowly: Gently move your iPhone around to let it scan the area. You may see a dot or a small white circle on the screen—this is where you’ll start measuring.

Step 3: Start Measuring

  1. Find the Start Point: Point your iPhone camera at one end of the item or space you want to measure.
  2. Tap the Plus (+) Button: When you’re ready, tap the small plus (+) button that appears on the screen. This will mark the starting point of your measurement.
  3. Move to the End Point: Slowly move your iPhone to the other end of the item, keeping the dot or circle on the screen aligned with where you want the measurement to end.

Step 4: Complete the Measurement

  1. Tap the Plus (+) Button Again: Once you reach the endpoint, tap the plus (+) button again to finish the measurement. The app will show the distance in your selected unit, such as inches or centimeters.
  2. Adjust if Needed: If it doesn’t look quite right, you can tap and drag the points to fine-tune the measurement.

Step 5: View and Save Measurements

  1. View the Measurement: After marking the points, the app will show you the total measurement right on the screen. You can move your phone slightly to view it from different angles.
  2. Take a Snapshot (Optional): If you want to save your measurement for later, tap the camera icon in the top-right corner of the screen. This takes a photo of your measurement, which saves to your Photos app.

Bonus Tip: Using the Level Tool

The Measure app also includes a Level tool, which can help you see if a surface is perfectly straight or balanced. Here’s how to access it:

  1. Tap on Level: While in the Measure app, tap the “Level” option at the bottom of the screen.
  2. Use the Level: Hold your iPhone against the surface you want to check. The screen will show you when it’s level by displaying green and 0° if it’s perfectly balanced.

Final Thoughts

The iPhone Measure app is a convenient and surprisingly accurate tool for quick measurements. Once you’ve practiced a few times, measuring objects and spaces will become second nature. Remember, it’s okay to go slow, take your time, and double-check. With this guide, you’ll soon be using your iPhone as a measuring tool confidently.

6 Simple Security Tips to Keep Your iPhone Safe

Your iPhone is more than just a phone; it’s a tool that helps you connect with friends and family, access important information, and capture memories. Just like you lock your front door to keep your home safe, it’s essential to protect your iPhone too! Here are six easy tips to help you keep your device secure and your information private.

Table of Contents

1. Set a Strong Passcode

One of the simplest ways to protect your iPhone is by setting a strong passcode. Here’s how to do it:

  • Open the Settings app: Look for the gear icon on your home screen and tap it.
  • Scroll down and tap on “Face ID & Passcode” or “Touch ID & Passcode”: This option will depend on whether your iPhone uses Face ID (face recognition) or Touch ID (fingerprint).
  • Tap “Turn Passcode On”: Follow the prompts to create a passcode. Choose something that is easy for you to remember but hard for others to guess. A mix of numbers and letters is best!

Setting a strong passcode helps keep your personal information safe if someone finds or steals your phone.

2. Enable Face ID or Touch ID

Face ID or Touch ID makes it even easier to unlock your phone securely without having to type in your passcode each time.

  • Still in the Settings app, tap on “Face ID & Passcode” or “Touch ID & Passcode.”
  • Follow the prompts to set up Face ID or Touch ID if you haven’t already. This way, you can use your face or fingerprint to unlock your phone quickly and securely.

3. Keep Your Software Up to Date

Just like keeping your car serviced, keeping your iPhone’s software updated is crucial for its security. Software updates often include important fixes for any vulnerabilities.

  • Open the Settings app and tap on “General.”
  • Tap on “Software Update.” If an update is available, tap “Download and Install.” Follow the prompts to complete the update.

Try to check for updates regularly. This helps your iPhone run smoothly and keeps your information safer.

4. Be Cautious with Apps

Apps are fantastic for adding new features to your iPhone, but it’s important to be careful about which ones you download.

  • Only download apps from the App Store: The App Store checks apps for safety. Avoid downloading apps from unknown sources or websites.
  • Check app reviews: Before downloading, look at the reviews to see what other users have said about the app. If many users report problems, it’s best to steer clear.

Being selective about your apps helps protect your personal information and keeps your iPhone running smoothly.

5. Use Two-Factor Authentication


Two-factor authentication adds an extra layer of security to your accounts. This means that even if someone has your password, they can’t access your account without another piece of information.

  • Go to Settings and tap on your name at the top.
  • Select “Password & Security.”
  • Tap “Two-Factor Authentication” and follow the prompts to set it up for your Apple ID.

This way, you’ll be notified if someone tries to access your account, keeping your information even safer.

6. Be Wary of Public Wi-Fi

Using public Wi-Fi is convenient, but it can also expose your information to risks. Whenever possible, try to avoid logging into sensitive accounts, like online banking, while on public Wi-Fi.

  • If you must use public Wi-Fi, consider using a VPN (Virtual Private Network). This adds extra protection by encrypting your internet connection, making it harder for anyone to access your data.

Final Thoughts

Taking these simple steps can greatly enhance the security of your iPhone and protect your personal information. Remember, it’s about creating habits that keep you safe while you enjoy the benefits of technology. If you ever feel uncertain, don’t hesitate to ask a family member or friend for help! Your iPhone is a powerful tool—let’s keep it that way.

iPhone Calendar Tips: Managing Events and Appointments

The iPhone Calendar app is a helpful tool that can keep your life organized and make sure you never miss an important event or appointment. Whether it’s a family gathering, a doctor’s visit, or a friend’s birthday, using your Calendar can simplify your scheduling. Here are some easy-to-follow tips for managing your events and appointments with the iPhone Calendar app.

Table of Contents

1. Open the Calendar App

First things first, let’s get started by opening your Calendar app. Look for the icon on your home screen; it looks like a calendar page. Tap it, and you’ll see your calendar view, which can be in a monthly, weekly, or daily layout.

Tip:

You can switch between views by tapping the buttons at the top of the screen that say “Month,” “Week,” or “Day.”

2. Adding an Event

To add a new event, follow these steps:

  1. Tap the “+” Button: Look for the plus sign (+) usually located in the top right corner of the screen. This will open a new event window.
  2. Enter Event Details:
    • Title: Write a short name for your event, like “Doctor Appointment” or “Dinner with Family.”
    • Location: If you want, you can add where the event will take place.
    • Date and Time: Select the date and time for your event. Just tap on the date and time fields to change them.
    • Notes (Optional): You can add any extra information you want to remember, like what you need to bring or who is attending.
  3. Set an Alert (Optional): If you want a reminder before the event, you can set an alert. Tap on “Alert” and choose how far in advance you want to be reminded—like 15 minutes or a day before.
  4. Save Your Event: Once everything looks good, tap “Add” in the upper right corner to save your event.

Tip:

If you have recurring events (like weekly meetings or monthly family dinners), you can tap on “Repeat” and choose how often it happens.

3. Viewing Your Events

To see what you have coming up, go back to your calendar view. You can easily navigate by tapping the arrows at the top to move to different months or days. If you tap on a specific day, you’ll see all the events scheduled for that day.

Tip:

Using the “Today” button (often at the bottom left) will bring you back to the current date quickly.

4. Editing or Deleting an Event


If you need to change or remove an event, here’s how:

  1. Find the Event: Navigate to the day of the event you want to change.
  2. Tap the Event: This will open up the event details.
  3. Edit or Delete:
    • To edit, just change any details you want, and then tap “Add” to save.
    • To delete, scroll down and tap “Delete Event.” Confirm when asked.

Tip:

You can also move an event to a different time or date by tapping and holding on the event, then dragging it to the new time slot.

5. Sharing Your Calendar

If you want to share your calendar with a family member or friend, follow these steps:

  1. Go to Settings: Tap on the “Settings” app (the gear icon) on your home screen.
  2. Scroll Down to Calendar: Tap on “Calendar,” then tap “Accounts.”
  3. Add an Account: Tap “Add Account” to share with someone. You can choose to add their email address.
  4. Invite Them to Events: When you create or edit an event, there’s an option to invite people. Just add their email in the “Invitees” section.

Tip:

This way, everyone can see the same events and appointments!

6. Using Siri to Manage Your Calendar

Did you know you can ask Siri to help you manage your calendar? Just say, “Hey Siri,” followed by your request, like “Schedule a meeting for tomorrow at 2 PM” or “What’s on my calendar for today?” It’s a simple and fast way to get things done.

Conclusion

Using the iPhone Calendar app doesn’t have to be overwhelming. With these easy tips, you can manage your events and appointments confidently. Take your time to explore the features, and soon you’ll find that keeping track of your schedule can be a breeze. Happy organizing!

iPhone Alarm and Timer: How to Set and Customize Alerts

Are you ready to master the art of alarms and timers on your iPhone? Whether you need to wake up in the morning, remind yourself of an appointment, or time your cooking perfectly, your iPhone has you covered! Let’s take a step-by-step look at how to set and customize these alerts in a simple and friendly way.

Table of Contents

Getting Started

First, let’s find the Clock app on your iPhone. It’s usually represented by a clock icon and can be found on your home screen. If you can’t find it, swipe down on your home screen and type “Clock” in the search bar.

Setting an Alarm

  1. Open the Clock App: Tap the Clock app icon to open it.
  2. Select the Alarm Tab: At the bottom of the screen, you’ll see several options. Tap on the “Alarm” tab, which looks like an alarm clock.
  3. Add a New Alarm: You’ll see a plus sign (+) in the top right corner. Tap on it to create a new alarm.
  4. Choose the Time: A clock will appear. Use the wheels to select the hour and minutes for your alarm. Don’t forget to choose whether it’s morning (AM) or evening (PM).
  5. Customize Your Alarm: After selecting the time, you can customize your alarm. Here’s how:
    • Label: Tap on the “Label” field to give your alarm a name, like “Wake Up” or “Doctor’s Appointment.” This helps you remember what the alarm is for!
    • Sound: Tap on “Sound” to choose how your alarm will sound. You can select a tone that you like or even a song from your music library.
    • Snooze Option: You can also toggle the “Snooze” option on or off. If it’s on, you can tap snooze when the alarm goes off to get a few extra minutes of sleep.
  6. Save Your Alarm: Once you’re happy with your settings, tap “Save” in the top right corner.

Turning Your Alarm On or Off

  • To turn your alarm on or off, simply toggle the switch next to the alarm time. If it’s green, your alarm is on! If it’s gray, it’s off.

Editing an Alarm

If you need to make changes to your alarm:

  1. Go back to the Alarm tab.
  2. Tap on the alarm you want to edit.
  3. Adjust any settings you need to change and then tap “Save.”

Deleting an Alarm

To remove an alarm that you no longer need:

  1. Go to the Alarm tab.
  2. Tap Edit in the top left corner.
  3. Select the alarm you want to delete.
  4. Tap Delete and then confirm by tapping Delete Alarm.

Using the Timer


Now that you’re an alarm pro, let’s check out how to set a timer!

  1. Open the Clock App: You’re already there!
  2. Select the Timer Tab: At the bottom of the screen, tap on the “Timer” tab.
  3. Set the Duration: Use the wheels to set how long you want the timer to run. You can select hours, minutes, and seconds.
  4. Choose a Sound: Tap on “When Timer Ends” to select a sound that will play when your timer goes off. You can choose from ringtones or even your music.
  5. Start the Timer: Once you’ve set your duration and sound, tap “Start.” Your timer will begin counting down!

Stopping or Canceling the Timer

  • If you need to stop the timer early, tap “Pause.” To cancel it completely, tap “Cancel.”

Checking Your Timer

If you want to see how much time is left, just open the Clock app and go to the Timer tab. You’ll see how much time remains.

Final Tips

  • Volume Matters: Make sure your iPhone’s volume is turned up so you can hear your alarms and timers! You can adjust the volume using the buttons on the side of your iPhone.
  • Stay Organized: Consider using different labels for your alarms to help keep track of your day.

Top 5 Weather Apps to Keep You Updated Daily

Weather apps have become an essential part of our daily routine, whether it’s planning your commute, a weekend trip, or just deciding if you should grab an umbrella before heading out. With so many apps out there, it can be hard to know which ones are worth your time. That’s why I’ve done the homework for you and picked out the Top 5 Weather Apps to keep you informed and ready for whatever Mother Nature throws your way!

Table of Contents

1. AccuWeather

AccuWeather has long been a favorite among weather enthusiasts, and for good reason. It offers precise and hyperlocal forecasts, often predicting weather changes right down to your street. The app also delivers hourly updates and detailed radar maps, making it one of the most reliable choices for staying ahead of the weather.

Key Features:

  • Minute-by-Minute Forecasts: Get updates on weather changes by the minute for your exact location.
  • Radar and Satellite Maps: Track storms and severe weather patterns in real-time.
  • Severe Weather Alerts: Stay safe with notifications for extreme weather conditions.

Download for iPhone

2. The Weather Channel

When you think of weather, chances are you’ve heard of The Weather Channel. Their app is one of the most popular weather apps for both casual users and weather geeks. Not only does it provide up-to-the-minute forecasts, but it also has a fun feature that provides local pollen reports—great if you’re an allergy sufferer.

Key Features:

  • Hourly and 10-Day Forecasts: Plan your week with confidence.
  • Weather Radar: See weather changes as they happen with interactive radar.
  • Health Tracking: Offers updates on flu reports and pollen levels in your area.

Download for iPhone

3. Dark Sky

If you prefer beautifully designed apps, Dark Sky might just be your new favorite. Known for its sleek interface and highly accurate weather predictions, Dark Sky shines when it comes to hyper-local forecasting, telling you exactly when rain will start or stop, down to the minute. This app is like having your own personal weather expert in your pocket!

Key Features:

  • Hyperlocal Forecasts: Know exactly when it will rain or snow, down to the minute.
  • Beautiful Design: Simple yet detailed visual representation of the weather.
  • Severe Weather Alerts: Stay informed about dangerous weather conditions.

(Note: Dark Sky has been integrated into Apple Weather, so Android users might need to look for alternatives.)

4. MyRadar

For those who love seeing detailed radar imagery, MyRadar is a fantastic app. It shows real-time animated radar around your location, so you can actually see the weather coming. This app is great for storm tracking, and if you enjoy outdoor activities like hiking or boating, it’s a must-have for keeping an eye on upcoming weather patterns.

Key Features:

  • Animated Weather Radar: Real-time radar that’s easy to read.
  • Hurricane Tracker: Track storms, hurricanes, and tropical systems.
  • Aviation Layers: Useful features for pilots and frequent travelers.

Download for iPhone

5. WeatherBug

WeatherBug is one of the most comprehensive weather apps out there, offering not only the basics like current weather, radar, and forecasts but also a whole range of bonus features like lightning alerts, air quality updates, and pollen counts. Its user-friendly interface makes checking the weather quick and easy, and it’s also great for planning outdoor activities.

Key Features:

  • Live Weather Cameras: View live weather conditions from over 10,000 cameras across the country.
  • Real-Time Lightning Alerts: Get instant alerts if lightning strikes near you.
  • Traffic Conditions: Plan your commute with integrated traffic and weather data.

Download for iPhone

Final Thoughts

Having a reliable weather app can make your life so much easier—whether you’re planning your outfit for the day, scheduling a weekend hike, or even tracking severe weather to stay safe. Each of the apps listed above brings something unique to the table, so you’re sure to find one that fits your lifestyle and needs.

Whichever app you choose, you’ll always be prepared for whatever the day brings. Now go ahead, download one (or all!) of these apps, and stay one step ahead of the weather!

How to Use Focus Mode on iPhone to Minimize Distractions

Ever get distracted by notifications when you’re trying to relax, work, or even sleep? Your iPhone has two great features—Do Not Disturb and Focus Modes—to help you reduce these interruptions.

Table of Contents

Key Takeaways:

  • Do Not Disturb: Mutes all notifications and calls when activated.
  • Focus Modes: Allows you to customize which notifications come through, based on what you’re doing.
  • Both features can be automated, so they turn on and off without you needing to remember.

Here’s a quick guide on how to use them.

Do Not Disturb: A Simple Way to Silence Notifications


Do Not Disturb is like putting a “quiet” sign on your phone. It stops notifications and calls so you can focus on what you’re doing without interruptions. Here’s how to turn it on:

  1. Open Control Center: Swipe down from the top-right corner of your screen.
  2. Tap the crescent moon icon: This activates Do Not Disturb instantly. You’ll see a little moon symbol at the top of your screen, letting you know it’s on.
  3. Set it on a schedule: Go to Settings > Focus > Do Not Disturb. You can schedule it to turn on automatically, like at bedtime, and choose which contacts or apps can still notify you.

Focus Modes: Customize What Interrupts You

Focus Modes are like a more personalized version of Do Not Disturb. Instead of silencing everything, you can allow certain notifications based on what you’re doing. Here’s how:

  1. Go to Settings > Focus.
  2. Choose or create a Focus Mode: You’ll see options like Work, Personal, or Sleep. You can pick which contacts or apps can reach you during these times.
  3. Automate it: You can schedule Focus Modes to turn on automatically at certain times, like when you’re working or relaxing.

Example: Sleep Mode

Let’s say you want to sleep peacefully. With Sleep Focus, you can allow only calls from close family members and turn off everything else. Just set it once, and it’ll turn on and off by itself each night.

Final Thoughts

These features are great for staying focused or relaxing without constant distractions. Once you set them up, they’ll make your iPhone much easier to use without the constant buzz of notifications.

Give them a try and enjoy fewer interruptions!

Top-5 Relaxation Apps for iPhone

Finding a moment of peace in today’s fast-paced world can be a challenge. Whether it’s juggling work, family, or just trying to keep up with life’s demands, we all need a way to unwind and relax. Thankfully, your iPhone can be a powerful tool for finding that much-needed calm. In this list, we’ve rounded up the top 5 relaxation apps that will help you de-stress, meditate, and sleep better—anytime, anywhere. Whether you’re new to relaxation apps or looking to switch up your routine, these picks are sure to soothe your mind and bring you back to balance.

Table of Contents

1. Calm – Your Personal Meditation and Sleep Aid

Calm isn’t just an app—it’s a whole mood. Known for its beautiful interface and soothing soundscapes, Calm is perfect for anyone looking to add moments of mindfulness into their day.

What It Does: Calm offers guided meditations, breathing exercises, sleep stories, and relaxing music designed to help you relax, reduce stress, and improve your sleep.

Key Features:

  • Sleep Stories: Narrated by celebrities like Matthew McConaughey, these bedtime tales help adults drift off peacefully.
  • Daily Calm: A daily 10-minute meditation that helps set a relaxed tone for the day.
  • Breathing Exercises: Quick and simple exercises to calm your nerves in moments of stress.

Practical Use: Use Calm during your commute to ease into your day or wind down before bed with a soothing sleep story.

Pricing: Freemium; offers a free version with limited content, and a subscription unlocks the full library.

Download Calm here.

2. Headspace – Find Your Moment of Zen

Headspace is perfect for beginners and seasoned meditators alike, offering a simple, playful approach to mindfulness.

What It Does: With a focus on guided meditation and mindfulness techniques, Headspace aims to teach you how to relax, breathe, and live a more mindful life.

Key Features:

  • Guided Meditations: Covering everything from stress reduction to mindful eating.
  • Sleepcasts: Unique audio experiences that help you unwind and get a restful sleep.
  • SOS Sessions: Quick 2-3 minute exercises designed for moments of panic, stress, or anxiety.

Practical Use: Start your morning with a 10-minute guided meditation to set a calm tone for the day, or use the SOS sessions when you need quick relief during a stressful meeting.

Pricing: Freemium; basic version is free, with a premium subscription for full access.

Download Headspace here.

3. Insight Timer – Meditation for Every Mood

With the largest free library of guided meditations, Insight Timer is a treasure trove for those seeking relaxation, peace, and mindfulness.

What It Does: Insight Timer provides access to thousands of free meditations, music tracks, and talks from mindfulness experts around the world.

Key Features:

  • Diverse Content: From meditation for sleep to guided gratitude practices, there’s something for everyone.
  • Live Events: Join live meditation sessions and connect with the global community.
  • Sleep Music: Soothing sounds to help you drift off into dreamland.

Practical Use: Set the timer for a quick 5-minute mindfulness break during work or dive into a deep relaxation session before bedtime.

Pricing: Freemium; free with the option to upgrade for offline access and additional features.

Download Insight Timer here.

4. Breethe – Meditation, Sleep, and Life Coaching

Breethe combines relaxation with life coaching, making it a versatile app for those looking to improve their mental well-being across different areas of life.

What It Does: Breethe offers a mix of guided meditations, life advice, sleep stories, and masterclasses that aim to improve not just relaxation, but overall life satisfaction.

Key Features:

  • Personalized Recommendations: Tailored content based on your specific needs, whether it’s stress, anxiety, or sleeplessness.
  • Life Masterclasses: Learn from experts on topics like self-esteem, managing relationships, and more.
  • Meditation Playlists: Curated for specific moods, activities, and goals.

Practical Use: Use Breethe’s morning meditations to kickstart a positive day or listen to a sleep story when winding down.

Pricing: Freemium; free access with a wide range of premium content available with a subscription.

Download Breethe here.

5. MyNoise – Customize Your Sound Environment

For those who find relaxation in soundscapes rather than guided meditations, MyNoise offers a highly customizable experience to create your perfect background noise.

What It Does: MyNoise allows you to create unique soundscapes, from calming rain to the gentle hum of a distant city, with sliders that let you fine-tune every aspect of the sound.

Key Features:

  • Customizable Soundscapes: Personalize sounds like white noise, nature sounds, or even café ambiance to your exact liking.
  • Noise Blocker: Perfect for masking distracting noises in your environment.
  • Offline Access: Download your favorite soundscapes to use anywhere, without an internet connection.

Practical Use: Use MyNoise to create a focused work environment or drown out city noise when trying to relax at home.

Pricing: Freemium; the basic app is free with in-app purchases for additional soundscapes.

Download MyNoise here.

Conclusion

Whether you’re looking to meditate, sleep better, or simply escape from the chaos of the day, these relaxation apps for iPhone offer something for everyone. Try one (or all!) of these apps and find out which one suits your relaxation needs best. Don’t forget to share your favorites with friends or explore more app lists to continue your journey toward a calmer mind.

Setting Up Medical ID on Your iPhone for Emergencies

Imagine being in an emergency where you can’t speak or share your medical information. Your iPhone’s Medical ID can be a lifesaver in these moments. It stores essential health details that first responders can access even when your phone is locked.

In just a few simple steps, you can set up your Medical ID, making sure your vital information is always available when needed.

Table of Contents

What Is Medical ID, and Why Does It Matter?

The Medical ID feature lets you enter important details like:

  • Your name and date of birth
  • Medical conditions, allergies, and medications
  • Emergency contact information
  • Blood type and organ donor status

This information can be accessed from your phone’s lock screen, allowing medical personnel to act quickly in an emergency.

Does the Process Differ Between iPhones?


The process for setting up Medical ID is mostly the same across all iPhones. However, there might be minor differences depending on your iOS version:

  • iOS 13 and Later: The Health app looks a bit different, but the steps remain the same.
  • Older iPhones: For those using iOS 12 or earlier, the layout is simpler, but you’ll follow the same steps.

No matter the iPhone model or iOS version, the setup is quick and easy.

How to Set Up Your Medical ID

Here’s a step-by-step guide:

  1. Open the Health App: Find the Health app (white icon with a red heart) and tap it.
  2. Go to the Medical ID Tab: Tap “Medical ID” in the bottom right corner.
  3. Edit Your Information: Tap “Edit” in the top right corner. Enter details like your medical conditions, medications, allergies, and emergency contacts.
  4. Turn On “Show When Locked”: Make sure to toggle this option so your information is accessible from the lock screen.
  5. Save: Once done, tap “Done” to save your Medical ID.

How to Access Medical ID in an Emergency

If someone needs to access your Medical ID in an emergency, here’s how they can do it:

  1. From the Lock Screen, swipe up or press the home button (depending on your iPhone model).
  2. Tap “Emergency” in the bottom left corner.
  3. Tap “Medical ID” to view your health information and emergency contacts.

Why This Step Matters

Setting up your Medical ID takes only a few minutes but could be crucial in an emergency. Medical responders will have access to the information they need to provide the best care quickly. Even if you’re perfectly healthy, it’s important to list emergency contacts.

Keep It Updated

As your health changes or you switch medications, remember to update your Medical ID so that it always has the correct information.

Final Thoughts

Setting up your Medical ID is a simple step that could make a big difference in an emergency. It’s quick, easy, and ensures that first responders have the information they need. Take a few minutes to set it up today, and share this guide with family and friends to help them stay safe too.