If you’re an Apple user, you’ve probably heard of AirDrop—Apple’s easy, fast way to share photos, files, and even web links between devices. Whether you’re new to the Apple ecosystem or just haven’t explored this feature yet, AirDrop is about to become your new best friend for transferring data seamlessly. In this guide, I’ll walk you through everything you need to know about sharing files using AirDrop, so you can start using it like a pro.
Table of Contents
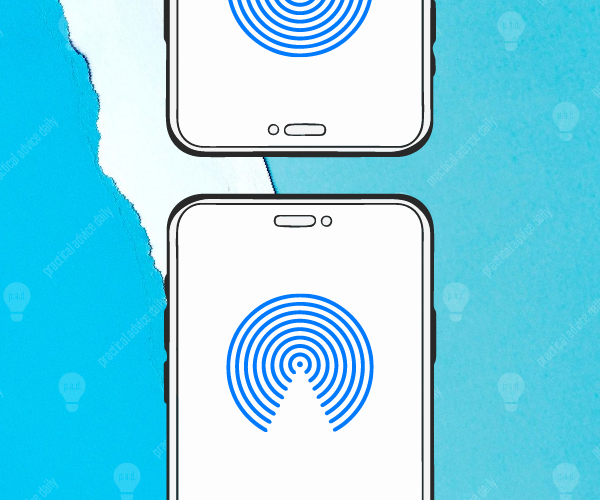
What is AirDrop?
In simple terms, AirDrop is Apple’s solution for sharing files wirelessly between iPhones, iPads, and Macs. Think of it as an invisible bridge connecting your devices, letting you send files quickly without the need for cables, apps, or cloud services.
AirDrop uses both Bluetooth and Wi-Fi, making it not only fast but also secure. It’s perfect for sharing high-quality photos, videos, and even large files like presentations or documents.
Why Use AirDrop?
I get it—there are so many ways to share files these days. Why choose AirDrop? The real advantage comes down to speed and simplicity:
- Fast transfers: AirDrop works almost instantly, especially with large files like 4K videos.
- No quality loss: Sharing via social media or messaging apps can compress your files, but AirDrop keeps the original quality intact.
- No internet needed: You don’t need a Wi-Fi connection to use AirDrop, making it handy even when you’re offline.
How to Enable AirDrop on Your iPhone or iPad
Before you can send or receive files, you need to make sure AirDrop is turned on. Here’s a quick step-by-step guide to setting it up:
- Open Control Center: On an iPhone with Face ID, swipe down from the top-right corner. For models with a Home button, swipe up from the bottom.
- Press and hold the network settings box: This includes icons like Wi-Fi and Bluetooth.
- Tap on AirDrop: You’ll see three options:
- Receiving Off: Turns off AirDrop completely.
- Contacts Only: Only people in your contacts can AirDrop to you.
- Everyone: Anyone nearby with an Apple device can send you files.
I’d recommend setting it to Contacts Only for day-to-day use. If you’re in a crowded place, like an airport or coffee shop, this prevents random people from sending you things.
Personal Tip:
I often toggle between Contacts Only and Everyone when I’m working in shared spaces. I don’t need strangers trying to AirDrop me random memes (yep, it happens!).
How to Share Files with AirDrop
Now that AirDrop is enabled, sharing files is a breeze. Let’s go through the process of sending a photo or file from your iPhone.
- Open the app that contains the file you want to share (for example, Photos if you’re sharing a picture).
- Select the file: Tap on the item you want to send.
- Tap the Share icon: It looks like a square with an upward arrow.
- Choose AirDrop: Your device will search for nearby Apple devices.
- Select the recipient: A list of available devices will appear—just tap the one you want to send the file to.
- Wait for the recipient to accept: The person on the receiving end will get a prompt to accept the file.
Once accepted, the transfer begins, and depending on the file size, it should complete in just a few seconds.
Fun Fact:
You can even share files to your MacBook or iPad using the same method. I find this especially useful when I’m editing photos on my iPhone and need to quickly send them to my Mac for some final tweaks in Photoshop.
Receiving Files via AirDrop
If someone’s sending you a file via AirDrop, you’ll get a notification asking you to Accept or Decline. Simply tap Accept, and the file will open in the appropriate app—for example, photos land in your Photos app, and documents may open in Files or another compatible app.
One thing I love about AirDrop is how it doesn’t clog up your home screen with downloads. Everything is neatly tucked into its corresponding app, so there’s no need to hunt for it afterward.
Troubleshooting AirDrop Issues
As seamless as AirDrop is most of the time, you might run into occasional hiccups. Don’t worry—I’ve been there too, and here are a few quick fixes that often solve the problem:
- Turn Bluetooth and Wi-Fi off and back on: Since AirDrop relies on both, this often resolves connectivity issues.
- Move devices closer: AirDrop works best when devices are within a few feet of each other.
- Restart your device: The old “turn it off and on again” trick works wonders here too.
- Check AirDrop settings: Make sure AirDrop is set to Contacts Only or Everyone.
I remember once trying to AirDrop a presentation to my colleague, but it just wouldn’t show up in the list of devices. A quick toggle of Bluetooth and AirDrop settings, and boom—it worked like a charm!
Bonus: Sharing Files Between iPhone and Mac
AirDrop isn’t just limited to iPhones and iPads. It works beautifully with Macs too, making it easy to move files between your laptop and phone.
For example, if you’re on your iPhone and want to send a PDF to your Mac:
- Select the file (just like you would when sharing between iPhones).
- Tap the Share icon and choose AirDrop.
- Select your Mac from the list of nearby devices.
On your Mac, a notification will pop up—just click Accept, and the file will save to your Downloads folder. Easy, right?
Final Thoughts
AirDrop is one of those features that might seem small, but once you start using it, you’ll wonder how you ever lived without it. Whether you’re quickly sending photos to friends or transferring important documents between your devices, it’s an incredibly useful tool that makes life just a little easier.
So, next time you’re trying to figure out how to get a large video off your iPhone or send a high-resolution photo to a friend without compressing it—give AirDrop a go. You’ll be pleasantly surprised at how fast and efficient it is!
Have you used AirDrop before, or do you have any other tips? Let me know in the comments—I’d love to hear your experiences!