Top 5 Photo Editing Apps for Beginners on iPhone

Editing photos on your iPhone can be a fun way to make your pictures look even better. If you’re new to photo editing, these apps are designed to be easy to use, with simple tools and guided features. Here’s a list of the top 5 photo editing apps for beginners—all free to download and use!

1. Snapseed – All-in-One Editing with Easy Tools

What Makes It Unique: Snapseed offers a complete range of photo editing tools without being overwhelming. Designed by Google, it’s simple to navigate, making it great for beginners who want a complete set of tools for editing.

  • Key Features:
    • One-Tap Filters: Apply different styles to your photo with a single tap.
    • Basic Editing Tools: Adjust brightness, contrast, and colors easily.
    • Guided Adjustments: Tools like “Tune Image” and “Details” help you make quick edits without any hassle.
  • Price: Free
  • Download Link: Snapseed on the App Store
Snapseed

2. VSCO – Quick Edits with Beautiful Filters

What Makes It Unique: VSCO is known for its simple filters that add a professional touch to any photo. With just a few taps, you can make your photos look like they were taken by a pro, and the app’s easy-to-use design makes it a great choice for beginners.

  • Key Features:
    • Elegant Filters: Over 10 free filters to instantly enhance your photos.
    • Basic Editing Tools: Adjust exposure, contrast, and more with easy sliders.
    • Preset Collections: Save your favorite filter combinations to use on future photos.
  • Price: Free (with in-app purchases for additional filters)
  • Download Link: VSCO on the App Store
VSCO

3. Adobe Photoshop Express – Simple Yet Powerful Editing Tools

What Makes It Unique: Adobe Photoshop Express brings the trusted tools of Photoshop to your iPhone in a simplified, user-friendly app. It has all the essentials, with a few extra effects to help your photos pop.

  • Key Features:
    • Quick Fixes: Crop, straighten, and adjust brightness in seconds.
    • Fun Filters and Effects: Add color effects or make your photo black-and-white with just a tap.
    • Collage Maker: Create photo collages easily within the app.
  • Price: Free (with in-app purchases)
  • Download Link: Adobe Photoshop Express on the App Store
Adobe

4. Canva – Perfect for Simple Edits and Creative Projects

What Makes It Unique: Canva is a versatile app that goes beyond photo editing. With its beginner-friendly interface, you can create simple photo edits or dive into projects like photo collages, social media posts, and more.

  • Key Features:
    • Easy Editing Tools: Crop, adjust colors, and add text with simple tools.
    • Templates and Layouts: Choose from pre-designed templates for collages or designs.
    • Fun Extras: Add stickers, text, and frames for extra creativity.
  • Price: Free (with premium options)
  • Download Link: Canva on the App Store
Canva

5. Pixlr – Beginner-Friendly with Fun Effects

What Makes It Unique: Pixlr combines essential editing tools with fun extras like overlays and borders. It’s a wonderful choice for beginners who want to explore a bit more creativity without needing advanced skills.

  • Key Features:
    • One-Tap Adjustments: Fix lighting, colors, and sharpness with one tap.
    • Creative Overlays: Add light leaks, sparkles, or textures to your photos.
    • Easy Collages: Arrange multiple photos in a collage with simple layouts.
  • Price: Free (with in-app purchases)
  • Download Link: Pixlr on the App Store
Pixlr

Final Thoughts

Each of these apps brings something unique to photo editing, making them perfect for beginners who want to explore their creative side. Whether you’re adjusting brightness, adding a filter, or putting together a fun collage, these apps make it easy to enjoy editing your photos. Download one (or try them all!) to see which works best for you. Happy editing!
Checklist for New iPhone Users: Step-by-Step Setup and Essential Adjustments

So, you’ve got a new iPhone—exciting, right? Whether it’s your first iPhone or you’re upgrading, this checklist will guide you through the setup process and help you make the essential adjustments for a smooth start. Don’t worry if you’re not a tech whiz; we’ll take it one step at a time!

Table of Contents

1. Power On and Begin Setup

  • Press and hold the power button on the side until the Apple logo appears.
  • Follow the on-screen instructions to select your language, country, and Wi-Fi network.
  • If you have an older phone, use the Quick Start option to transfer data by holding it near your new iPhone. If not, choose “Set Up Manually.”

2. Sign in with Your Apple ID

Your Apple ID is the account that lets you download apps, sync photos, and use features like iCloud.

  • Enter your Apple ID email and password.
  • If you don’t have one, tap “Forgot password or don’t have an Apple ID?” and follow the prompts to create a new account.

3. Set Up Face ID or Touch ID

This feature makes unlocking your iPhone and approving purchases easier.

  • Follow the instructions to scan your face or fingerprint.
  • You can skip this step if you prefer but setting it up adds convenience and security.

4. Choose a Passcode

A passcode keeps your phone secure.

  • Create a six-digit passcode (or tap “Passcode Options” for a four-digit one).
  • Remember it, as you’ll use it frequently!

5. Connect to iCloud

iCloud stores your photos, contacts, and other important data safely online.

  • Ensure iCloud is enabled during setup.
  • If you skipped this earlier, go to Settings > [Your Name] > iCloud to turn it on.

6. Update Your iPhone

7. Install Essential Apps

Visit the App Store to download apps you’ll need for daily use, such as messaging, email, navigation, or social media.

  • Tap the App Store icon, search for an app, and tap “Get” to download it.

8. Adjust Key Settings

Here’s how to personalize your iPhone:

  • Display: Adjust brightness and enable Night Shift for eye comfort (Settings > Display & Brightness).
  • Sounds: Customize ringtones and notifications (Settings > Sounds & Haptics).
  • Do Not Disturb: Silence notifications at bedtime or during meetings (Settings > Focus > Do Not Disturb).

9. Set Up Emergency SOS

Ensure your safety features are in place.

10. Backup Your iPhone

A backup saves your data in case you ever lose or damage your phone.

  • Go to Settings > [Your Name] > iCloud > iCloud Backup and turn it on.
  • Alternatively, connect your iPhone to a computer and back it up via iTunes or Finder.

11. Learn Basic Gestures and Features

If your iPhone has no home button, get familiar with these gestures:

  • Swipe up from the bottom to go home.
  • Swipe down from the top-right for Control Center.
  • Swipe down from the middle for notifications.

12. Explore Your iPhone’s Camera

Take a moment to open the Camera app and experiment with features like Portrait mode, video recording, and zoom. It’s a great way to capture memories!

5 Best Free Apps to Learn New Skills on Your iPhone

Your iPhone can be a gateway to learning new things, whether it’s a language, cooking techniques, or even creative skills like photography. Here are five of the best apps to get started—each one offering unique features that make learning engaging, easy, and fun. Best of all, they’re free to download!

Table of Contents

1. Duolingo – Learn Languages with Gamified Lessons

What Makes It Unique: Duolingo stands out for its interactive, game-like approach to language learning. The app uses bite-sized lessons and rewards, making the process feel less like studying and more like play. With over 30 languages to choose from, Duolingo is ideal for anyone looking to start from scratch or improve existing language skills.

  • Key Features:
    • Gamified lessons with points and badges to keep you motivated.
    • Personalized lessons that adapt to your learning pace.
    • Audio-based exercises for practicing pronunciation.
  • Price: Free (with an optional paid version for additional features)
  • Download Link: Duolingo on the App Store

2. YouTube – Learn Practically Anything Through Video Tutorials

What Makes It Unique: YouTube is not just for entertainment—it’s a vast library of educational content on nearly every topic imaginable, from cooking to exercise to arts and crafts. The range of content makes it perfect for people who prefer visual learning, with videos from experts and hobbyists alike.

  • Key Features:
    • A huge selection of free tutorials and instructional videos.
    • Options to save and organize videos in playlists for easy access.
    • Ability to pause, rewind, and watch videos at your own pace.
  • Price: Free (with ads; premium subscription available)
  • Download Link: YouTube on the App Store

3. Skillshare – Explore Creativity with Classes on Art, Writing, and More


What Makes It Unique: Skillshare specializes in creative skills like art, photography, and writing. The app provides thousands of high-quality video lessons taught by professionals, with a focus on hands-on projects and practical learning. While Skillshare offers a premium subscription, there is plenty of free content to help you get started.

  • Key Features:
    • Short, project-based lessons led by experts in creative fields.
    • Hands-on projects that help you put your new skills into practice.
    • Categories for everything from drawing to productivity and lifestyle skills.
  • Price: Free (with optional premium subscription)
  • Download Link: Skillshare on the App Store

4. Coursera – Access University-Quality Courses from Top Institutions

What Makes It Unique: Coursera offers a vast selection of courses created by leading universities and companies, allowing you to access quality education from home. With beginner-friendly courses on everything from business to the arts, Coursera is a great option for structured learning.

  • Key Features:
    • Courses created by respected institutions like Yale, Google, and Stanford.
    • Video lessons, quizzes, and assignments to reinforce learning.
    • Options to earn certificates in specific subjects if desired.
  • Price: Free (with optional paid courses and certificates)
  • Download Link: Coursera on the App Store

5. Khan Academy – Free Courses on a Variety of Subjects for All Levels

What Makes It Unique: Khan Academy is known for its high-quality lessons in math, science, history, and more, designed for learners of all ages. The app is completely free, making it a fantastic resource for anyone looking to deepen their knowledge on a budget.

  • Key Features:
    • Comprehensive video lessons across academic and general-interest topics.
    • Interactive exercises and quizzes to test your understanding.
    • Track your progress with achievements as you complete courses.
  • Price: Free
  • Download Link: Khan Academy on the App Store

Final Thoughts

Learning new skills has never been easier with these free apps. Each one brings unique features, from Duolingo’s fun language games to Coursera’s university-quality courses. Start by downloading the one that matches your interests, and enjoy discovering new skills at your own pace!

How to Organize Your iPhone Home Screen with Widgets

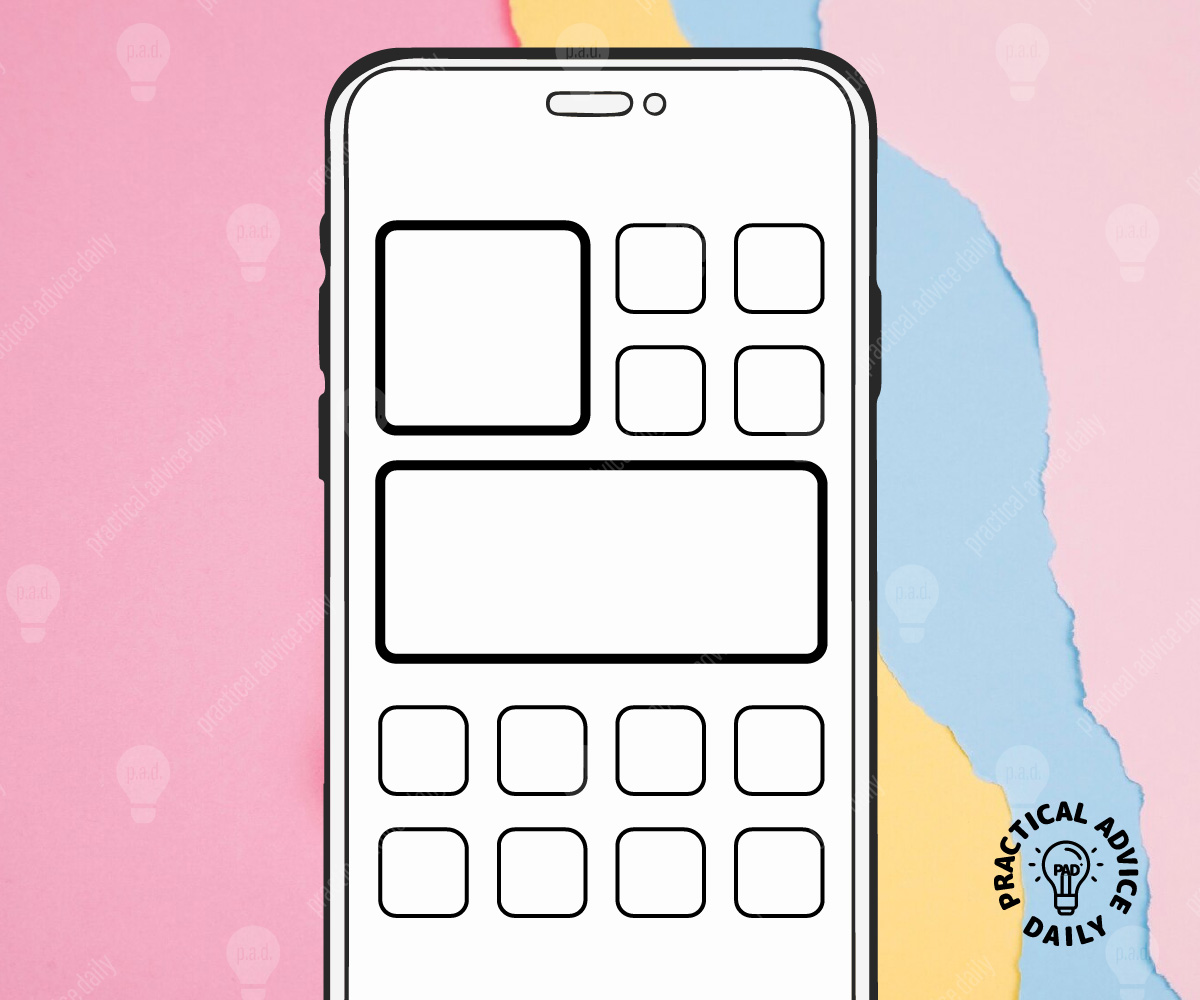
Is your iPhone home screen feeling cluttered or hard to navigate? Adding widgets is a quick way to personalize your screen and make it easier to find what you need. Widgets are like mini-displays for your favorite apps, giving you quick information at a glance—such as weather, calendar events, or photos—without having to open each app. This guide will walk you through the steps to set up widgets, rearrange icons, and organize your screen so it feels like it was made just for you!

Table of Contents

Step 1: Decide Which Widgets You Want

Think about which apps you check most often or which information you want to see quickly. Some popular widget choices are:

Step 2: Add a Widget to Your Home Screen

Here’s how to start adding widgets to your home screen:

  1. Press and Hold: Find an empty spot on your home screen, then press and hold until the app icons start to “wiggle.”
  2. Tap the Plus (+) Button: In the top left corner of the screen, you’ll see a plus (+) button. Tap it to open the widget selection.
  3. Choose Your Widget: Scroll through the list of widgets or use the search bar at the top to find specific ones, like “Weather” or “Photos.”
  4. Select a Widget Size: Widgets usually come in different sizes—small, medium, and large. Pick the size that works best for you, depending on how much information you want to see.
  5. Add the Widget: Tap Add Widget at the bottom of the screen. Your new widget will appear on your home screen.

Step 3: Arrange Your Widgets and Apps

Now that you’ve added widgets, you can organize them alongside your apps to create a layout that’s both useful and easy to navigate.

  1. Move Widgets and Apps: Press and hold any widget or app until it starts to wiggle. Then, drag it to the spot where you’d like it to stay. You can place widgets next to or above apps for a balanced look.
  2. Create a Stack of Widgets: To save space, you can “stack” widgets on top of each other. Drag one widget on top of another (they need to be the same size), and they’ll form a “stack” you can swipe through. This is helpful if you want several widgets but don’t want them taking up too much space.

Step 4: Use App Library to Organize Apps

If you don’t need every app on your home screen, you can remove some and find them in your App Library instead. This makes your home screen feel more organized and less cluttered.

  1. Remove Unneeded Apps from Home Screen: Press and hold an app icon until a menu appears. Tap Remove from Home Screen to keep the app but take it off the main screen. You’ll still find it in the App Library.
  2. Access the App Library: Swipe to the last page of your home screen, and you’ll see the App Library, which automatically organizes apps into categories like Social, Productivity, and Entertainment.

Step 5: Customize Your Home Screen Background

You can make your home screen feel even more personal by changing your background. A simple background can also make your widgets and apps easier to see.

  1. Open Settings: Go to your iPhone’s Settings app.
  2. Choose Wallpaper: Tap Wallpaper and then Choose a New Wallpaper.
  3. Pick a Background: You can choose a picture from your photos or pick from Apple’s built-in options.
  4. Set Your Wallpaper: Tap Set and choose whether you want the wallpaper for just your home screen, just your lock screen, or both.

By following these steps, you’ll have an organized, custom home screen that shows you exactly what you need at a glance. Adding widgets, arranging apps, and simplifying your layout can make your iPhone easier and more enjoyable to use. Enjoy your new setup!

5 Best To-Do List Apps for Keeping Your Day Organized

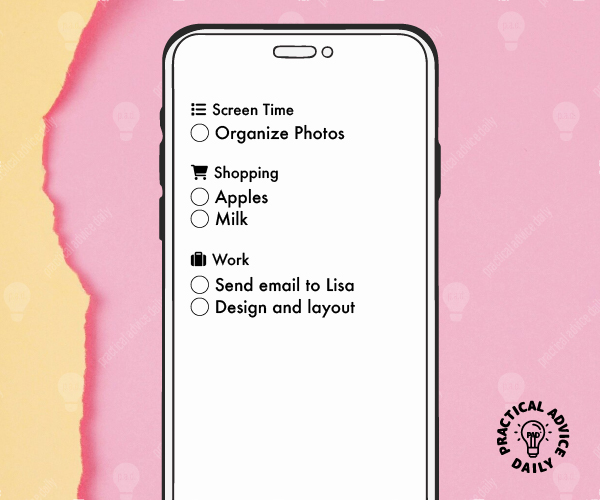
Staying organized can be a challenge, but with the right tools, it can be simple and even enjoyable! To-Do list apps can help you keep track of your tasks and make your day more manageable. Here’s a list of five fantastic to-do list apps that are user-friendly and perfect for anyone looking to stay organized.

Table of Contents

1. Microsoft To Do

Overview: Microsoft To Do is a free app that helps you create simple to-do lists. You can break tasks into smaller steps, set due dates, and even share your lists with others.

Features:

  • Create different lists for various tasks, like groceries, household chores, or work projects.
  • Set reminders for important deadlines.
  • Add notes to tasks for extra details.

How to Download:

2. Todoist

Overview: Todoist is a versatile app that allows you to manage your tasks easily. Its clean interface makes it simple to add, organize, and complete tasks.

Features:

  • Organize tasks into projects and assign due dates.
  • Use labels to categorize tasks (like “urgent” or “personal”).
  • Collaborate with others on shared tasks.

How to Download:

3. Any.do

Overview: Any.do is a popular app that combines your to-do list with a calendar. This makes it easy to see your tasks alongside your schedule.

Features:

  • Create tasks and add them to your daily planner.
  • Set reminders that notify you when a task is due.
  • Share tasks with family or friends to work together.

How to Download:

4. Google Keep

Overview: Google Keep is not just a to-do list app; it’s also a note-taking tool. It’s great for jotting down quick ideas and organizing your tasks.

Features:

  • Create color-coded lists to make it visually appealing.
  • Add images or voice notes to your tasks.
  • Access your lists from any device with your Google account.

How to Download:

5. Apple Reminders

Overview: If you have an iPhone, you already have access to Apple Reminders. This app is built into your device and offers a straightforward way to keep track of tasks.

Features:

  • Create simple lists and add tasks with due dates.
  • Set location-based reminders that alert you when you arrive at a place.
  • Organize your tasks into different lists for better management.

How to Access:

  • Apple Reminders comes pre-installed on all iPhones. Just search for “Reminders” in your apps.

Getting Started

To make the most of these apps, start by downloading one or two that catch your interest. Here are some simple steps to get started:

  1. Choose an App: Select one of the apps from the list above and download it from the App Store.
  2. Create an Account (if needed): Some apps may require you to create an account. Follow the prompts to set it up.
  3. Add Your Tasks: Begin by entering a few tasks you need to complete. Don’t worry about making it perfect; just get started!
  4. Set Reminders: If your app allows, set reminders for important tasks so you don’t forget them.
  5. Check Off Completed Tasks: As you complete tasks, check them off. This will give you a sense of accomplishment!

Conclusion

Using a to-do list app can transform how you manage your daily tasks. With these five user-friendly apps, you can choose the one that fits your style and needs best. Remember, staying organized is all about finding what works for you. Happy organizing!

Top 5 Weather Apps to Keep You Updated Daily

Weather apps have become an essential part of our daily routine, whether it’s planning your commute, a weekend trip, or just deciding if you should grab an umbrella before heading out. With so many apps out there, it can be hard to know which ones are worth your time. That’s why I’ve done the homework for you and picked out the Top 5 Weather Apps to keep you informed and ready for whatever Mother Nature throws your way!

Table of Contents

1. AccuWeather

AccuWeather has long been a favorite among weather enthusiasts, and for good reason. It offers precise and hyperlocal forecasts, often predicting weather changes right down to your street. The app also delivers hourly updates and detailed radar maps, making it one of the most reliable choices for staying ahead of the weather.

Key Features:

  • Minute-by-Minute Forecasts: Get updates on weather changes by the minute for your exact location.
  • Radar and Satellite Maps: Track storms and severe weather patterns in real-time.
  • Severe Weather Alerts: Stay safe with notifications for extreme weather conditions.

Download for iPhone

2. The Weather Channel

When you think of weather, chances are you’ve heard of The Weather Channel. Their app is one of the most popular weather apps for both casual users and weather geeks. Not only does it provide up-to-the-minute forecasts, but it also has a fun feature that provides local pollen reports—great if you’re an allergy sufferer.

Key Features:

  • Hourly and 10-Day Forecasts: Plan your week with confidence.
  • Weather Radar: See weather changes as they happen with interactive radar.
  • Health Tracking: Offers updates on flu reports and pollen levels in your area.

Download for iPhone

3. Dark Sky

If you prefer beautifully designed apps, Dark Sky might just be your new favorite. Known for its sleek interface and highly accurate weather predictions, Dark Sky shines when it comes to hyper-local forecasting, telling you exactly when rain will start or stop, down to the minute. This app is like having your own personal weather expert in your pocket!

Key Features:

  • Hyperlocal Forecasts: Know exactly when it will rain or snow, down to the minute.
  • Beautiful Design: Simple yet detailed visual representation of the weather.
  • Severe Weather Alerts: Stay informed about dangerous weather conditions.

(Note: Dark Sky has been integrated into Apple Weather, so Android users might need to look for alternatives.)

4. MyRadar

For those who love seeing detailed radar imagery, MyRadar is a fantastic app. It shows real-time animated radar around your location, so you can actually see the weather coming. This app is great for storm tracking, and if you enjoy outdoor activities like hiking or boating, it’s a must-have for keeping an eye on upcoming weather patterns.

Key Features:

  • Animated Weather Radar: Real-time radar that’s easy to read.
  • Hurricane Tracker: Track storms, hurricanes, and tropical systems.
  • Aviation Layers: Useful features for pilots and frequent travelers.

Download for iPhone

5. WeatherBug

WeatherBug is one of the most comprehensive weather apps out there, offering not only the basics like current weather, radar, and forecasts but also a whole range of bonus features like lightning alerts, air quality updates, and pollen counts. Its user-friendly interface makes checking the weather quick and easy, and it’s also great for planning outdoor activities.

Key Features:

  • Live Weather Cameras: View live weather conditions from over 10,000 cameras across the country.
  • Real-Time Lightning Alerts: Get instant alerts if lightning strikes near you.
  • Traffic Conditions: Plan your commute with integrated traffic and weather data.

Download for iPhone

Final Thoughts

Having a reliable weather app can make your life so much easier—whether you’re planning your outfit for the day, scheduling a weekend hike, or even tracking severe weather to stay safe. Each of the apps listed above brings something unique to the table, so you’re sure to find one that fits your lifestyle and needs.

Whichever app you choose, you’ll always be prepared for whatever the day brings. Now go ahead, download one (or all!) of these apps, and stay one step ahead of the weather!

Top-5 Relaxation Apps for iPhone

Finding a moment of peace in today’s fast-paced world can be a challenge. Whether it’s juggling work, family, or just trying to keep up with life’s demands, we all need a way to unwind and relax. Thankfully, your iPhone can be a powerful tool for finding that much-needed calm. In this list, we’ve rounded up the top 5 relaxation apps that will help you de-stress, meditate, and sleep better—anytime, anywhere. Whether you’re new to relaxation apps or looking to switch up your routine, these picks are sure to soothe your mind and bring you back to balance.

Table of Contents

1. Calm – Your Personal Meditation and Sleep Aid

Calm isn’t just an app—it’s a whole mood. Known for its beautiful interface and soothing soundscapes, Calm is perfect for anyone looking to add moments of mindfulness into their day.

What It Does: Calm offers guided meditations, breathing exercises, sleep stories, and relaxing music designed to help you relax, reduce stress, and improve your sleep.

Key Features:

  • Sleep Stories: Narrated by celebrities like Matthew McConaughey, these bedtime tales help adults drift off peacefully.
  • Daily Calm: A daily 10-minute meditation that helps set a relaxed tone for the day.
  • Breathing Exercises: Quick and simple exercises to calm your nerves in moments of stress.

Practical Use: Use Calm during your commute to ease into your day or wind down before bed with a soothing sleep story.

Pricing: Freemium; offers a free version with limited content, and a subscription unlocks the full library.

Download Calm here.

2. Headspace – Find Your Moment of Zen

Headspace is perfect for beginners and seasoned meditators alike, offering a simple, playful approach to mindfulness.

What It Does: With a focus on guided meditation and mindfulness techniques, Headspace aims to teach you how to relax, breathe, and live a more mindful life.

Key Features:

  • Guided Meditations: Covering everything from stress reduction to mindful eating.
  • Sleepcasts: Unique audio experiences that help you unwind and get a restful sleep.
  • SOS Sessions: Quick 2-3 minute exercises designed for moments of panic, stress, or anxiety.

Practical Use: Start your morning with a 10-minute guided meditation to set a calm tone for the day, or use the SOS sessions when you need quick relief during a stressful meeting.

Pricing: Freemium; basic version is free, with a premium subscription for full access.

Download Headspace here.

3. Insight Timer – Meditation for Every Mood

With the largest free library of guided meditations, Insight Timer is a treasure trove for those seeking relaxation, peace, and mindfulness.

What It Does: Insight Timer provides access to thousands of free meditations, music tracks, and talks from mindfulness experts around the world.

Key Features:

  • Diverse Content: From meditation for sleep to guided gratitude practices, there’s something for everyone.
  • Live Events: Join live meditation sessions and connect with the global community.
  • Sleep Music: Soothing sounds to help you drift off into dreamland.

Practical Use: Set the timer for a quick 5-minute mindfulness break during work or dive into a deep relaxation session before bedtime.

Pricing: Freemium; free with the option to upgrade for offline access and additional features.

Download Insight Timer here.

4. Breethe – Meditation, Sleep, and Life Coaching

Breethe combines relaxation with life coaching, making it a versatile app for those looking to improve their mental well-being across different areas of life.

What It Does: Breethe offers a mix of guided meditations, life advice, sleep stories, and masterclasses that aim to improve not just relaxation, but overall life satisfaction.

Key Features:

  • Personalized Recommendations: Tailored content based on your specific needs, whether it’s stress, anxiety, or sleeplessness.
  • Life Masterclasses: Learn from experts on topics like self-esteem, managing relationships, and more.
  • Meditation Playlists: Curated for specific moods, activities, and goals.

Practical Use: Use Breethe’s morning meditations to kickstart a positive day or listen to a sleep story when winding down.

Pricing: Freemium; free access with a wide range of premium content available with a subscription.

Download Breethe here.

5. MyNoise – Customize Your Sound Environment

For those who find relaxation in soundscapes rather than guided meditations, MyNoise offers a highly customizable experience to create your perfect background noise.

What It Does: MyNoise allows you to create unique soundscapes, from calming rain to the gentle hum of a distant city, with sliders that let you fine-tune every aspect of the sound.

Key Features:

  • Customizable Soundscapes: Personalize sounds like white noise, nature sounds, or even café ambiance to your exact liking.
  • Noise Blocker: Perfect for masking distracting noises in your environment.
  • Offline Access: Download your favorite soundscapes to use anywhere, without an internet connection.

Practical Use: Use MyNoise to create a focused work environment or drown out city noise when trying to relax at home.

Pricing: Freemium; the basic app is free with in-app purchases for additional soundscapes.

Download MyNoise here.

Conclusion

Whether you’re looking to meditate, sleep better, or simply escape from the chaos of the day, these relaxation apps for iPhone offer something for everyone. Try one (or all!) of these apps and find out which one suits your relaxation needs best. Don’t forget to share your favorites with friends or explore more app lists to continue your journey toward a calmer mind.

10 Must-Know iPhone Tips for Everyone

Mastering a few essential tips can significantly enhance your experience, making your device more intuitive and enjoyable to use. In this article, we’ll uncover ten must-know iPhone tips specifically tailored for seniors. These tips will help you customize your iPhone to better suit your needs, improve accessibility, and take full advantage of the device’s powerful features.

Table of Contents

Enlarge Text Size

Larger text can make reading messages, emails, and browsing the web much easier on the eyes.

  1. Open the Settings app.
  2. Tap Display & Brightness.
  3. Select Text Size.
  4. Drag the slider to increase the text size to your preference.

Use Siri for Hands-Free Commands

Siri can help you perform various tasks without touching your iPhone, from making calls to setting reminders.

  1. Press and hold the Side Button (or the Home Button on older models) to activate Siri.
  2. Alternatively, say “Hey Siri” if you have voice activation enabled.
  3. Ask Siri to perform tasks like “Call [contact name]” or “Set a reminder for [task].”

Set Up Emergency Contacts

Having emergency contacts set up allows first responders to quickly contact your loved ones in case of an emergency.

  1. Open the Health app.
  2. Tap your profile picture in the top right corner.
  3. Select Medical ID > Edit.
  4. Scroll to Emergency Contacts and add contacts from your list.

Enable Voice Dictation

Voice dictation allows you to speak instead of type, which can be easier and faster.

  1. Open any app where you can type, like Messages or Notes.
  2. Tap the microphone icon on the keyboard.
  3. Start speaking, and your words will be transcribed into text.

Use the Magnifier Tool

The magnifier tool can turn your iPhone into a digital magnifying glass, making it easier to read small text or see fine details.

  1. Go to Settings > Accessibility > Magnifier.
  2. Toggle on Magnifier.
  3. Triple-click the Side Button (or the Home Button) to activate the magnifier.

Create a Medical ID

A Medical ID can provide important health information to first responders, such as allergies and medical conditions.

  1. Open the Health app.
  2. Tap your profile picture in the top right corner.
  3. Select Medical ID > Edit.
  4. Fill in your medical information and tap Done.

Set Up Find My iPhone

Find My iPhone helps you locate your device if it’s lost or stolen.

  1. Go to Settings > [Your Name] > Find My > Find My iPhone.
  2. Toggle on Find My iPhone and Send Last Location.

Customize Ringtones and Alerts

Custom ringtones and alerts can help you easily identify calls and notifications from important contacts.

  1. Go to Settings > Sounds & Haptics.
  2. Select Ringtone or Text Tone.
  3. Choose a tone from the list or tap Tone Store to download more.

Use the Flashlight

The flashlight feature can be handy in low-light situations.

  1. Swipe down from the top-right corner of the screen to open Control Center.
  2. Tap the flashlight icon to turn it on or off.

Manage Notifications


Managing notifications can reduce distractions and help you focus on what’s important.

  1. Go to Settings > Notifications.
  2. Select the apps you want to adjust.
  3. Toggle off Allow Notifications or customize the alert style and sound.

Conclusion

By implementing these ten tips, you can transform your iPhone into a more senior-friendly device, making it easier and more enjoyable to use. From enlarging text to setting up emergency contacts and using Siri for hands-free commands, these adjustments will enhance your overall experience. Keep exploring your iPhone’s features and settings to find more ways to tailor it to your needs, ensuring that technology remains a helpful tool in your daily life.

5 Ways to Make Your iPhone More User-Friendly

As we age, technology can sometimes feel more like a hurdle than a help. However, the iPhone is designed with numerous features that can make everyday use simpler and more accessible, especially for seniors. Whether it’s adjusting the display for better visibility or setting up quick access to frequently used contacts, these small changes can have a big impact. In this article, we’ll explore five practical tips to make your iPhone more user-friendly, ensuring you get the most out of your device without any hassle.

Table of Contents

Adjust Display Settings for Better Visibility

As we age, our vision might not be as sharp as it once was. Luckily, the iPhone offers several settings to make the display easier to see and use.

Steps to Adjust Display Settings:

  1. Increase Text Size:
    • Go to Settings > Display & Brightness > Text Size.
    • Drag the slider to increase the text size to a comfortable level.
  2. Enable Bold Text:
    • Go to Settings > Display & Brightness.
    • Toggle on Bold Text.
  3. Use Display Zoom:
    • Go to Settings > Display & Brightness > View (under Display Zoom).
    • Select Standard or Zoomed based on your preference.
    • Tap Set and confirm your choice.

These adjustments will make reading text and viewing icons on your iPhone much easier.

Set Up One-Touch Dialing for Frequently Called Numbers

Calling loved ones can be made much simpler by setting up one-touch dialing. This feature allows you to quickly call your most frequent contacts with just a tap.

Steps to Set Up One-Touch Dialing:

  1. Add Contacts to Favorites:
    • Open the Phone app and go to Favorites.
    • Tap the + icon in the top-left corner.
    • Select a contact and choose the preferred number (e.g., mobile or home).
  2. Use the Contacts Widget:
    • Swipe right on the home screen to access the widgets screen.
    • Scroll to the bottom and tap Edit.
    • Tap the + icon in the top-left corner, search for Contacts, and add the widget to your home screen.
  3. Create Shortcuts:
    • You can also create shortcuts using the Shortcuts app.
    • Open Shortcuts and tap Create Shortcut.
    • Tap Add Action > Contact > Call.
    • Select a contact, then tap Next and give the shortcut a name.
    • Add the shortcut to your home screen for quick access.

Now you can quickly call important contacts with just a tap, saving time and effort.

Organize the Home Screen with Essential Apps

Having your most-used apps readily accessible on the home screen can make using your iPhone much more convenient. Organizing your apps will help you find what you need quickly.

Steps to Organize the Home Screen:

  1. Rearrange Apps:
    • Press and hold any app until all apps start to jiggle.
    • Drag the app to your desired location.
    • You can also drag apps onto each other to create folders.
  2. Create Folders:
    • To create a folder, drag one app onto another.
    • The iPhone will automatically create a folder with a suggested name (which you can edit).
    • Add more apps to the folder by dragging them into it.
  3. Use the Dock for Most-Used Apps:
    • The dock at the bottom of the screen can hold up to four apps.
    • Drag your most frequently used apps to the dock for easy access.

A well-organized home screen makes navigating your iPhone smoother and faster.

Use Widgets for Quick Access

Widgets provide quick access to information and frequently used functions directly from your home screen. They can show you the weather, your calendar events, and more at a glance.

Steps to Add Widgets:

  1. Access the Widgets Screen:
    • Swipe right on the home screen to access the widgets screen.
  2. Add Widgets:
    • Scroll to the bottom and tap Edit.
    • Tap the + icon in the top-left corner to open the widget gallery.
    • Browse or search for the widget you want, then tap Add Widget.
  3. Customize Widget Placement:
    • You can drag and place widgets anywhere on your home screen.
    • To remove a widget, press and hold it, then tap Remove Widget.

Widgets provide quick access to important information without needing to open apps.

Enable Voice Control

Voice Control allows you to operate your iPhone using just your voice. This can be particularly helpful for those who find it challenging to use the touchscreen.

Steps to Enable Voice Control:

  1. Enable Voice Control:
    • Go to Settings > Accessibility > Voice Control.
    • Toggle on Voice Control.
  2. Learn Voice Commands:
    • Tap Customize Commands to see a list of available commands.
    • You can also create your own commands by tapping Create New Command.
  3. Use Voice Control:
    • Once enabled, you can say commands like “Open Safari” or “Scroll Down” to navigate your iPhone.
    • To turn off Voice Control, say “Go to sleep.”

Using Voice Control makes operating your iPhone easier and more intuitive, especially if you have difficulty with the touchscreen.

Conclusion

With these simple adjustments, your iPhone can become an even more powerful tool to support your daily activities. From making calls with a single touch to easily accessing important information through widgets, these tips are designed to enhance your user experience and make technology work for you. Embrace these changes and enjoy the convenience and efficiency that a well-optimized iPhone can bring to your life. If you found these tips helpful, be sure to explore more of our guides to keep discovering ways to simplify your tech use.

12 Common iPhone Problems – How To Fix Them

As iPhones become an essential part of our daily lives, encountering occasional issues is inevitable. Whether it’s a frozen screen or battery drain, these problems can be frustrating. This guide provides straightforward solutions to 12 common iPhone problems, ensuring your device runs smoothly and efficiently.

Table of Contents

Frozen or Unresponsive Screen

Solution:

  • Force restart your iPhone by pressing and holding both the Home button and the Power button (for iPhone 8 and earlier) or the Volume Up button and the Power button (for iPhone X and later) until the Apple logo appears.

Battery Drain Issues

Solution:

  • Check for apps using excessive battery: Go to Settings > Battery.
  • Reduce screen brightness or enable Auto-Brightness: Settings > Display & Brightness.
  • Enable Low Power Mode: Settings > Battery > Low Power Mode.
  • Turn off Background App Refresh: Settings > General > Background App Refresh.

Storage Full

Solution:

  • Review and delete unused apps: Settings > General > iPhone Storage.
  • Offload unused apps: Enable Settings > General > iPhone Storage > Offload Unused Apps.
  • Delete old messages and attachments.
  • Use iCloud to store photos and videos: Settings > [your name] > iCloud > Photos > iCloud Photos.

Wi-Fi Connectivity Issues

Solution:

  • Toggle Wi-Fi off and on: Settings > Wi-Fi.
  • Forget and reconnect to the network: Settings > Wi-Fi > [Network Name] > Forget This Network.
  • Restart your router.
  • Reset network settings: Settings > General > Reset > Reset Network Settings.

Bluetooth Connectivity Issues

Solution:

  • Toggle Bluetooth off and on: Settings > Bluetooth.
  • Forget and reconnect to the Bluetooth device: Settings > Bluetooth > [Device Name] > Forget This Device.
  • Ensure the Bluetooth device is fully charged.
  • Restart your iPhone.

App Crashes and Glitches

Solution:

  • Update the app: App Store > Updates.
  • Restart the app: Swipe up from the bottom and swipe the app away.
  • Reinstall the app: Delete it and download it again from the App Store.
  • Check for iOS updates: Settings > General > Software Update.

Restoring from a Backup

Solution:

  • Connect your iPhone to Wi-Fi.
  • Go to Settings > General > Reset > Erase All Content and Settings.
  • Follow the setup process and choose Restore from iCloud Backup or Restore from iTunes Backup.
  • Select the backup you want to restore.

Sound and Audio Problems

Solution:

  • Check the volume level and mute switch.
  • Ensure Bluetooth is off if not using a Bluetooth device.
  • Clean the speaker and microphone openings.
  • Restart your iPhone.
  • Check for updates: Settings > General > Software Update.

iMessage and FaceTime Issues

Solution:

  • Ensure iMessage and FaceTime are activated: Settings > Messages > iMessage and Settings > FaceTime.
  • Toggle iMessage and FaceTime off and on.
  • Sign out and back into your Apple ID: Settings > [your name] > Sign Out.

Slow Performance

Solution:

  • Restart your iPhone.
  • Close unnecessary apps running in the background.
  • Free up storage space.
  • Update to the latest iOS version.
  • Reset settings: Settings > General > Reset > Reset All Settings.

Touch Screen Sensitivity

Solution:

  • Remove any screen protectors or cases.
  • Clean the screen with a soft, lint-free cloth.
  • Restart your iPhone.
  • Adjust 3D Touch settings: Settings > Accessibility > Touch > 3D & Haptic Touch.

Overheating

Solution:

  • Avoid using your iPhone in direct sunlight.
  • Remove any case when charging.
  • Close unused apps running in the background.
  • Turn off unnecessary features like Bluetooth and Wi-Fi.
  • If overheating persists, allow the iPhone to cool down before using it again.

Conclusion

By following these simple solutions, you can tackle most common iPhone problems with ease. Keeping your device updated and properly maintained will help prevent many issues from occurring in the first place. If you encounter persistent problems, don’t hesitate to seek professional assistance. Stay connected and enjoy your iPhone experience with confidence!