iPhone Alarm and Timer: How to Set and Customize Alerts

Are you ready to master the art of alarms and timers on your iPhone? Whether you need to wake up in the morning, remind yourself of an appointment, or time your cooking perfectly, your iPhone has you covered! Let’s take a step-by-step look at how to set and customize these alerts in a simple and friendly way.

Table of Contents

Getting Started

First, let’s find the Clock app on your iPhone. It’s usually represented by a clock icon and can be found on your home screen. If you can’t find it, swipe down on your home screen and type “Clock” in the search bar.

Setting an Alarm

  1. Open the Clock App: Tap the Clock app icon to open it.
  2. Select the Alarm Tab: At the bottom of the screen, you’ll see several options. Tap on the “Alarm” tab, which looks like an alarm clock.
  3. Add a New Alarm: You’ll see a plus sign (+) in the top right corner. Tap on it to create a new alarm.
  4. Choose the Time: A clock will appear. Use the wheels to select the hour and minutes for your alarm. Don’t forget to choose whether it’s morning (AM) or evening (PM).
  5. Customize Your Alarm: After selecting the time, you can customize your alarm. Here’s how:
    • Label: Tap on the “Label” field to give your alarm a name, like “Wake Up” or “Doctor’s Appointment.” This helps you remember what the alarm is for!
    • Sound: Tap on “Sound” to choose how your alarm will sound. You can select a tone that you like or even a song from your music library.
    • Snooze Option: You can also toggle the “Snooze” option on or off. If it’s on, you can tap snooze when the alarm goes off to get a few extra minutes of sleep.
  6. Save Your Alarm: Once you’re happy with your settings, tap “Save” in the top right corner.

Turning Your Alarm On or Off

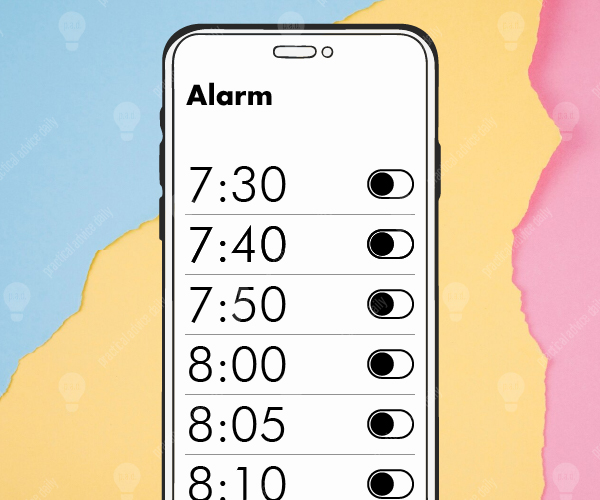
  • To turn your alarm on or off, simply toggle the switch next to the alarm time. If it’s green, your alarm is on! If it’s gray, it’s off.

Editing an Alarm

If you need to make changes to your alarm:

  1. Go back to the Alarm tab.
  2. Tap on the alarm you want to edit.
  3. Adjust any settings you need to change and then tap “Save.”

Deleting an Alarm

To remove an alarm that you no longer need:

  1. Go to the Alarm tab.
  2. Tap Edit in the top left corner.
  3. Select the alarm you want to delete.
  4. Tap Delete and then confirm by tapping Delete Alarm.

Using the Timer


Now that you’re an alarm pro, let’s check out how to set a timer!

  1. Open the Clock App: You’re already there!
  2. Select the Timer Tab: At the bottom of the screen, tap on the “Timer” tab.
  3. Set the Duration: Use the wheels to set how long you want the timer to run. You can select hours, minutes, and seconds.
  4. Choose a Sound: Tap on “When Timer Ends” to select a sound that will play when your timer goes off. You can choose from ringtones or even your music.
  5. Start the Timer: Once you’ve set your duration and sound, tap “Start.” Your timer will begin counting down!

Stopping or Canceling the Timer

  • If you need to stop the timer early, tap “Pause.” To cancel it completely, tap “Cancel.”

Checking Your Timer

If you want to see how much time is left, just open the Clock app and go to the Timer tab. You’ll see how much time remains.

Final Tips

  • Volume Matters: Make sure your iPhone’s volume is turned up so you can hear your alarms and timers! You can adjust the volume using the buttons on the side of your iPhone.
  • Stay Organized: Consider using different labels for your alarms to help keep track of your day.

How to Use Focus Mode on iPhone to Minimize Distractions

Ever get distracted by notifications when you’re trying to relax, work, or even sleep? Your iPhone has two great features—Do Not Disturb and Focus Modes—to help you reduce these interruptions.

Table of Contents

Key Takeaways:

  • Do Not Disturb: Mutes all notifications and calls when activated.
  • Focus Modes: Allows you to customize which notifications come through, based on what you’re doing.
  • Both features can be automated, so they turn on and off without you needing to remember.

Here’s a quick guide on how to use them.

Do Not Disturb: A Simple Way to Silence Notifications


Do Not Disturb is like putting a “quiet” sign on your phone. It stops notifications and calls so you can focus on what you’re doing without interruptions. Here’s how to turn it on:

  1. Open Control Center: Swipe down from the top-right corner of your screen.
  2. Tap the crescent moon icon: This activates Do Not Disturb instantly. You’ll see a little moon symbol at the top of your screen, letting you know it’s on.
  3. Set it on a schedule: Go to Settings > Focus > Do Not Disturb. You can schedule it to turn on automatically, like at bedtime, and choose which contacts or apps can still notify you.

Focus Modes: Customize What Interrupts You

Focus Modes are like a more personalized version of Do Not Disturb. Instead of silencing everything, you can allow certain notifications based on what you’re doing. Here’s how:

  1. Go to Settings > Focus.
  2. Choose or create a Focus Mode: You’ll see options like Work, Personal, or Sleep. You can pick which contacts or apps can reach you during these times.
  3. Automate it: You can schedule Focus Modes to turn on automatically at certain times, like when you’re working or relaxing.

Example: Sleep Mode

Let’s say you want to sleep peacefully. With Sleep Focus, you can allow only calls from close family members and turn off everything else. Just set it once, and it’ll turn on and off by itself each night.

Final Thoughts

These features are great for staying focused or relaxing without constant distractions. Once you set them up, they’ll make your iPhone much easier to use without the constant buzz of notifications.

Give them a try and enjoy fewer interruptions!

Setting Up Medical ID on Your iPhone for Emergencies

Imagine being in an emergency where you can’t speak or share your medical information. Your iPhone’s Medical ID can be a lifesaver in these moments. It stores essential health details that first responders can access even when your phone is locked.

In just a few simple steps, you can set up your Medical ID, making sure your vital information is always available when needed.

Table of Contents

What Is Medical ID, and Why Does It Matter?

The Medical ID feature lets you enter important details like:

  • Your name and date of birth
  • Medical conditions, allergies, and medications
  • Emergency contact information
  • Blood type and organ donor status

This information can be accessed from your phone’s lock screen, allowing medical personnel to act quickly in an emergency.

Does the Process Differ Between iPhones?


The process for setting up Medical ID is mostly the same across all iPhones. However, there might be minor differences depending on your iOS version:

  • iOS 13 and Later: The Health app looks a bit different, but the steps remain the same.
  • Older iPhones: For those using iOS 12 or earlier, the layout is simpler, but you’ll follow the same steps.

No matter the iPhone model or iOS version, the setup is quick and easy.

How to Set Up Your Medical ID

Here’s a step-by-step guide:

  1. Open the Health App: Find the Health app (white icon with a red heart) and tap it.
  2. Go to the Medical ID Tab: Tap “Medical ID” in the bottom right corner.
  3. Edit Your Information: Tap “Edit” in the top right corner. Enter details like your medical conditions, medications, allergies, and emergency contacts.
  4. Turn On “Show When Locked”: Make sure to toggle this option so your information is accessible from the lock screen.
  5. Save: Once done, tap “Done” to save your Medical ID.

How to Access Medical ID in an Emergency

If someone needs to access your Medical ID in an emergency, here’s how they can do it:

  1. From the Lock Screen, swipe up or press the home button (depending on your iPhone model).
  2. Tap “Emergency” in the bottom left corner.
  3. Tap “Medical ID” to view your health information and emergency contacts.

Why This Step Matters

Setting up your Medical ID takes only a few minutes but could be crucial in an emergency. Medical responders will have access to the information they need to provide the best care quickly. Even if you’re perfectly healthy, it’s important to list emergency contacts.

Keep It Updated

As your health changes or you switch medications, remember to update your Medical ID so that it always has the correct information.

Final Thoughts

Setting up your Medical ID is a simple step that could make a big difference in an emergency. It’s quick, easy, and ensures that first responders have the information they need. Take a few minutes to set it up today, and share this guide with family and friends to help them stay safe too.

How to Use AirDrop on Your iPhone to Share Files Easily

If you’re an Apple user, you’ve probably heard of AirDrop—Apple’s easy, fast way to share photos, files, and even web links between devices. Whether you’re new to the Apple ecosystem or just haven’t explored this feature yet, AirDrop is about to become your new best friend for transferring data seamlessly. In this guide, I’ll walk you through everything you need to know about sharing files using AirDrop, so you can start using it like a pro.

Table of Contents

What is AirDrop?

In simple terms, AirDrop is Apple’s solution for sharing files wirelessly between iPhones, iPads, and Macs. Think of it as an invisible bridge connecting your devices, letting you send files quickly without the need for cables, apps, or cloud services.

AirDrop uses both Bluetooth and Wi-Fi, making it not only fast but also secure. It’s perfect for sharing high-quality photos, videos, and even large files like presentations or documents.

Why Use AirDrop?

I get it—there are so many ways to share files these days. Why choose AirDrop? The real advantage comes down to speed and simplicity:

  • Fast transfers: AirDrop works almost instantly, especially with large files like 4K videos.
  • No quality loss: Sharing via social media or messaging apps can compress your files, but AirDrop keeps the original quality intact.
  • No internet needed: You don’t need a Wi-Fi connection to use AirDrop, making it handy even when you’re offline.

How to Enable AirDrop on Your iPhone or iPad

Before you can send or receive files, you need to make sure AirDrop is turned on. Here’s a quick step-by-step guide to setting it up:

  1. Open Control Center: On an iPhone with Face ID, swipe down from the top-right corner. For models with a Home button, swipe up from the bottom.
  2. Press and hold the network settings box: This includes icons like Wi-Fi and Bluetooth.
  3. Tap on AirDrop: You’ll see three options:
    • Receiving Off: Turns off AirDrop completely.
    • Contacts Only: Only people in your contacts can AirDrop to you.
    • Everyone: Anyone nearby with an Apple device can send you files.

I’d recommend setting it to Contacts Only for day-to-day use. If you’re in a crowded place, like an airport or coffee shop, this prevents random people from sending you things.

Personal Tip:

I often toggle between Contacts Only and Everyone when I’m working in shared spaces. I don’t need strangers trying to AirDrop me random memes (yep, it happens!).

How to Share Files with AirDrop

Now that AirDrop is enabled, sharing files is a breeze. Let’s go through the process of sending a photo or file from your iPhone.

  1. Open the app that contains the file you want to share (for example, Photos if you’re sharing a picture).
  2. Select the file: Tap on the item you want to send.
  3. Tap the Share icon: It looks like a square with an upward arrow.
  4. Choose AirDrop: Your device will search for nearby Apple devices.
  5. Select the recipient: A list of available devices will appear—just tap the one you want to send the file to.
  6. Wait for the recipient to accept: The person on the receiving end will get a prompt to accept the file.

Once accepted, the transfer begins, and depending on the file size, it should complete in just a few seconds.

Fun Fact:

You can even share files to your MacBook or iPad using the same method. I find this especially useful when I’m editing photos on my iPhone and need to quickly send them to my Mac for some final tweaks in Photoshop.

Receiving Files via AirDrop


If someone’s sending you a file via AirDrop, you’ll get a notification asking you to Accept or Decline. Simply tap Accept, and the file will open in the appropriate app—for example, photos land in your Photos app, and documents may open in Files or another compatible app.

One thing I love about AirDrop is how it doesn’t clog up your home screen with downloads. Everything is neatly tucked into its corresponding app, so there’s no need to hunt for it afterward.

Troubleshooting AirDrop Issues

As seamless as AirDrop is most of the time, you might run into occasional hiccups. Don’t worry—I’ve been there too, and here are a few quick fixes that often solve the problem:

  • Turn Bluetooth and Wi-Fi off and back on: Since AirDrop relies on both, this often resolves connectivity issues.
  • Move devices closer: AirDrop works best when devices are within a few feet of each other.
  • Restart your device: The old “turn it off and on again” trick works wonders here too.
  • Check AirDrop settings: Make sure AirDrop is set to Contacts Only or Everyone.

I remember once trying to AirDrop a presentation to my colleague, but it just wouldn’t show up in the list of devices. A quick toggle of Bluetooth and AirDrop settings, and boom—it worked like a charm!

Bonus: Sharing Files Between iPhone and Mac

AirDrop isn’t just limited to iPhones and iPads. It works beautifully with Macs too, making it easy to move files between your laptop and phone.

For example, if you’re on your iPhone and want to send a PDF to your Mac:

  1. Select the file (just like you would when sharing between iPhones).
  2. Tap the Share icon and choose AirDrop.
  3. Select your Mac from the list of nearby devices.

On your Mac, a notification will pop up—just click Accept, and the file will save to your Downloads folder. Easy, right?

Final Thoughts

AirDrop is one of those features that might seem small, but once you start using it, you’ll wonder how you ever lived without it. Whether you’re quickly sending photos to friends or transferring important documents between your devices, it’s an incredibly useful tool that makes life just a little easier.

So, next time you’re trying to figure out how to get a large video off your iPhone or send a high-resolution photo to a friend without compressing it—give AirDrop a go. You’ll be pleasantly surprised at how fast and efficient it is!

Have you used AirDrop before, or do you have any other tips? Let me know in the comments—I’d love to hear your experiences!

Basic iPhone Navigation and Gestures

Welcome to our guide on basic iPhone navigation and gestures! If you’re new to the iPhone or just want to get more comfortable using it, you’ve come to the right place. We’ll walk you through the essentials so you can use your iPhone with confidence.

Table of Contents

Turning the iPhone On and Off

To turn on your iPhone:

  1. Press and hold the Sleep/Wake button (on the right side or top of your iPhone) until you see the Apple logo.
  2. Release the button and wait for your iPhone to start up.

To turn off your iPhone:

  1. Press and hold the Sleep/Wake button until you see “slide to power off” on the screen.
  2. Swipe the slider to the right to turn off your iPhone.

Understanding the Home Screen and Lock Screen

The Home screen and Lock screen are where you’ll spend most of your time.

Home Screen:

  • The main screen with all your app icons.
  • You’ll see a status bar at the top showing the time, battery level, and signal strength.
  • The dock at the bottom holds your most-used apps.

Lock Screen:

  • Shows the time, date, and any notifications you have.
  • To unlock your iPhone, use Touch ID (place your finger on the Home button) or Face ID (look at your screen), or enter your passcode if you have one set up.

Using Basic Gestures

Using gestures is an easy way to control your iPhone.

Swipe:

  • Swipe left or right to move between Home screens or delete emails and messages.
  • Swipe up from the bottom of the screen to access the Control Center.

Tap:

  • Tap on apps, buttons, and links to open or select them.
  • Tap and hold an app icon until it wiggles to rearrange or delete it.

Pinch:

  • Place two fingers on the screen and bring them together to zoom out.
  • Move your fingers apart to zoom in. This works in photos, maps, and webpages.

Understanding Common Icons and Buttons


Icons and buttons help you navigate and use your iPhone effectively.

Status Bar Icons:

  • Battery: Shows your battery level. A lightning bolt indicates charging.
  • Wi-Fi: Indicates Wi-Fi connection strength.
  • Signal: Shows your cellular signal strength.

Control Center:

  • Swipe down from the upper-right corner (iPhone X and later) or swipe up from the bottom (iPhone 8 and earlier) to access.
  • Use controls for brightness, volume, airplane mode, Wi-Fi, and the flashlight.

App Icons:

  • Recognize common apps like Phone, Messages, Safari (internet), and Photos.
  • Tap and hold an app icon to move it or delete it. Tap the “x” to delete an app.

Additional Tips and Tricks

Here are a few extra tips to help you get the most out of your iPhone:

Using Siri:

  • Hold down the Home button (or the side button on iPhone X and later) to activate Siri.
  • Ask Siri to make calls, send texts, set reminders, or answer questions.

Taking Screenshots:

  • Press the Sleep/Wake button and the Home button at the same time (or the volume up button on iPhone X and later) to take a screenshot.
  • Find your screenshots in the Photos app.

Using Search:

  • Swipe down from the middle of the Home screen to bring up the search bar.
  • Type the name of an app, contact, or anything else you’re looking for.

Conclusion

You’ve now learned the basics of navigating your iPhone and using gestures! Practice these steps to become more comfortable with your device. Stay tuned for more tips and guides to help you get the most out of your iPhone. Happy exploring!

Managing Your Photos and Videos on iPhone

Capturing and managing photos and videos on your iPhone can be a delightful way to preserve memories and share moments with loved ones. With the user-friendly Photos app, it’s easy to take, organize, edit, and briefly share your photos and videos. This guide will walk you through the essential steps to make the most of your iPhone’s photo and video capabilities.

Table of Contents

Taking Photos and Recording Videos

How to Take Photos:

  1. Opening the Camera App:
  2. Different Modes:
    • Photo: This is the default mode for taking pictures.
    • Portrait: Provides a depth effect, making the subject stand out by blurring the background.
    • Panorama: Captures wide landscape shots by panning your phone.
  3. Using Zoom and Flash Options:
    • Pinch the screen to zoom in and out.
    • Tap the flash icon to turn the flash on, off, or set it to auto.
  4. Tips for Taking Clear Photos:
    • Hold your phone steady and tap the screen to focus on your subject.
    • Use natural lighting whenever possible.

Recording Videos:

  1. Switching to Video Mode:
    • Open the Camera app and swipe to select the Video mode.
    • Tap the red record button to start recording and tap again to stop.
  2. Recording in Different Resolutions:
    • Go to Settings > Camera > Record Video to select the desired resolution (e.g., 1080p or 4K).
  3. Using Slow-Motion and Time-Lapse Features:
    • Swipe in the Camera app to select Slo-mo or Time-lapse modes for creative video effects.

Viewing and Organizing Photos

Viewing Your Photos:

  1. Accessing the Photos App:
    • Tap the Photos app icon to open it.
  2. Navigating Through Tabs:
  3. Searching for Specific Photos:
    • Use the search bar to find photos by date, location, or keywords.

Creating and Managing Albums:

  1. How to Create a New Album:
    • In the Albums tab, tap the “+” sign and select “New Album.”
    • Name your album and select photos to add.
  2. Adding Photos to Albums:
    • Select photos, tap the share button, and choose “Add to Album.”
  3. Organizing Albums:
    • Drag and drop albums to reorder them.
    • Use folders to group similar albums together.

Editing Photos and Videos


Basic Editing Tools:

  1. How to Crop and Rotate Photos:
  2. Adjusting Brightness, Contrast, and Color:
    • Tap the adjust icon (a dial) and use the sliders to enhance your photo.
  3. Using Filters:
    • Tap the filter icon (three overlapping circles) and choose a filter to apply.

Advanced Editing Features:

  1. Using the Markup Tool:
    • Tap the three dots in the edit menu and select “Markup” to add text or drawings.
  2. Editing Videos:
    • Tap “Edit” on a video to trim its length, adjust playback speed, or apply filters.
  3. Third-Party Apps:
    • Explore apps like Snapseed or VSCO for more advanced editing options.

Sharing Photos and Videos (Brief Overview)

Sharing your photos and videos is simple and can bring joy to others. Tap the share button on any photo or video to send it via Messages, Mail, or social media. You can also create shared albums to invite family and friends to view and add their own photos.

Backing Up Your Photos and Videos (Brief Overview)

Ensuring your photos and videos are backed up is crucial. Enable iCloud Photos in Settings to automatically back up your media to the cloud. This allows you to access your photos from any Apple device and ensures they are safe even if you lose your phone. Other backup options include using iTunes or Finder to back up to a computer or utilizing third-party cloud services like Google Photos or Dropbox.

Conclusion

Managing your photos and videos on your iPhone can be easy and enjoyable. By following these steps, you can capture beautiful moments, organize them efficiently, edit them to perfection, and keep them secure. Explore and make the most of your iPhone’s capabilities to preserve and share your precious memories.

Personalizing Your iPhone: Customizing Settings for Ease of Use

Getting comfortable with your iPhone can significantly enhance your daily experience, especially if you’re not very tech-savvy. Personalizing your iPhone makes it easier to use and more enjoyable. This guide will walk you through simple steps to customize your iPhone, ensuring it suits your preferences and needs. From changing the wallpaper to organizing apps, setting up shortcuts, and managing notifications, we’ve got you covered. Let’s dive in and make your iPhone truly yours!

Table of Contents

Changing the Wallpaper

Changing the wallpaper on your iPhone can give it a fresh and personalized look. You can choose from Apple’s selection of wallpapers or use a photo from your own collection.

  1. Open the Settings app on your iPhone.
  2. Scroll down and tap on Wallpaper.
  3. Tap Choose a New Wallpaper.
  4. Select a wallpaper from the options available (Dynamic, Stills, Live) or tap Photos to choose one from your gallery.
  5. Adjust the image as needed and choose Set.
  6. Select whether you want to set the wallpaper for your Lock Screen, Home Screen, or Both.

Organizing Apps into Folders


Organizing your apps into folders can help you keep your home screen tidy and make it easier to find the apps you use most frequently.

  1. Press and hold an app icon until it starts to jiggle.
  2. Drag the app icon over another app you want to group it with and release it. A folder will be created.
  3. You can name the folder by tapping on the name field at the top.
  4. To add more apps to the folder, simply drag and drop them into the folder while the icons are still jiggling.
  5. Press the Home button or tap Done in the top right corner to stop the jiggling and save your changes.

Setting Up Shortcuts for Frequently Used Apps

Creating shortcuts for frequently used apps can save you time and make accessing your favorite apps more convenient.

  1. Open the Shortcuts app on your iPhone.
  2. Tap the + icon in the top right corner to create a new shortcut.
  3. Tap Add Action and select the action you want the shortcut to perform (e.g., open an app).
  4. Choose the app you want to create a shortcut for.
  5. Tap Next and give your shortcut a name.
  6. Tap Done to save your shortcut.
  7. To add the shortcut to your home screen, tap the three dots on the shortcut, then tap the share icon and select Add to Home Screen.

Customizing Notification Settings to Reduce Distractions

Customizing your notification settings can help you manage your time better and reduce distractions from unnecessary alerts.

  1. Open the Settings app on your iPhone.
  2. Tap on Notifications.
  3. Scroll through the list of apps and tap on the one you want to customize.
  4. Toggle off Allow Notifications to turn off notifications for that app completely, or adjust the alert settings to your preference (e.g., lock screen, notification center, banners).
  5. You can also set the Notification Style to be less intrusive by selecting options like Sounds and Badges only.
  6. Repeat these steps for any other apps you wish to customize notifications for.

Conclusion

Customizing your iPhone doesn’t have to be a daunting task. By following these simple steps, you can make your device more intuitive and tailored to your personal needs. Whether it’s changing the wallpaper, organizing your apps, setting up convenient shortcuts, or managing notifications, each adjustment helps make your iPhone more user-friendly. Take a little time to personalize your iPhone today, and enjoy a more seamless and enjoyable experience with your device!

Did You Get My Message

Open the Message app. Scroll up till the Search box with magnifying glass displays. Type in the person’s name.

Table of Contents

Your phone rings. You answer.

The person on the other end says, “Hey, did you get my text message?”

“What text message?” you say.

“The one I sent you a hour ago”.

Oops – somehow you missed the message. How do you find it?

Open The Message App

If you are lucky, the message will be right there at the top, waiting. It not, then…

Scroll up till the search box with magnifying glass and microphone displays.

Search Message App
Search Message App

Start Typing

As you type, results will display what you are typing.

Recommend you type the person’s name 😊

Scroll down in the results and you can see all the messages that reference what you type.

Message Search
Message Search

iPhone Messages Swipe Left Swipe Right

iPhone Messages Swipe Left Swipe Right

Depending on which direction you swipe a message conversation or a particular reply will determine what you can do.

Table of Contents

Swipe Conversation

Swiping a conversation to the left allows you to mark the conversation as unread.

Swiping a conversation to the right allows you to mute a conversation or delete a conversation.

Swipe conversation
Swipe conversation

Muting a conversation means you won’t get a ‘ding’ or vibration when a new message is added to the conversation. You will still get new messages, just no notifications.

Deleting a conversation does what it is – mostly. If you tap Edit near the top you can Show Recently Deleted.

From there you have the options to Delete, Recover, Delete All or Recover All.

Recover conversation

Swipe Message

You can swipe a message within a conversation left to reply to that particular message no matter where it is in the conversation. If you decide you do not want to reply to a particular message, then tap anywhere outside of the response.

You can swipe a message within a conversation right to see when that particular message was sent.

Swipe message
Swipe message

With that said, keep on swiping in the free world.

iPhone Do Not Disturb While Driving

iPhone Do Not Disturb While Driving

Create a Driving Focus. Configure the Driving Focus. Enable the Driving Focus to come on automatically or manually. Drive and not receive notifications from your iPhone while driving.

Table of Contents

Create Driving Focus

A Focus is an Apple feature that allows you to customize your devices and silence calls and notifications. You can turn in on and off in the Control Center or by telling Siri “Hey Siri, enable my Driving Focus“.

Go to your iPhone Settings > Focus and click on the + sign in the upper right hand corner to create a Focus for driving it you haven’t already done so.

Create Focus
Create Focus

What do you want to focus on?

Tap the Driving Focus.

Scroll down and click on Customize Focus.

Customize Driving Focus

You have the following options to configure:

  • People – who you want to allow to notify you and who you want to silence notifications from
  • Auto-Reply – who you want to auto-reply to and what you want to say
  • Customize screen – choose a lock screen to turn on to help limit distractions
  • While driving – when to activate Driving Focus; either automatically, when connected to car bluetooth or manually

People

By default no one is allowed to notify you when Driving Focus is on.

You can specify who to silent notifications from and who you want to allow notifications from.

Driving Focus notifications

You also have the option of choosing who to allow calls from: Everybody, Allowed People Only, Favorites, Contacts Only.

The other option is to Allow Repeated Calls or not. If enabled, then the second call from the same person within three minutes will not be silenced.

In my mumble opinion, allowing someone to notify you while you have the Driving Focus on defeats the purpose of having the Driving Focus.

Auto-Reply

Auto-Reply gives you the option to send a pre-typed message to either:

  • No One
  • Recents
  • Favorites
  • All Contacts

Below that you can specify a message to send. The default message is “I’m driving with Focus turned on. I’ll see your message whenI get where I’m going.”

If you do send an auto-reply message, the person who is trying to notify you will choose to notify you anyway if send “urgent” as an additional message.

Customize screen

This is where you get to choose a lock screen for yourself when you are in Driving Focus. The intention is to help minimize distractions. Choose wisely.

This is an option where you can pick a Lock Screen you already have created or a new one.

While Driving

Choose how Driving Focus is turned on.

  • Automatically – automatically activated based on motion detected
  • When Connected to Car Bluetooth
  • Manually – manually from the Control Center… or “Hey Siri, enable Driving Focus”
  • Activate With CarPlay – will be turned on automatically when connected to CarPlay.
Hey Siri, turn on Driving Focus
“Hey Siri, turn on Driving Focus”