What’s the Difference? iPhone’s Silent Mode vs. Do Not Disturb

If you’re new to iPhones or just need a little more guidance on controlling notifications, you might have wondered about the difference between Silent Mode and Do Not Disturb. These two features may sound similar, but they serve different purposes. This guide will walk you through what each of them does, when to use them, and how to customize settings to make them work best for you.

Table of Contents

Silent Mode vs. Do Not Disturb: Key Differences

Here’s a simple comparison of the two features:

  • Silent Mode:
    • What it does: Mutes all sounds, including ringtones, alarms, and notifications.
    • When to use it: When you want to silence your iPhone but still receive notifications and calls. It’s perfect when you’re in a meeting, at the movies, or just need some peace and quiet.
    • How to turn it on:
      1. Find the Ring/Silent switch on the left side of your iPhone (above the volume buttons).
      2. Slide the switch to the orange position to enable Silent Mode.
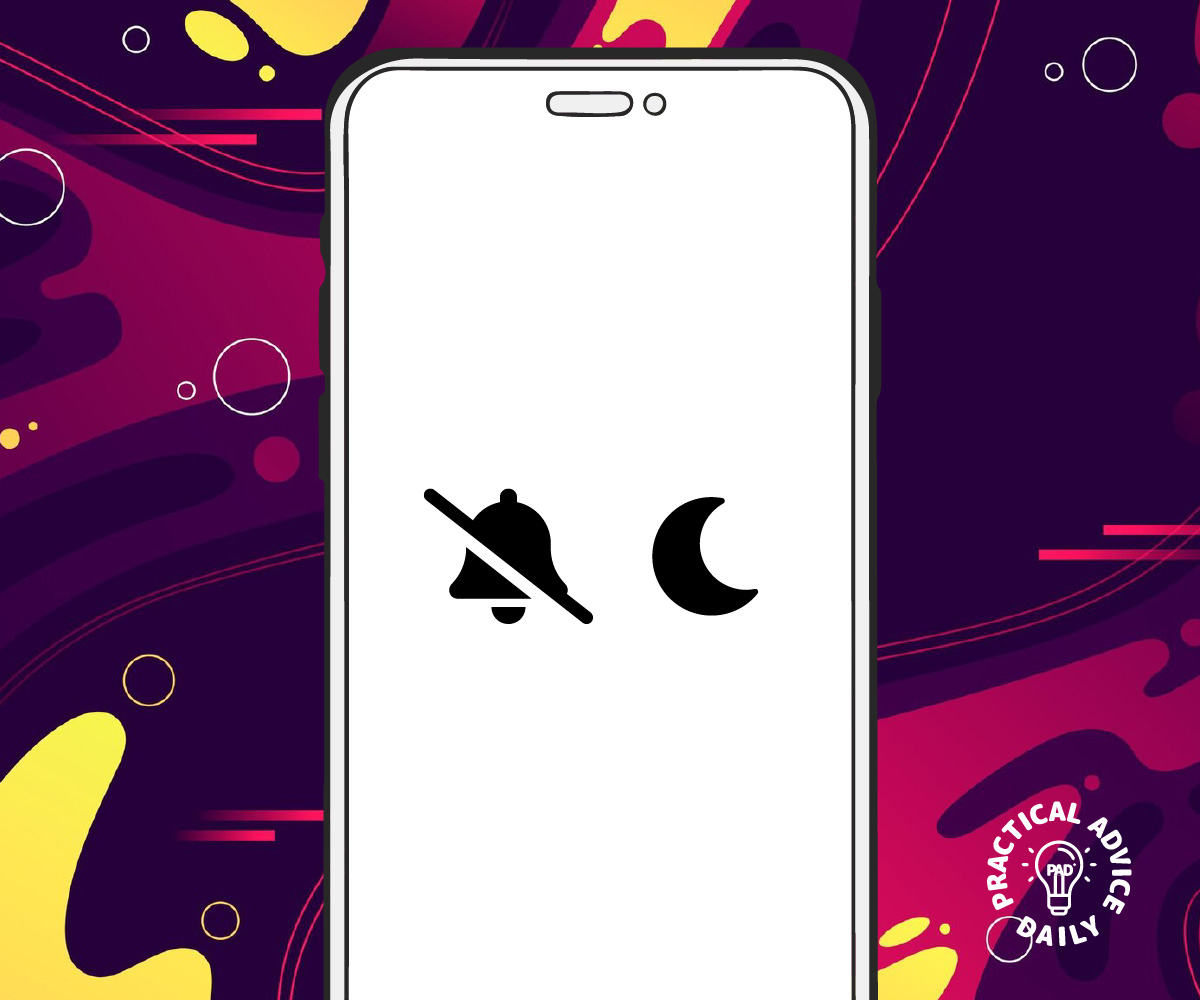
      3. You will see a small bell icon with a line through it on your screen, showing that Silent Mode is on.
  • Do Not Disturb (DND):
    • What it does: Silences calls, notifications, and alerts. Unlike Silent Mode, DND can also prevent your phone from vibrating. It allows you to customize what gets through (like calls from certain people).
    • When to use it: When you need complete focus or rest, such as during naps, meetings, or at night while sleeping.
    • How to turn it on:
      1. Go to Settings > Focus > Do Not Disturb.
      2. Toggle the switch to on.
      3. You’ll also see a moon icon in the status bar, indicating that DND is active.

When to Use Each:


Use Silent Mode:

  • When you’re in a social setting (like a dinner or movie) and don’t want your iPhone’s ringtones or alerts disturbing others.
  • When you want to silence calls but still see incoming notifications.

Use Do Not Disturb:

  • When you want to avoid distractions completely. DND mutes calls, notifications, and vibrations.
  • When you need time to focus, work, or sleep without interruptions.
  • When you need to ensure certain people (family or close friends) can still reach you, while everyone else is muted.

Customizing Silent Mode & Do Not Disturb:

Both features offer customization options to suit your needs.

  • Customizing Silent Mode:
    Unfortunately, Silent Mode doesn’t offer much customization beyond turning on or off. However, you can use Do Not Disturb or Focus modes to further personalize your experience.
  • Customizing Do Not Disturb:
    1. Allow Calls from: You can choose to allow calls from certain people or groups (like favorites or specific contacts).
    2. Scheduled DND: Set a schedule for when DND should automatically turn on and off. Perfect for maintaining your peace during sleep hours.
    3. Apps Allowed: Choose whether notifications from apps can still come through while DND is on.

Tips for Better Control:

  • Set up a “Do Not Disturb While Driving” mode: If you prefer not to be distracted by calls or messages while driving, use the Driving Focus within the Focus settings to activate DND automatically when your iPhone detects you’re in the car.
  • Use Focus Modes for Specific Situations: You can create custom Focus modes, such as “Work” or “Sleep,” to control which notifications you receive based on your activity. This allows you to avoid unnecessary alerts while staying accessible for the important ones.

Conclusion:

Now you know the difference between Silent Mode and Do Not Disturb! By understanding these two features and customizing them to fit your needs, you can ensure that your iPhone helps you stay connected while allowing you to control when and how you’re interrupted. Whether you need quiet or focus, these settings are there to help you manage your notifications and improve your iPhone experience.

iPhone Gestures You’re Not Using (But Should Be!)

Did you know your iPhone has hidden gestures that can make navigation and multitasking faster and easier? Whether you’re new to iPhones or just looking to improve your efficiency, these simple gestures can save you time and effort. Let’s dive into some handy iPhone gestures that you’re probably not using—but should be!

Table of Contents

Key iPhone Gestures to Boost Your Efficiency:

  1. Switch Between Apps
    • What to do: Swipe left or right at the bottom of your screen (where the home bar is) to quickly switch between apps.
    • Why it helps: Skip the home screen and jump straight into the app you need!
  2. Return to Home Screen
    • What to do: Swipe up from the bottom of the screen (without pausing).
    • Why it helps: Instantly return to your home screen without the need to press any buttons.
  3. Close Apps Quickly
    • What to do: Swipe up from the bottom and pause for a moment to view all your open apps. Then, swipe up on the apps you want to close.
    • Why it helps: Keep your phone running smoothly by closing apps you’re not using.
  4. Quick Access to Control Center
    • What to do: Swipe down from the top-right corner of your screen.
    • Why it helps: Easily access your settings, like Wi-Fi, volume, and brightness, without opening the Settings app.
  5. Take a Screenshot
    • What to do: Press the side button and the volume up button at the same time.
    • Why it helps: Capture anything on your screen with just a quick press—perfect for saving information or creating a note!
  6. Use Reachability Mode
  7. Switch Between Active Apps
    • What to do: Swipe left or right with three fingers to quickly scroll through open apps.
    • Why it helps: Multitask like a pro by easily jumping between your most-used apps.

Tips to Remember:

  • These gestures are designed to make using your iPhone easier and more efficient.
  • Practice these gestures to get comfortable and use them without thinking twice.
  • Keep in mind that gestures may work a bit differently on older iPhone models, but the basics stay the same.

How to Use iPhone’s Bedtime Mode for Better Sleep

Sleep is important for overall health, especially as we get older. But with all the distractions on our phones, getting a good night’s sleep can be harder than it should be. Fortunately, iPhone’s Bedtime Mode is here to help! It’s a simple feature built into the Health app that can guide you to set a consistent bedtime routine, improve your sleep quality, and reduce distractions before bed.

In this guide, we’ll walk you through setting up and customizing Bedtime Mode, step by step, to help you get the rest you deserve.

Table of Contents

Step 1: Open the Health App

  • Find the Health app on your iPhone. It’s a white icon with a red heart inside.
  • Tap to open the app.

Step 2: Access the Sleep Section

  • In the Health app, tap on the Browse tab at the bottom right.
  • Scroll down and tap on Sleep.

Step 3: Set Up Bedtime Mode

  • Under the Set Up Sleep section, tap Get Started.
  • You’ll be asked to set a bedtime schedule, including:
    • Bedtime: The time you want to go to sleep.
    • Wake-up time: The time you need to wake up.
  • Once you set these times, your phone will remind you to wind down before bed.

Step 4: Customize Your Sleep Schedule

  • You can set different schedules for different days of the week, which is helpful if your schedule changes.
  • Choose how many hours of sleep you want each night. The Health app will aim to help you reach this goal.
  • Set a wind-down period that prepares you for sleep by reducing distractions. This includes silencing notifications.

Step 5: Use Wind Down Mode

  • Wind Down mode activates a Do Not Disturb feature, which will silence calls and notifications.
  • You can set it to trigger a calm, relaxing activity on your phone, like listening to calming music or using a meditation app.
  • You can even add shortcuts to your Wind Down screen, like a gentle reminder to put away your phone or do a short stretch.

Step 6: Track Your Sleep

  • After using Bedtime Mode for a while, the Health app will track your sleep habits and give you insights on how well you’re sleeping.
  • Check the Sleep Analysis section in the Sleep tab of the Health app to see how close you are to your sleep goals.

Tips for Better Sleep with Bedtime Mode

  • Avoid using your phone in bed once the Bedtime Mode is active.
  • Keep your room dark and quiet to help improve your sleep quality.
  • Stick to your sleep schedule even on weekends to develop a consistent routine.
  • If you want a more comfortable sleep environment, consider using Night Shift (found in your settings) to reduce blue light exposure before bed.

Conclusion

Using iPhone’s Bedtime Mode is a simple and effective way to improve your sleep habits and reduce screen distractions at night. By setting a consistent bedtime routine, you can fall asleep faster, sleep more soundly, and wake up feeling more refreshed.

iPhone Holiday Features: Setting Up Custom Holiday Greetings

The holiday season is a time for joy, celebration, and connection. If you have an iPhone, you can make this time even more special by setting up custom holiday greetings and using other fun features to enhance your experience. In this guide, we’ll show you how to set it all up—step by step—so you can enjoy the holidays with ease, even if you’re not familiar with technology.

Table of Contents

How to Set Up Custom Holiday Greetings on Your iPhone

A custom holiday greeting can make your messages and calls feel extra special. Here’s how to create your own:

  1. Open the “Contacts” app on your iPhone.
  2. Find and select the contact you want to send a custom greeting to.
  3. Scroll down and tap “Edit” at the bottom of the screen.
  4. Under “Notes,” type your holiday message (e.g., “Happy Holidays! Wishing you peace and joy!”).
  5. Once finished, tap “Done” in the top right corner.

Tip: Now, when you call or message that person, your custom greeting will show up in their contact info or in the message.

Customize Your iPhone’s Lock Screen with Holiday Themes

Want to add a festive touch to your phone? Follow these easy steps:

  1. Open Settings on your iPhone.
  2. Tap “Wallpaper.”
  3. Choose Choose a New Wallpaper.
  4. Browse your photo album for a favorite holiday image (or use one of the built-in Apple wallpapers).
  5. Tap “Set” to choose the lock screen or home screen, or both!

Set Up Holiday Do Not Disturb

During the busy holiday season, you might want to focus on family and fun without distractions. Here’s how to turn on Do Not Disturb:

  1. Swipe down from the top-right corner of your iPhone to open the Control Center.
  2. Tap the moon icon to turn on Do Not Disturb.
  3. To customize it, go to Settings > Focus > Do Not Disturb and set times for when you don’t want to be disturbed.

Send Holiday Greetings with Siri

You can even use Siri to send a quick holiday message! Just follow these steps:

  1. Hold down the side button or say, “Hey Siri.”
  2. Say something like, “Send a Merry Christmas message to [contact name].”
  3. Siri will type the message for you, and you can confirm or change it before sending.

Create Holiday Reminders

To stay organized and not miss any special moments, set up holiday reminders:

  1. Open the “Reminders” app.
  2. Tap New Reminder at the bottom left.
  3. Type something like, “Call Aunt Mary on Christmas Eve”.
  4. Tap “Details” to set a specific time or date.
  5. Hit “Add” when done.

How to Plan a Trip Using iPhone Apps: Travel Tips for Beginners

Planning a trip can feel like a big task, especially if you’re new to using an iPhone or technology. But don’t worry—your iPhone can make everything easier! With the right apps, you can find flights, book accommodations, and organize all your travel plans with just a few taps.

In this guide, we’ll show you simple, easy-to-follow steps to plan your next trip using your iPhone. Let’s get started!

Table of Contents

1. Finding Flights with Your iPhone

The first step in planning your trip is finding the best flights. Here’s how to do it:

  • Download a flight booking app like Kayak, Expedia, or Google Flights from the App Store.
  • Open the app and enter your departure city, destination, and travel dates.
  • Compare flight options: Look at prices, times, and airlines to choose the best flight for you.
  • Book your flight: Once you’ve selected a flight, tap to book it and enter your payment information.

Tip: Some apps even offer price alerts, so you can get notified if prices drop!

2. Booking Accommodations (Hotels or Rentals)

Once your flight is booked, it’s time to find a place to stay. Here’s how to use your iPhone to find accommodations:

  • Download a hotel or rental app like Booking.com, Airbnb, or Hotels.com.
  • Enter your destination and travel dates in the app.
  • Browse through available options: You can filter results by price, location, and amenities (like free Wi-Fi or breakfast).
  • Read reviews: Look at what other travelers have said to help you make a decision.
  • Book your stay: Once you find a place you like, tap to book and confirm your reservation.

Tip: Many apps offer customer service if you have any questions during the booking process!

3. Organizing Your Travel Details

Now that you have your flight and accommodations sorted, it’s time to keep track of your trip details. The best way to do this is with a trip planning app:

  • Download a trip planner app like TripIt or Google Trips.
  • Enter your flight and accommodation details: These apps can automatically add your travel info from email confirmations.
  • View your trip schedule: You can see your entire itinerary, including flight times and hotel check-in details, all in one place.

Tip: Some apps also let you add activities, restaurant reservations, and other fun plans for your trip.

4. Navigating and Exploring Your Destination

Once you’re on your trip, you’ll want to explore your destination. Use your iPhone to help you get around and discover new places:

  • Use Apple Maps or Google Maps for directions: Just enter the address or name of the place you want to visit, and the app will show you the best route.
  • Download a local guide app: Apps like TripAdvisor and Yelp can help you find top-rated attractions, restaurants, and things to do.

Tip: You can even download offline maps in case you don’t have internet access during your trip!

5. Managing Your Travel Budget

It’s always important to keep track of your spending while traveling. Use your iPhone to stay on budget:

  • Download a budgeting app like Mint or PocketGuard.
  • Add your expenses: As you spend money on your trip, enter the amounts in your app to track your budget.

Tip: Some apps can automatically categorize your spending, so you’ll know exactly where your money is going.

6. Packing for Your Trip

Packing can be stressful, but your iPhone can help you stay organized:

  • Use a packing list app like PackPoint or Google Keep.
  • Create a list of items you need to bring, like clothes, toiletries, and travel documents.
  • Check off items as you pack to make sure you don’t forget anything.

Tip: Some apps suggest items based on the weather at your destination!

Wrapping It All Up

Your iPhone can make trip planning easy, even if you’re new to using technology. By following these steps and using the right apps, you’ll be ready to enjoy your trip with less stress and more fun!

How to Create and Share Checklists with Reminders on iPhone

Managing tasks can be overwhelming, but your iPhone can make it easy to stay organized with checklists and reminders. This simple guide will show you how to create, share, and set reminders for your to-dos, so you can stay on track with minimal effort.

Table of Contents

1. Open the Reminders App

  • First, unlock your iPhone and find the Reminders app. It’s pre-installed on your phone, so you should be able to find it on your home screen.
  • Tap on the app to open it.

2. Create a New Checklist

  • Once you’re in the Reminders app, tap New Reminder or the + icon at the bottom-right corner of the screen.
  • Choose Add List to start a new checklist.
  • Type a name for your checklist, such as “Grocery List” or “To-Do for the Day.”

3. Add Tasks to Your Checklist

  • Tap on your newly created list to open it.
  • To add a task, tap New Reminder at the bottom.
  • Type your task, like “Buy apples” or “Call Mom.” Repeat this to add all the tasks you need.

4. Set Reminders for Each Task

  • After adding a task, tap on it to open the details.
  • You’ll see an option to Add Date. Tap on it to select the date and time you want to be reminded.
  • You can also set it to Repeat (daily, weekly, etc.) by tapping Repeat and choosing your preference.
  • Hit Done when you’re finished.

5. Share Your Checklist

  • To share your checklist with someone else, tap Edit in the upper-right corner of your checklist.
  • Next, tap Share and select how you want to share it (via Message, Mail, or other apps).
  • Enter the contact’s information and tap Send. Now, the person you shared it with can see and make changes to the list.

6. Mark Tasks as Done

  • As you complete tasks, go back to your checklist and tap the circle next to each item to check it off. This will help you keep track of what you’ve completed and what still needs attention.

Helpful Tips:

Conclusion

Creating and sharing checklists with reminders on your iPhone is an easy and effective way to manage your daily tasks. Whether you’re organizing errands or keeping track of important dates, these simple steps will help you stay on top of your responsibilities without the stress. Don’t hesitate to make your iPhone work for you—start using reminders today and see how much easier task management can be!

Speak Up! Getting Started with Siri

Setting up and using Siri on your new iPhone can make everyday tasks much easier, especially if you’re looking for hands-free assistance. Whether you’re new to iPhones or just not very tech-savvy, this guide will walk you through the process step-by-step in a simple and friendly way.

Table of Contents

Setting Up Siri on Your iPhone

Follow these simple steps to get started:

  1. Unlock Your iPhone
    • Press the Home button or swipe up on the screen to unlock your phone.
  2. Go to Settings
    • Find the gray gear icon labeled “Settings” on your home screen and tap it.
  3. Select Siri & Search
    • Scroll down and tap Siri & Search to access Siri’s settings.
  4. Enable Siri
    • Toggle on the options for:
      • Listen for “Hey Siri”: This allows you to activate Siri hands-free by saying “Hey Siri.”
      • Press Side Button for Siri: Lets you activate Siri by pressing and holding the side button (or the Home button on older models).
  5. Set Up “Hey Siri”
    • Follow the on-screen prompts to train Siri to recognize your voice. You’ll be asked to say a few phrases.
  6. Choose Your Siri Voice (Optional)
    • You can select a male or female voice and different accents. Tap Siri Voice under settings to make your choice.
  7. Test Siri
    • Say, “Hey Siri, what’s the weather?” to ensure everything is working.

How to Use Siri for Hands-Free Assistance

Now that Siri is set up, here are some practical ways to use it:

Everyday Tasks

  • Set Reminders: “Hey Siri, remind me to take my medication at 8 PM.”
  • Send Messages: “Hey Siri, send a message to Sarah saying I’ll call her later.”
  • Make Calls: “Hey Siri, call John” or “Hey Siri, call 911.”

Getting Information

  • Check the Weather: “Hey Siri, what’s the weather like today?”
  • Ask Questions: “Hey Siri, how many cups are in a quart?”
  • Get Directions: “Hey Siri, give me directions to the nearest grocery store.”
  • Find Nearby Services: “Hey Siri, find a coffee shop near me.”

Accessibility Features

Tips for Using Siri Effectively

  • Speak Clearly: Talk at a natural pace and volume.
  • Use Specific Commands: The more specific you are, the better Siri can help.
  • Correct Mistakes: If Siri misunderstands you, say, “That’s not what I meant,” or manually adjust the response on-screen.

Troubleshooting Siri

If Siri isn’t working as expected, try these steps:

  • Check Your Internet Connection: Siri needs Wi-Fi or cellular data to work.
  • Ensure Siri is Enabled: Double-check the settings under Siri & Search.
  • Restart Your iPhone: Sometimes a quick restart can resolve issues.

With Siri by your side, you can make your iPhone experience easier and more enjoyable. Don’t be afraid to explore and ask Siri for help—it’s here to make your life simpler.

Save Money with Free iPhone Features

Did you know your iPhone has hidden gems that can save you money? Many people spend on apps and services they don’t need, simply because they’re unaware of what their iPhone can already do. This guide will introduce you to free, built-in features that can replace costly third-party apps or subscriptions. Whether you’re tech-savvy or just getting started, this simple guide is here to help you make the most of your device.

Table of Contents

Free iPhone Features That Save You Money

1. Maps: No Need for Paid GPS Apps

Skip the subscription fees for navigation apps!

  • What It Does: Provides turn-by-turn directions, traffic updates, and public transit routes.
  • How to Use It:
    1. Open the Maps app on your iPhone.
    2. Type in your destination and select a route.
    3. Follow the directions provided – it’s that easy!

2. Health App: Your Free Fitness Tracker

Why pay for a fitness tracker when your iPhone has one built in?

  • What It Does: Tracks your steps, distance walked, and even health data like heart rate (when paired with an Apple Watch).
  • How to Use It:
    1. Open the Health app.
    2. Tap Browse to explore your activity and health metrics.
    3. Set up goals to monitor your progress.

3. Reminders and Notes: Skip Subscription-Based Organizers

Stay organized without buying expensive planning apps.

  • What It Does: Helps you create to-do lists, reminders, and notes.
  • How to Use It:
    1. Open the Reminders or Notes app.
    2. Tap the “+” button to add a new task or note.
    3. Set deadlines, priorities, or even share lists with others.

4. Photos App: Free Photo Editor

Stop paying for photo-editing apps!

  • What It Does: Offers basic photo editing tools like cropping, filters, and adjustments for brightness or contrast.
  • How to Use It:
    1. Open the Photos app and select a photo.
    2. Tap Edit in the top right corner.
    3. Use the tools at the bottom to enhance your photo, then tap Done.

5. FaceTime and iMessage: Free Communication Tools

Eliminate monthly fees for video-calling apps or international messaging.

  • What It Does: Lets you make free video and audio calls and send messages over Wi-Fi.
  • How to Use It:
    1. Open the FaceTime app to start a call.
    2. Use iMessage in the Messages app to send texts and multimedia.

6. Safari: A Built-In Ad Blocker

No need to pay for third-party ad blockers or browsers.

Tips for Maximizing These Features

  • Take time to explore your iPhone’s pre-installed apps.
  • Visit Settings to customize features to your needs.
  • Search for tutorials directly in the Tips app for quick lessons.

Conclusion

Your iPhone is more than just a phone – it’s a powerful tool that can save you money if you know how to use it. By tapping into these free features, you can eliminate unnecessary costs and make the most of your device. Start exploring today, and enjoy the confidence of knowing you’re not overpaying for things your iPhone already offers for free!

3 iPhone Settings That Risk Your Privacy

iPhone Settings

Your iPhone has many features designed to make life easier, but some settings could unintentionally expose your personal data. This guide highlights three iPhone settings you should change to protect your privacy, especially if you’re new to smartphones. Follow these simple steps to stay safe and secure.

Table of Contents

1. Location Services: Limit Unnecessary Tracking

Your iPhone’s Location Services allows apps to track your location, but some apps don’t need this access. Leaving this feature on for every app can expose your whereabouts.

How to Adjust Location Services:

  • Open the Settings app.
  • Scroll down and tap Privacy & Security.
  • Select Location Services.
  • Review the list of apps and their permissions.
    • Choose Never or While Using the App for apps that don’t need constant access.

Tip: Avoid granting “Always” access unless absolutely necessary, such as for navigation apps like Google Maps.

2. Ad Tracking: Prevent Personalized Ads

Apple allows advertisers to track your activity across apps to serve personalized ads. Disabling this setting reduces the data shared about your interests.

How to Turn Off Ad Tracking:

  • Open the Settings app.
  • Tap Privacy & Security.
  • Scroll down to Apple Advertising.
  • Toggle off Personalized Ads.

Why This Helps: Turning off ad tracking minimizes the amount of personal data advertisers can use, offering better privacy.

3. App Permissions: Manage Data Access

Many apps request access to your camera, microphone, and contacts. Granting these permissions to every app can compromise your privacy.

How to Check and Update App Permissions:

  • Open the Settings app.
  • Scroll down to find the list of your apps.
  • Tap an app to see its permissions (e.g., Camera, Microphone, Contacts).
  • Turn off access for any features the app doesn’t need.

Example: A flashlight app likely doesn’t need access to your contacts or microphone.

Final Thoughts

Adjusting these iPhone settings can go a long way in protecting your privacy. By taking a few minutes to review your settings, you’ll feel more confident knowing your personal data is secure.

Remember, if you’re unsure about a setting, it’s okay to ask for help or do some research. Your privacy is worth the effort!

Should You Update? The Handy Guide to iPhone Software Updates

Keeping your iPhone up to date is important, but knowing when and why to update can feel confusing. This guide explains the pros and cons of updating your iPhone’s software and helps you decide if it’s the right time for you.

Table of Contents

What is an iPhone Software Update?

An iPhone software update (also called an iOS update) improves how your phone works. It can add new features, fix problems, and help keep your device secure.

Pros of Updating Your iPhone

  • Improved Security: Updates often fix security issues that protect your information.
  • New Features: Apple adds new tools and features to make your iPhone more useful.
  • Bug Fixes: Updates fix glitches and errors that may cause apps or your phone to work poorly.
  • Better Performance: Updates can make your phone faster and smoother to use.

Cons of Updating Your iPhone

  • Compatibility Issues: Older iPhones may slow down or not support all features.
  • App Problems: Some apps may not work correctly after an update until they’re also updated.
  • Storage Space: Updates can take up storage space, especially if your phone is nearly full.
  • Time-Consuming: Updates can take time to download and install.

How to Decide If You Should Update

  1. Check Your Phone’s Age: If your phone is older, updates might slow it down.
  2. Review the Update Details: Go to Settings > General > Software Update and read about what the update includes.
  3. Back Up Your Data: Always back up your iPhone before updating to avoid losing any information.
  4. Check Storage Space: Make sure you have enough free space for the update.
  5. Wait a Few Days: If you’re unsure, wait a few days after the update is released to see if others report any issues.

How to Update Your iPhone

Updating your iPhone is simple. Follow these steps:

  1. Connect to Wi-Fi: Ensure your phone is connected to a Wi-Fi network.
  2. Plug into Power: Keep your phone plugged in to avoid running out of battery during the update.
  3. Go to Settings: Open Settings > General > Software Update.
  4. Download and Install: Tap Download and Install, then follow the on-screen instructions.

Final Thoughts

Updating your iPhone can help keep it secure and working well, but it’s important to check if it’s the right time for you. By understanding the benefits and risks, you can make a confident choice.