How to Offload Unused Apps Without Losing Data on Your iPhone

Your iPhone can fill up with apps you rarely use, taking up valuable storage space. Instead of deleting them, you can use the Offload Unused Apps feature. This lets you free up space while keeping your app data intact, so you can pick up where you left off if you reinstall the app later. Here’s how it works and how you can use it.

Table of Contents

What Is Offloading Apps?

Offloading an app removes it from your iPhone but keeps its data saved. If you reinstall the app, all your settings, logins, and files will still be there. This is different from deleting an app, which erases everything.

Why Offload Apps?

  • Frees up storage space on your iPhone.
  • Keeps your app data, so you don’t lose progress or saved files.
  • Automatically offloads apps you don’t use often (if enabled).

How to Offload Unused Apps Manually

Follow these simple steps to offload an app:

  1. Open the Settings app on your iPhone.
  2. Tap General > iPhone Storage.
  3. Scroll through the list of apps and select the one you want to offload.
  4. Tap Offload App, then confirm by tapping Offload App again.
  5. The app will be removed, but its icon will stay on your home screen with a small cloud symbol.

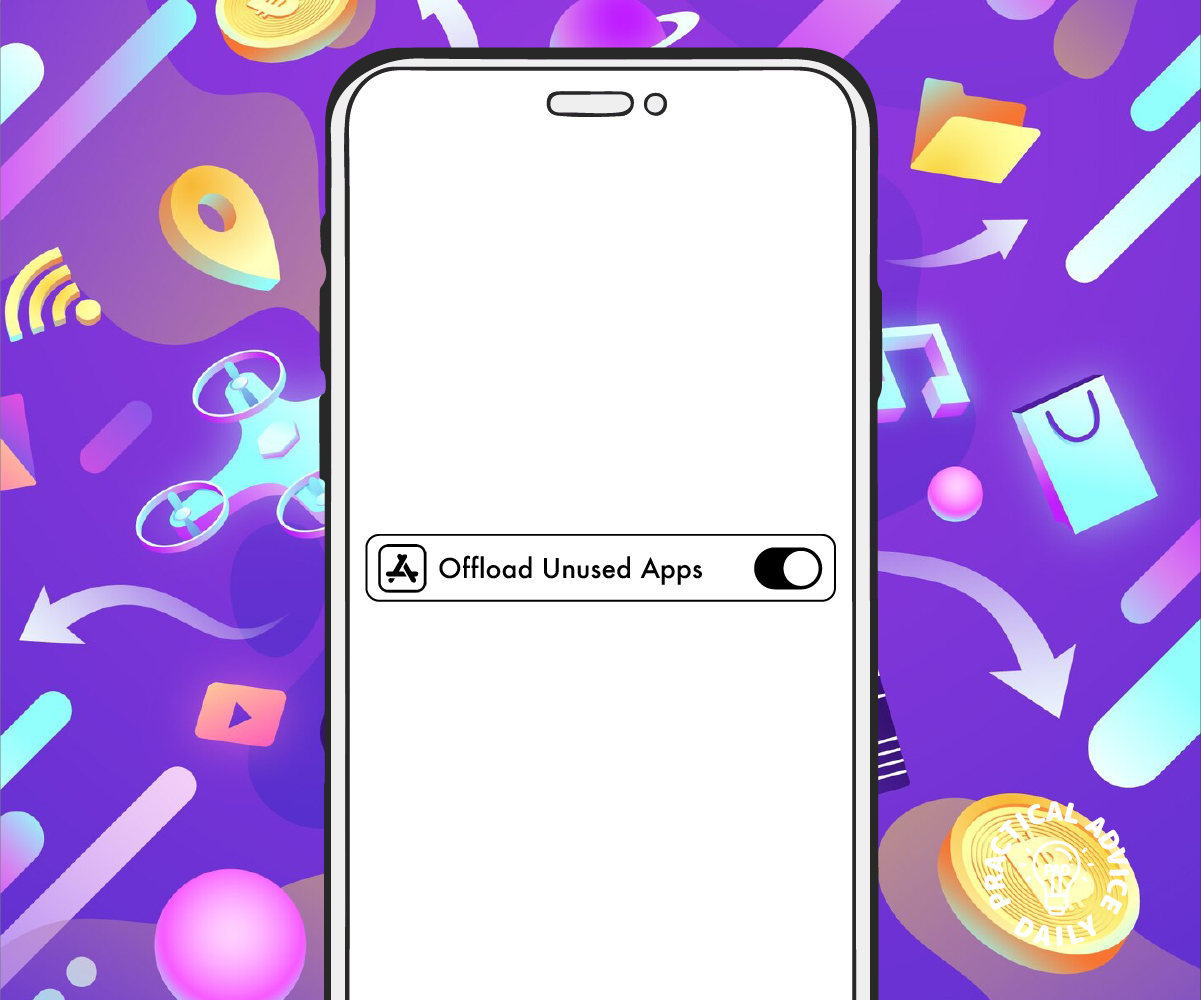
How to Automatically Offload Unused Apps

If you want your iPhone to offload apps automatically when storage is low, enable this setting:

  1. Open Settings.
  2. Tap App Store.
  3. Scroll down and toggle on Offload Unused Apps.

This will automatically remove apps you don’t use often but keep their data safe.

How to Reinstall an Offloaded App

If you want to use an offloaded app again, here’s how to get it back:

  • Tap the app’s icon on your home screen. Your iPhone will start downloading it again.
  • Alternatively, go to the App Store, search for the app, and tap the download button.

Once the app is reinstalled, all your data will be restored.

Final Thoughts

Offloading apps is a simple yet powerful way to manage your iPhone storage without losing important data. By using this feature, you can keep your device running smoothly while ensuring that your essential information is safe and accessible whenever you need it.

Try it out and enjoy a clutter-free iPhone without the stress of losing your files!

Speed Up a Slow iPhone

Is your iPhone running slower than usual? Over time, your device can become sluggish due to background apps, cluttered storage, or outdated software. The good news is that you don’t need to be a tech expert to fix it! Here are some easy and practical solutions to help speed up your iPhone.

Table of Contents

1. Close Unused Apps

Apps running in the background can slow down your iPhone.

  • Swipe up from the bottom of the screen (or double-click the Home button on older models).
  • Swipe away any apps you’re not using.

2. Restart Your iPhone

A simple restart can refresh your device and improve performance.

  • Hold down the Power button and Volume button (for newer models) or the Power button alone (for older models) until the power-off slider appears.
  • Slide to turn off your iPhone.
  • Wait a few seconds, then turn it back on.

3. Free Up Storage Space

A full storage can slow down your iPhone. Try these steps:

  • Delete unused apps: Press and hold an app icon, then tap Remove App.
  • Clear old photos and videos: Open the Photos app, go to Albums > Recently Deleted, and permanently remove them.
  • Offload unused apps: Go to Settings > General > iPhone Storage and tap an app to offload it while keeping its data.

4. Update Your Software

Keeping your iPhone updated ensures it runs smoothly.

  • Open Settings.
  • Tap General > Software Update.
  • If an update is available, tap Download and Install.

5. Reduce Background Activity

Too many background processes can slow things down.

  • Turn off Background App Refresh: Go to Settings > General > Background App Refresh and choose Off or Wi-Fi only.
  • Reduce motion effects: Go to Settings > Accessibility > Motion and turn on Reduce Motion.

6. Clear Safari Cache

If Safari is slow, clearing its cache can help.

  • Go to Settings > Safari.
  • Tap Clear History and Website Data.
  • Confirm by tapping Clear History and Data.

7. Reset All Settings

If your iPhone is still slow, resetting settings might help.

  • Go to Settings > General > Transfer or Reset iPhone.
  • Tap Reset > Reset All Settings (this won’t delete your data, just resets settings to default).

Final Thoughts

These simple steps can help bring your iPhone back up to speed. Try them one by one, and you’ll notice a difference in performance. If your iPhone is still slow after trying these fixes, it may be time to consult Apple Support.

Hidden Privacy Features in Safari: Browsing Safer on iPhone

Apple prides itself on privacy, and Safari, its default web browser, comes packed with powerful tools to help protect your data. Whether you’re an iPhone pro or just getting started, this guide will walk you through Safari’s hidden privacy features and how to use them to stay safe online.

Table of Contents

1. Intelligent Tracking Prevention (ITP)

Websites and advertisers use trackers to collect information about your browsing habits. Safari’s Intelligent Tracking Prevention (ITP) helps stop them from following you across different sites.

How to Enable ITP:

  1. Open Settings on your iPhone.
  2. Scroll down and tap Safari.
  3. Toggle on Prevent Cross-Site Tracking.

✅ This feature blocks trackers from gathering data about your online activity.

2. Private Relay (iCloud+ Feature)

Private Relay is an advanced privacy feature available with iCloud+. It hides your IP address, making it harder for websites to track your location and browsing habits.

How to Enable Private Relay:

  1. Open Settings.
  2. Tap your Apple ID (your name at the top).
  3. Select iCloud > Private Relay.
  4. Toggle Private Relay on.

✅ Your internet activity is encrypted, preventing websites from identifying you.

3. Hide Your IP Address

Your IP address can reveal your approximate location. Safari lets you hide it to enhance your privacy.

How to Hide Your IP Address:

  1. Open Settings.
  2. Tap Safari.
  3. Select Hide IP Address.
  4. Choose From Trackers or From Trackers and Websites.

✅ This prevents websites and trackers from using your IP to follow you.

4. Use Private Browsing Mode

Private Browsing mode prevents Safari from saving your browsing history, cookies, and other data.

How to Enable Private Browsing:

  1. Open Safari.
  2. Tap the Tabs button (two overlapping squares at the bottom right).
  3. Select Private.
  4. Tap the + button to open a private tab.

✅ When you close the private tab, your history and data are erased.

5. Block Pop-ups and Malicious Websites

Safari has built-in settings to block unwanted pop-ups and protect against malicious sites.

How to Enable These Protections:

  1. Go to Settings > Safari.
  2. Toggle on Block Pop-ups.
  3. Scroll down and make sure Fraudulent Website Warning is turned on.

✅ This helps keep harmful websites and annoying pop-ups away.

6. Clear Your Browsing Data Regularly

For added security, clear your browsing history and cookies from time to time.

How to Clear Browsing Data:

  1. Go to Settings > Safari.
  2. Scroll down and tap Clear History and Website Data.
  3. Confirm by selecting Clear History and Data.

✅ This removes stored website data that could track your online activity.

Final Thoughts

Apple makes privacy a priority, and Safari has built-in tools to help you stay safe while browsing. By enabling these settings, you can protect your personal data and enjoy a more private online experience.

Got questions? Let us know in the comments below!

🔒 Stay safe and happy browsing!

How to Check Which Apps Have Access to Your Location on iPhone

With privacy concerns on the rise, it’s essential to know which apps can access your location. Some apps need this information to function properly, but others might be tracking you unnecessarily. Luckily, your iPhone makes it easy to check and control these permissions.

Follow this step-by-step guide to manage your location settings and protect your privacy.

Table of Contents


How to Check Which Apps Have Location Access

  1. Open Settings – Tap the Settings app on your iPhone.
  2. Go to Privacy & Security – Scroll down and tap Privacy & Security.
  3. Select Location Services – Tap Location Services to see which apps have access to your location.
  4. Review the App List – You’ll see a list of apps with their location access settings:
    • Never – The app cannot access your location.
    • Ask Next Time or When I Share – The app will ask for permission each time it needs location access.
    • While Using the App – The app can only access your location when it’s open.
    • Always – The app can access your location even when you’re not using it.

How to Change Location Permissions

  1. Tap the App Name – Select an app from the list.
  2. Choose a New Setting – Change the permission to Never, Ask Next Time, While Using the App, or Always (if available).
  3. Disable Precise Location (Optional) – Toggle off Precise Location to allow only an approximate location instead of your exact location.

Additional Privacy Tips

  • Turn Off Location Services When Not Needed – If you rarely use location-based features, you can disable Location Services entirely by toggling it off at the top of the screen.
  • Check System Services – Scroll down in the Location Services menu and tap System Services to see which iPhone features use location tracking.
  • Enable Location Alerts – Go to Settings > Privacy & Security > Location Services > System Services > Significant Locations to review how often your iPhone tracks your movement.

By regularly reviewing and adjusting these settings, you can enhance your privacy and prevent unnecessary tracking.

Taking control of your location settings ensures that only the apps you trust can see your whereabouts. Keep your iPhone secure and enjoy peace of mind!

How to Lock Notes on iPhone for Privacy (A Feature Many Don’t Use but Should)

Your iPhone’s Notes app is a great place to store important information, like passwords, personal thoughts, or financial details. But did you know you can lock your notes to keep them private? With the built-in lock feature, you can secure notes using Face ID, Touch ID, or a password. This guide will show you how to do it step by step.

Table of Contents

Why Lock Your Notes?

Locking notes is useful if you:

  • Store sensitive information like passwords, medical records, or financial details.
  • Share your iPhone with family members or friends.
  • Want an extra layer of security for personal thoughts or journal entries.

How to Lock a Note on Your iPhone

Before you start, make sure your iPhone is updated to the latest iOS version.

Step 1: Enable Notes Locking

  1. Open the Settings app on your iPhone.
  2. Scroll down and tap Notes.
  3. Tap Password.
  4. Choose how you want to lock your notes:
    • Face ID (if available)
    • Touch ID (if your iPhone has it)
    • A custom password (for added security)
  5. Enter and confirm your chosen password.
  6. If prompted, enable Use Face ID or Use Touch ID for quick access.

Step 2: Lock an Individual Note

  1. Open the Notes app.
  2. Select the note you want to lock or create a new one.
  3. Tap the Share button (a square with an arrow pointing up).
  4. Scroll down and tap Lock Note.
  5. Enter your password or use Face ID/Touch ID to confirm.
  6. A lock icon will appear at the top of the note.

Step 3: Lock and Unlock Notes

  • To lock a note, tap the lock icon at the top after adding content.
  • To unlock a note, tap it and use Face ID, Touch ID, or enter your password.
  • To remove a lock, open the note, tap the lock icon, and select Remove Lock.

Additional Tips for Keeping Notes Secure

  • Use a strong password if not using Face ID or Touch ID.
  • Don’t share your password with others.
  • Regularly back up your iPhone to avoid losing important locked notes.
  • If you forget your Notes password, Apple cannot recover it, so write it down in a secure place.

Conclusion

Locking your notes on an iPhone is an easy way to keep private information safe. By following these steps, you can add an extra layer of security to your most sensitive notes. Give it a try today and enjoy greater peace of mind!

iPhone Gestures You Didn’t Know Existed: Swipe, Tap, and Pinch Hacks

Navigating an iPhone can feel overwhelming, but learning a few simple gestures can make things much easier. Whether you want to switch between apps quickly, zoom in effortlessly, or use hidden multitasking tricks, these gestures will help you use your iPhone more efficiently.

Table of Contents

1. Swipe Between Apps Instantly

No need to go back to the home screen every time you switch apps!

  • For iPhones with Face ID: Swipe left or right at the very bottom of the screen to move between recently used apps.
  • For iPhones with a Home Button: Double-click the Home button to see all open apps, then swipe left or right to select one.

2. Pinch-to-Zoom Tricks

Did you know you can zoom in on photos, websites, and even text?

  • Photos and Web Pages: Use two fingers and spread them apart to zoom in. Pinch them together to zoom out.
  • Text Messages and Emails: Some apps let you zoom in on text by pinching outward with two fingers, making reading easier.
  • Maps: Pinch apart to zoom in and see details, like street names, or pinch together to zoom out.

3. Quick Access to the Control Center

Easily adjust volume, brightness, Wi-Fi, and more with a simple swipe.

  • For iPhones with Face ID: Swipe down from the top-right corner of the screen.
  • For iPhones with a Home Button: Swipe up from the bottom edge of the screen.

4. Three-Finger Gestures for Text Editing

These simple tricks make fixing typos easier!

  • Undo Typing: Swipe left with three fingers.
  • Redo Typing: Swipe right with three fingers.
  • Copy and Paste: Pinch in with three fingers to copy and pinch out with three fingers to paste.

5. Hidden Keyboard Trackpad

Move the text cursor easily when typing.

  • Tap and hold the spacebar until the keyboard turns into a trackpad, then slide your finger to move the cursor exactly where you need it.

6. Swipe to Delete in the Calculator

Avoid retyping long numbers with this handy trick.

7. Reachability Mode for One-Handed Use

Easily access the top of the screen if your iPhone feels too tall to reach.

  • For iPhones with Face ID: Swipe down on the bottom edge of the screen.
  • For iPhones with a Home Button: Lightly double-tap (not press) the Home button.

Final Thoughts

Mastering these iPhone gestures will make navigating your device smoother and more enjoyable. Try them out and see how much easier using your iPhone can be!

How to Use Siri Shortcuts to Automate Everyday Tasks

Automation is making life easier, and with Siri Shortcuts, you can simplify common tasks on your iPhone. Whether you want to send a text, set a reminder, or control smart home devices, Siri Shortcuts can help. This guide will show you, step by step, how to create and use Siri Shortcuts to save time and effort.

Table of Contents


What Are Siri Shortcuts?

Siri Shortcuts are custom commands that allow you to automate tasks on your iPhone. With a simple voice command, you can perform multiple actions at once.

For example: You can create a shortcut that sends a “Good morning” message to your family and plays your favorite news podcast—all with one Siri command.

How to Set Up Siri Shortcuts

Follow these steps to create and use Siri Shortcuts on your iPhone:

Step 1: Open the Shortcuts App

  • Unlock your iPhone.
  • Find and open the Shortcuts app (it comes pre-installed on iPhones).

Step 2: Create a New Shortcut

  • Tap the + button in the top right corner.
  • Select Add Action to choose what you want Siri to do.

Step 3: Choose an Action

You can select from various actions, such as:

  • Sending a message (e.g., “I’m on my way!”)
  • Setting a reminder (e.g., “Remind me to take my medicine at 8 AM”)
  • Adjusting smart home devices (e.g., “Turn off the lights”)

Step 4: Add a Voice Command

  • Tap the Settings icon (a small slider button in the top right corner).
  • Tap Add to Siri and record a phrase like “Morning Routine” or “Send Update.”
  • Tap Done to save.

Step 5: Test Your Shortcut

  • Activate Siri by saying “Hey Siri” or holding the side button.
  • Speak your shortcut phrase and see if it works as expected.

Useful Siri Shortcuts for Everyday Life

Here are some useful shortcuts to make your life easier:

  • “Good Night” Shortcut: Turns off lights, sets an alarm, and enables Do Not Disturb mode.
  • “Running Late” Shortcut: Sends a preset text and shares your location.
  • “Reminder Check” Shortcut: Reads out your reminders for the day.

Editing or Deleting a Shortcut

If you need to make changes:

  • Open the Shortcuts app.
  • Tap on the shortcut you want to edit.
  • Make your changes or tap Delete Shortcut if you no longer need it.

Final Tips

  • Start with simple shortcuts before trying more complex ones.
  • Experiment with different actions to find what works best for you.
  • Use Siri regularly to make automation a habit.

By following this guide, you can use Siri Shortcuts to simplify daily tasks and save time. Have fun automating your iPhone experience!

How to Use the Back Tap Feature on iPhone for Quick Actions

Did you know you can perform tasks on your iPhone just by tapping the back of your device? The Back Tap feature is a hidden but powerful tool that lets you quickly take screenshots, open apps, and trigger shortcuts—perfect for making your iPhone easier to use.

This guide will walk you through enabling and customizing Back Tap so you can use it for quick actions. Whether you’re new to iPhones or just looking for an easier way to navigate your device, this step-by-step guide will help!

Table of Contents

What is Back Tap?

Back Tap is an accessibility feature on iPhones running iOS 14 or later. It allows you to double-tap or triple-tap the back of your iPhone to perform certain actions, like:

  • Taking a screenshot
  • Opening the camera
  • Turning on the flashlight
  • Accessing Control Center
  • Launching an app
  • Running a shortcut

This feature works even if your iPhone has a case, as long as the taps are firm enough.

How to Enable Back Tap

Setting up Back Tap is easy! Just follow these steps:

  1. Open the Settings app on your iPhone.
  2. Scroll down and tap Accessibility.
  3. Under Touch, select Back Tap.
  4. Choose Double Tap or Triple Tap.
  5. Select the action you want to assign to each tap.

Once enabled, you can start using Back Tap immediately!

Best Uses for Back Tap

Back Tap is highly customizable, making it a great tool for simplifying daily tasks. Here are some useful ways to use it:

  • Take a screenshot – No need to press buttons; just tap the back of your phone.
  • Launch the Camera – Capture moments instantly with a quick tap.
  • Turn on the Flashlight – Perfect for when you need light in the dark.
  • Open an App – Set it to launch your favorite app instantly.
  • Run a Shortcut – Automate tasks like sending a message, playing music, or checking the weather.

Troubleshooting Back Tap Issues

If Back Tap isn’t working, try these solutions:

Final Thoughts

Back Tap is a hidden gem that makes using your iPhone easier and more efficient. Whether you want to take screenshots quickly, turn on your flashlight, or access your favorite apps, this feature is a game-changer.

Try it out and see how much more convenient your iPhone can be! If you found this guide helpful, share it with friends and family so they can enjoy this handy trick too.

iPhone Spam Call Protection: What Works and What Doesn’t?

Unwanted spam calls can be annoying and sometimes even dangerous. Fortunately, iPhones offer several features to help block spam calls, but not all methods work the same way. In this guide, we’ll compare different spam call protection options, including Silence Unknown Callers, carrier-based filters, and third-party apps, to help you decide which is best for you.

Table of Contents

Silence Unknown Callers


How It Works:

  • Blocks calls from numbers not in your contacts, messages, or recent outgoing calls.
  • Sends unknown calls directly to voicemail.
  • You can check missed calls in your Recent Calls list.

Pros: ✔ Simple to enable and use. ✔ No extra cost. ✔ Effective against robocalls and telemarketers.

Cons: ✖ Can block important calls from doctors, banks, or deliveries. ✖ Doesn’t filter out spam calls that mimic real numbers.

How to Turn It On:

  1. Open the Settings app.
  2. Tap Phone.
  3. Select Silence Unknown Callers.
  4. Toggle the switch to on.

Carrier-Based Spam Call Filters

Most phone carriers offer spam call protection with special features. Here’s what they provide:

AT&T Call Protect

  • Auto-blocks fraudulent calls.
  • Identifies suspected spam calls.
  • Free basic version; paid upgrade available for extra protection.

Verizon Call Filter

  • Detects and labels spam calls.
  • Allows you to block specific numbers.
  • Free and paid versions available.

T-Mobile Scam Shield

  • Auto-blocks known scam calls.
  • Gives you a second number for online sign-ups.
  • Free for T-Mobile customers.

Pros: ✔ Works before the call reaches your phone. ✔ Filters out high-risk spam calls. ✔ No need to change phone settings frequently.

Cons: ✖ Some features require a paid plan. ✖ Spam detection isn’t always perfect.

How to Enable:

  • Check your carrier’s website or app for activation steps.
  • Some features may require downloading a separate app.

Third-Party Spam Call Blocking Apps

If you need stronger protection, apps like Hiya, RoboKiller, and Truecaller can help.

Hiya

  • Identifies spam calls and blocks them.
  • Provides caller ID details.
  • Free and premium versions available.

RoboKiller

  • Blocks spam calls and uses “answer bots” to waste scammers’ time.
  • Customizable call filtering.
  • Monthly subscription required.

Truecaller

  • Identifies unknown numbers.
  • Community-driven spam reporting.
  • Free and premium versions available.

Pros: ✔ More powerful filtering than built-in options. ✔ Identifies numbers with crowd-sourced data. ✔ Customizable settings for better control.

Cons: ✖ Some require a paid subscription. ✖ May need access to your contacts. ✖ Can drain battery faster due to background processing.

How to Install and Use:

  1. Download the app from the App Store.
  2. Follow the on-screen setup instructions.
  3. Allow necessary permissions for full functionality.
  4. Adjust settings to customize spam call protection.

Which One Should You Use?

  • For a simple, free optionSilence Unknown Callers
  • For carrier-level filteringCarrier-based spam filters
  • For advanced features and customizationThird-party apps

Using a combination of these features can provide the best protection against spam calls. Try different methods and see what works best for you!

How to Schedule Text Messages on iPhone (And Why You Should)

Scheduling text messages on your iPhone can be incredibly useful. Whether you want to send a birthday message in advance, remind a friend about an appointment, or simply ensure you don’t forget to check in with someone, scheduling texts can save time and keep you organized.

Unfortunately, the iPhone’s built-in Messages app doesn’t have a scheduling feature. However, you can schedule texts using the Shortcuts app or third-party apps. Here’s how.

Table of Contents

How to Schedule Text Messages Using the Shortcuts App

Apple’s Shortcuts app allows you to automate tasks on your iPhone, including scheduling text messages. Follow these simple steps:

  1. Open the Shortcuts app on your iPhone. (If you don’t have it, download it from the App Store.)
  2. Tap the Automation tab at the bottom.
  3. Tap Create Personal Automation (or + if you already have automations set up).
  4. Select Time of Day and choose when you want to send the message.
  5. Tap Next, then tap Add Action.
  6. In the search bar, type Send Message and select it.
  7. Tap Message, type in your text, and select the recipient.
  8. Tap Next, review your automation, and toggle off Ask Before Running for automatic sending.
  9. Tap Done to save.

Your message will now be sent automatically at the scheduled time.

Using Third-Party Apps to Schedule Text Messages

If you need more flexibility, third-party apps like Scheduled, SMS Scheduler, or ReminderBase can help. Here’s how to use Scheduled:

  1. Download the Scheduled app from the App Store.
  2. Open the app and create an account if needed.
  3. Tap Create Message and enter your text.
  4. Select the recipient from your contacts.
  5. Choose the date and time to send the message.
  6. Tap Schedule Message.
  7. (Optional) Some apps require you to manually confirm sending due to Apple’s restrictions.

Why You Should Schedule Text Messages


Scheduling texts can help in many ways, including:

  • Never Forget Important Messages – Schedule birthday wishes or holiday greetings in advance.
  • Stay Organized – Remind yourself or others about appointments and deadlines.
  • Help with Work and BusinessSchedule reminders for clients or colleagues.
  • Keep in Touch EasilyRegularly check in with loved ones without worrying about forgetting.

By using the Shortcuts app or a third-party app, you can make sure your messages are sent exactly when you need them to be.

Final Thoughts

While the iPhone doesn’t have a built-in text scheduling feature, using the Shortcuts app or third-party apps makes it easy to plan and send messages in advance. Give it a try and take the stress out of remembering to send important texts!