Best iPhone Features for Keeping Track of Medication Reminders

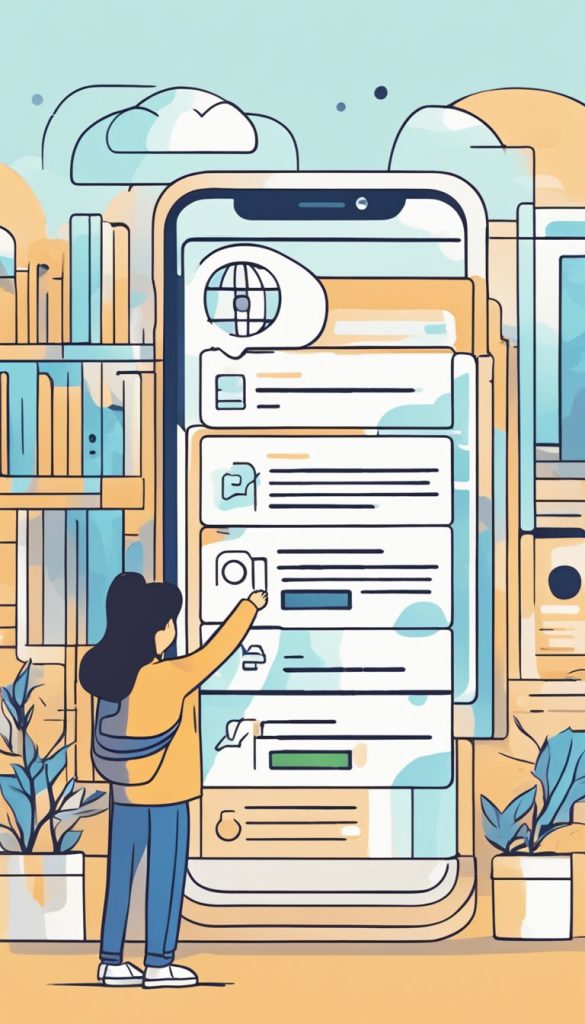
Keeping track of medication schedules can be tricky, especially when you’re juggling multiple pills or doses throughout the day. The good news? Your iPhone can help. Whether it’s reminding you when to take your meds or making sure you don’t miss a dose, your iPhone has built-in features—and there are also apps—that make the process much easier.

This guide walks you through everything you need to know, in simple steps, to use your iPhone as your personal medication assistant.

Table of Contents

Key Takeaways

  • iPhones come with built-in tools like the Health app and Reminders app that can help you track and manage your medications easily.
  • Third-party apps like Medisafe and MyTherapy offer extra features like refill reminders and caregiver alerts.
  • Setting up reminders is quick and doesn’t require tech expertise—this guide provides easy steps for each method.
  • Taking advantage of these tools can reduce missed doses and improve your overall health and well-being.

iPhone’s Built-In Features for Medication Reminders

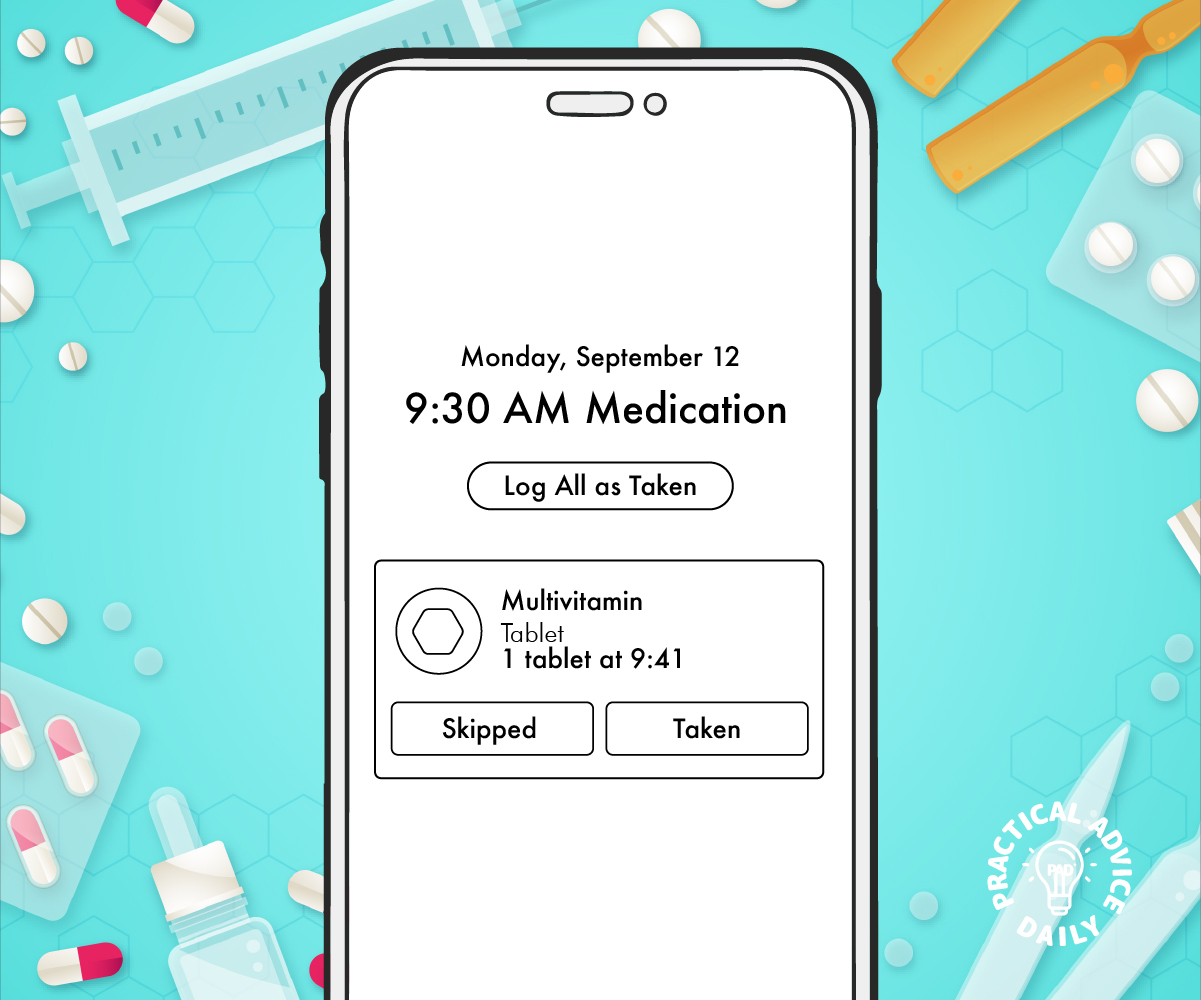
1. Health App (iOS 16 and up)

Apple’s Health app now includes a Medications feature that’s perfect for keeping track of your prescriptions.

How to Set It Up:

  1. Open the Health app.
  2. Tap Browse at the bottom, then choose Medications.
  3. Tap Add a Medication.
  4. Enter the medication name, type (pill, injection, etc.), and dosage.
  5. Set a schedule (how often and what time you need to take it).
  6. Choose if you want reminders turned on.
  7. Tap Done.

📌 Why it’s great:

  • Sends a reminder at the exact time you need to take your meds
  • Lets you track if you missed or took your dose
  • Stores your medication list for easy reference at doctor visits

2. Reminders App

If your iPhone doesn’t support the Health app’s medication feature or you prefer a simpler setup, the Reminders app works great too.

How to Use It:

  1. Open the Reminders app.
  2. Tap New Reminder.
  3. Enter something like “Take blood pressure pill.”
  4. Tap the calendar/clock icon to set date and time.
  5. Tap Add to save.

📌 Tip: You can set this reminder to repeat daily, weekly, or on specific days.

Helpful Third-Party Apps for Medication Management

If you want more detailed features or have multiple medications, these apps are easy to use and offer added support.

1. Medisafe Pill Reminder

  • Sends reminders with sound and visuals
  • Lets you mark meds as “taken” or “missed”
  • Allows a family member to be notified if you miss a dose
  • Free with optional paid features

How to Get Started:

  1. Download Medisafe from the App Store.
  2. Open the app and follow the setup guide.
  3. Add your medications, schedule, and dose.

2. MyTherapy: Medication Reminder

  • Combines medication tracking with health logs (like blood pressure)
  • Tracks your progress with a health journal
  • Simple interface that’s easy to navigate

To Use:

  1. Search for MyTherapy in the App Store and download it.
  2. Tap through the instructions to add medications and schedules.
  3. Set up daily reminders.

Tips for Making Medication Tracking Easier

  • Use alarm sounds you can hear clearly. You can adjust this in Settings.
  • Put a label on your phone case: “Check medication reminder!” for added help.
  • Involve a loved one who can help you set things up if it feels confusing.
  • Keep your iPhone charged so you don’t miss reminders.

Why This Matters

Taking medications on time is a big part of staying healthy, especially for chronic conditions. But life gets busy, and it’s easy to forget a dose. With your iPhone’s tools and a few helpful apps, you can take back control—without needing to be a tech expert.

These reminders give peace of mind, not just for you but also for family members who care about your well-being. Whether you use the built-in features or a third-party app, the key is consistency—and now you’ve got the tools to make that possible.

Emergency Alerts on iPhone

Have you ever heard a loud, sudden sound from your iPhone—like a siren—and wondered what it was? That’s likely an emergency alert, a helpful feature that notifies you about urgent safety situations. These alerts can seem alarming, especially if you’re not familiar with them, but they’re designed to keep you safe.

Table of Contents

In this guide, we’ll walk you through:

  • What emergency alerts are
  • The different types of alerts
  • How they work
  • How to turn them on or off
  • How to customize them to suit your needs

What Are Emergency Alerts?

Emergency alerts are important safety messages sent by government agencies to warn you about serious situations in your area.

These can include:

  • Dangerous weather (like hurricanes or flash floods)
  • AMBER Alerts (for missing children)
  • Emergency situations (like natural disasters or public safety threats)

You don’t need to install anything—these alerts come built into your iPhone.

Types of Emergency Alerts on iPhone

There are a few types you might receive:

  1. Presidential Alerts
    • Sent during a national emergency
    • Cannot be turned off
  2. Emergency Alerts
    • Includes severe weather, natural disasters, or other threats
    • Can be turned off if you prefer
  3. Public Safety Alerts
    • Warnings about less urgent events, like a nearby fire or evacuation
    • Optional
  4. AMBER Alerts
    • Help find missing children in your area
    • Include a loud sound and detailed information

How Do Emergency Alerts Work?

  • These alerts use your location to send messages relevant to your area.
  • They appear as notifications on your screen and often come with a loud sound to catch your attention—even if your phone is on silent.
  • You don’t need an app or internet connection to receive them.

How to Manage Emergency Alerts on Your iPhone

If you’d like to adjust which alerts you receive, here’s how to do it:

Step-by-Step: Turn Emergency Alerts On or Off

  1. Open the Settings app on your iPhone.
  2. Scroll down and tap Notifications.
  3. Scroll all the way to the bottom.
  4. You’ll see switches for:
    • AMBER Alerts
    • Emergency Alerts
    • Public Safety Alerts
  5. Tap the switch to turn each alert on (green) or off (gray).

Note: You cannot turn off Presidential Alerts.

Should You Keep Alerts On?

It’s usually a good idea to keep them turned on, especially:

  • If you live in an area with bad weather
  • If you want to be aware of nearby emergencies
  • If you want to help in AMBER Alert situations

But if the sound startles you at night or causes stress, it’s okay to turn off certain types and keep only the most important ones.

Final Tips for iPhone Users

  • Keep your phone updated to make sure alerts work correctly.
  • Test alerts may happen occasionally—these are just practice and not real emergencies.
  • Ask a family member for help if you’re unsure. It’s okay to need support!

You’re in Control

Emergency alerts are there to help, not to scare. Now that you understand what they are and how to manage them, you’re in control of how you stay informed. Don’t hesitate to adjust the settings to make your iPhone work best for you.

How to Set Up Fall Detection (Important for Seniors)

Your iPhone and Apple Watch can do more than tell time or make calls—they can help keep you safe. One of the most important safety features for older adults is Fall Detection. If you fall and don’t respond, your Apple Watch can call emergency services for you.

This guide will walk you through how to set it up, how it works, and why it matters—no tech experience needed!

Table of Contents

🔑 Key Takeaway

Fall Detection is a simple, powerful safety tool built into your Apple Watch.
It’s designed to recognize when you take a hard fall and get you help fast—especially if you’re unable to respond yourself.

What Is Fall Detection:

  • Detects hard falls using motion sensors.
  • Taps your wrist and sounds an alert.
  • Shows options to call emergency services or say you’re OK.
  • If you don’t move or respond after about a minute, it automatically calls 911 and shares your location.

Why it matters:

  • For older adults and people with health concerns, falls can happen unexpectedly and lead to serious injuries.
  • Having Fall Detection turned on means emergency help can reach you quickly, even if you can’t call for it.

📱 What You’ll Need

  • An iPhone (running iOS 12 or later).
  • An Apple Watch Series 4 or later (running the latest watchOS).
  • The Watch app on your iPhone.

✅ How to Turn On Fall Detection (Step-by-Step)

Follow these easy steps to turn on Fall Detection:

  1. Open the Watch app on your iPhone.
  2. Tap on the “My Watch” tab at the bottom.
  3. Scroll down and tap Emergency SOS.
  4. Find the Fall Detection switch.
  5. Toggle it ON (it will turn green).
  6. Choose when it should be active:
    • Always On – recommended for seniors.
    • Only during workouts – for younger, more active users.
  7. Make sure your Medical ID and Emergency Contacts are set up (more on that below).

This helps emergency services know important health info. Here’s how:

  1. Open the Health app on your iPhone.
  2. Tap your profile picture in the top right.
  3. Tap Medical ID.
  4. Tap Edit.
  5. Add details like medical conditions, medications, and emergency contacts.
  6. Turn on “Show When Locked” so others can see it in an emergency.
  7. Tap Done.

🙋 Tips for Using Fall Detection

  • Wear your watch snugly for accurate detection.
  • If you fall but are okay, tap “I’m OK” on the watch screen.
  • Update your Medical ID regularly with any health changes.
  • Test it by gently simulating a fall (not recommended often!) or asking someone to help you understand what the alert looks like.

❤️ Final Thoughts

Fall Detection is more than a feature—it’s a safety net. With just a few taps, your Apple Watch becomes a lifeline in emergencies. Whether you’re staying active or just going about your day, knowing help is just a fall away can make all the difference.

You’re not alone—and technology is here to support you.

How to Convert Live Photos to GIFs on Your iPhone

Live Photos capture a few seconds of motion and sound before and after you take a picture. While they add life to your photos, they are not as easy to share as GIFs. Converting Live Photos into GIFs makes sharing these dynamic images simpler. This guide will walk you through how to do it using the Photos app and third-party tools.

Table of Contents

Method 1: Convert Live Photos to GIFs Using the Photos App

Your iPhone’s Photos app has built-in options to turn Live Photos into GIF-like animations. Follow these steps:

  1. Open the Photos app on your iPhone.
  2. Find your Live Photo by going to the “Albums” tab and selecting “Live Photos.”
  3. Swipe up on the Live Photo to reveal effects.
  4. Choose “Loop” or “Bounce.”
    • Loop: Plays the Live Photo continuously.
    • Bounce: Plays the Live Photo forward and backward repeatedly.
  5. Save and share your GIF using the Share button.

💡 Note: This method does not create a true GIF file but makes your Live Photo behave like a GIF.

Method 2: Use a Third-Party App for More Control

For full control over GIF creation, you can use a free app like GIPHY or Lively from the App Store. Here’s how:

Using GIPHY

  1. Download and install GIPHY from the App Store.
  2. Open GIPHY and tap the “Create” button.
  3. Select your Live Photo from your camera roll.
  4. Customize your GIF (add stickers, text, or adjust speed if desired).
  5. Tap “Next” and save your GIF to your Photos app or share it instantly.

Using Lively

  1. Download and install Lively from the App Store.
  2. Open Lively and allow access to your Live Photos.
  3. Select the Live Photo you want to convert.
  4. Tap “GIF” to generate the animation.
  5. Save or share your new GIF.

Final Thoughts

Converting Live Photos into GIFs is a simple way to make your moving pictures easier to share. Whether you use the Photos app for quick conversions or a third-party tool for more options, you can turn your favorite Live Photos into shareable GIFs in just a few steps.

Try it out and start sharing your favorite moments with friends and family today! 🎉

Best Practices for Organizing iPhone Photos by Albums and Tags

Keeping your iPhone photos organized makes it easier to find special memories when you need them. With albums, tags, and the search feature, you can manage your pictures efficiently. This guide will walk you through the best ways to organize your iPhone photos, step by step.

Table of Contents

1. Creating and Using Albums

Albums help you group photos by events, people, or themes. Here’s how to create and manage them:

  1. Open the Photos app.
  2. Tap on “Albums” at the bottom of the screen.
  3. Tap the “+” sign in the top left corner and select “New Album.”
  4. Name your album (e.g., “Family Trip 2024”).
  5. Tap “Save,” then select the photos you want to add.
  6. Tap “Done.”

Tip: You can also move photos to an album by selecting a picture, tapping the share icon (a square with an arrow), and choosing “Add to Album.”

2. Using Tags to Find Photos Faster

While the iPhone doesn’t have manual tagging, it automatically detects faces, objects, and locations. Here’s how to use these features:

  • People & Places:
    • Open the Photos app and go to the “Albums” tab.
    • Scroll down to the “People & Places” section.
    • Tap on a person’s face or a location to see related photos.
  • Adding a Name to a Recognized Face:
    1. Open a photo with a person’s face.
    2. Swipe up or tap the info (i) button.
    3. Tap “Add Name” and type in their name.
    4. Tap “Done.”

3. Searching for Photos Easily

The Search feature helps you find photos quickly without scrolling through thousands of images.

  • To search for a specific photo:
    1. Open the Photos app.
    2. Tap the Search icon (magnifying glass) at the bottom.
    3. Type keywords like “beach,” “birthday,” or a person’s name.
    4. Browse the results and select your photo.

Tip: You can also search using dates (e.g., “March 2023”) or objects (e.g., “dog,” “flower”).

4. Using Favorites for Quick Access

If you frequently access certain photos, marking them as favorites saves time.

  1. Open the Photos app and find the picture.
  2. Tap the heart icon below the photo.
  3. Your photo will now appear in the Favorites album.

5. Keeping Your Albums Organized

Once you’ve created albums, maintaining them is essential.

  • Rename or Delete Albums:
    • Go to Albums and tap “See All” (if needed).
    • Tap “Edit” (top right corner).
    • Rename or delete albums by tapping the appropriate options.
  • Move Photos Between Albums:
    • Open an album, tap “Select,” choose the photos, and add them to a new album.

Final Thoughts

Organizing your iPhone photos with albums, tags, and search makes it easier to enjoy and share your memories. Start small—create a few albums today, and soon, finding your favorite pictures will be effortless!

How to Recover Deleted Photos and Videos on iPhone

Accidentally deleting photos and videos can be frustrating, but don’t worry—your iPhone has built-in tools to help you recover them. If needed, third-party recovery options can also help. Follow this step-by-step guide to get your lost media back.

Table of Contents

Method 1: Recover from the “Recently Deleted” Album

Your iPhone automatically stores deleted photos and videos in a special folder for 30 days before permanently removing them. Here’s how to retrieve them:

  1. Open the Photos app on your iPhone.
  2. Tap on Albums at the bottom of the screen.
  3. Scroll down and select Recently Deleted under “Utilities.”
  4. Browse through the deleted items and find the photo or video you want to restore.
  5. Tap on the photo or video, then tap Recover (or select multiple and tap Recover All).
  6. The recovered item will be restored to its original album.

Note: If the item has been deleted for more than 30 days, it will no longer be in the Recently Deleted album.

Method 2: Restore from iCloud Backup

If the photo or video is no longer in the Recently Deleted album, you may be able to recover it from an iCloud backup. Here’s how:

  1. Check iCloud Photos:
    • Go to Settings > [Your Name] > iCloud > Photos.
    • Ensure that iCloud Photos is turned on.
    • Visit iCloud.com on a computer, sign in, and check if the photo is in the Photos section.
  2. Restore an iCloud Backup (Last Resort)
    • Go to Settings > General > Transfer or Reset iPhone > Erase All Content and Settings.
    • Follow the setup steps and choose Restore from iCloud Backup.
    • Select a backup from before the photos or videos were deleted.

Warning: This will erase your iPhone and restore it from the selected backup, so back up your current data first.

Method 3: Use Third-Party Recovery Apps

If you don’t have a backup, third-party recovery tools can help scan your device for lost photos and videos. Some popular options include:

  • Dr.Fone – Data Recovery
  • iMobie PhoneRescue
  • Tenorshare UltData

How to Use a Recovery App:

  1. Download and install the recovery app on your computer.
  2. Connect your iPhone to the computer using a USB cable.
  3. Follow the on-screen instructions to scan for deleted files.
  4. Select the photos and videos you want to restore and save them to your device.

Note: These apps are not always guaranteed to work, and some require a paid version for full recovery.

Prevent Future Data Loss

To avoid losing important photos and videos in the future, consider these tips:

Final Thoughts

Losing photos and videos can be stressful, but with these recovery methods, you have a good chance of getting them back. Start with the Recently Deleted album, check your iCloud backups, and use third-party apps if necessary. By backing up your media regularly, you can prevent future data loss.

If you found this guide helpful, share it with friends and family who might need it!

Simple but Effective Way To Clear Safari Cache

Browsing the web on your iPhone should be quick and easy, but over time, Safari can slow down due to stored cache, cookies, and browsing data. Clearing this data can help improve browsing speed and free up storage space. If you’re new to iPhones or technology in general, don’t worry—this guide will walk you through the process step by step.

Table of Contents

Why Should You Clear Safari Cache?

Regularly clearing Safari’s cache helps:

Step-by-Step Guide to Clearing Safari Cache on iPhone

Follow these simple steps to clear your browsing data:

1. Open the Settings App

  • Locate and tap the Settings icon on your iPhone’s home screen.

2. Scroll Down and Select Safari

  • Scroll through the list and find Safari—tap on it to open Safari’s settings.

3. Tap on “Clear History and Website Data”

  • This option is located in the middle of the page.

4. Confirm Your Action

  • A pop-up will appear asking if you want to clear history and data. Tap Clear History and Data to confirm.

✅ That’s it! Your Safari cache, cookies, and browsing data have been cleared

Additional Tips for Better Browsing Performance

By following these simple steps, you can enjoy a faster and more efficient browsing experience on your iPhone. Regularly clearing Safari’s cache is a small but effective habit that keeps your device running smoothly!

How to Offload Unused Apps Without Losing Data on Your iPhone

Your iPhone can fill up with apps you rarely use, taking up valuable storage space. Instead of deleting them, you can use the Offload Unused Apps feature. This lets you free up space while keeping your app data intact, so you can pick up where you left off if you reinstall the app later. Here’s how it works and how you can use it.

Table of Contents

What Is Offloading Apps?

Offloading an app removes it from your iPhone but keeps its data saved. If you reinstall the app, all your settings, logins, and files will still be there. This is different from deleting an app, which erases everything.

Why Offload Apps?

  • Frees up storage space on your iPhone.
  • Keeps your app data, so you don’t lose progress or saved files.
  • Automatically offloads apps you don’t use often (if enabled).

How to Offload Unused Apps Manually

Follow these simple steps to offload an app:

  1. Open the Settings app on your iPhone.
  2. Tap General > iPhone Storage.
  3. Scroll through the list of apps and select the one you want to offload.
  4. Tap Offload App, then confirm by tapping Offload App again.
  5. The app will be removed, but its icon will stay on your home screen with a small cloud symbol.

How to Automatically Offload Unused Apps

If you want your iPhone to offload apps automatically when storage is low, enable this setting:

  1. Open Settings.
  2. Tap App Store.
  3. Scroll down and toggle on Offload Unused Apps.

This will automatically remove apps you don’t use often but keep their data safe.

How to Reinstall an Offloaded App

If you want to use an offloaded app again, here’s how to get it back:

  • Tap the app’s icon on your home screen. Your iPhone will start downloading it again.
  • Alternatively, go to the App Store, search for the app, and tap the download button.

Once the app is reinstalled, all your data will be restored.

Final Thoughts

Offloading apps is a simple yet powerful way to manage your iPhone storage without losing important data. By using this feature, you can keep your device running smoothly while ensuring that your essential information is safe and accessible whenever you need it.

Try it out and enjoy a clutter-free iPhone without the stress of losing your files!

Speed Up a Slow iPhone

Is your iPhone running slower than usual? Over time, your device can become sluggish due to background apps, cluttered storage, or outdated software. The good news is that you don’t need to be a tech expert to fix it! Here are some easy and practical solutions to help speed up your iPhone.

Table of Contents

1. Close Unused Apps

Apps running in the background can slow down your iPhone.

  • Swipe up from the bottom of the screen (or double-click the Home button on older models).
  • Swipe away any apps you’re not using.

2. Restart Your iPhone

A simple restart can refresh your device and improve performance.

  • Hold down the Power button and Volume button (for newer models) or the Power button alone (for older models) until the power-off slider appears.
  • Slide to turn off your iPhone.
  • Wait a few seconds, then turn it back on.

3. Free Up Storage Space

A full storage can slow down your iPhone. Try these steps:

  • Delete unused apps: Press and hold an app icon, then tap Remove App.
  • Clear old photos and videos: Open the Photos app, go to Albums > Recently Deleted, and permanently remove them.
  • Offload unused apps: Go to Settings > General > iPhone Storage and tap an app to offload it while keeping its data.

4. Update Your Software

Keeping your iPhone updated ensures it runs smoothly.

  • Open Settings.
  • Tap General > Software Update.
  • If an update is available, tap Download and Install.

5. Reduce Background Activity

Too many background processes can slow things down.

  • Turn off Background App Refresh: Go to Settings > General > Background App Refresh and choose Off or Wi-Fi only.
  • Reduce motion effects: Go to Settings > Accessibility > Motion and turn on Reduce Motion.

6. Clear Safari Cache

If Safari is slow, clearing its cache can help.

  • Go to Settings > Safari.
  • Tap Clear History and Website Data.
  • Confirm by tapping Clear History and Data.

7. Reset All Settings

If your iPhone is still slow, resetting settings might help.

  • Go to Settings > General > Transfer or Reset iPhone.
  • Tap Reset > Reset All Settings (this won’t delete your data, just resets settings to default).

Final Thoughts

These simple steps can help bring your iPhone back up to speed. Try them one by one, and you’ll notice a difference in performance. If your iPhone is still slow after trying these fixes, it may be time to consult Apple Support.

Hidden Privacy Features in Safari: Browsing Safer on iPhone

Apple prides itself on privacy, and Safari, its default web browser, comes packed with powerful tools to help protect your data. Whether you’re an iPhone pro or just getting started, this guide will walk you through Safari’s hidden privacy features and how to use them to stay safe online.

Table of Contents

1. Intelligent Tracking Prevention (ITP)

Websites and advertisers use trackers to collect information about your browsing habits. Safari’s Intelligent Tracking Prevention (ITP) helps stop them from following you across different sites.

How to Enable ITP:

  1. Open Settings on your iPhone.
  2. Scroll down and tap Safari.
  3. Toggle on Prevent Cross-Site Tracking.

✅ This feature blocks trackers from gathering data about your online activity.

2. Private Relay (iCloud+ Feature)

Private Relay is an advanced privacy feature available with iCloud+. It hides your IP address, making it harder for websites to track your location and browsing habits.

How to Enable Private Relay:

  1. Open Settings.
  2. Tap your Apple ID (your name at the top).
  3. Select iCloud > Private Relay.
  4. Toggle Private Relay on.

✅ Your internet activity is encrypted, preventing websites from identifying you.

3. Hide Your IP Address

Your IP address can reveal your approximate location. Safari lets you hide it to enhance your privacy.

How to Hide Your IP Address:

  1. Open Settings.
  2. Tap Safari.
  3. Select Hide IP Address.
  4. Choose From Trackers or From Trackers and Websites.

✅ This prevents websites and trackers from using your IP to follow you.

4. Use Private Browsing Mode

Private Browsing mode prevents Safari from saving your browsing history, cookies, and other data.

How to Enable Private Browsing:

  1. Open Safari.
  2. Tap the Tabs button (two overlapping squares at the bottom right).
  3. Select Private.
  4. Tap the + button to open a private tab.

✅ When you close the private tab, your history and data are erased.

5. Block Pop-ups and Malicious Websites

Safari has built-in settings to block unwanted pop-ups and protect against malicious sites.

How to Enable These Protections:

  1. Go to Settings > Safari.
  2. Toggle on Block Pop-ups.
  3. Scroll down and make sure Fraudulent Website Warning is turned on.

✅ This helps keep harmful websites and annoying pop-ups away.

6. Clear Your Browsing Data Regularly

For added security, clear your browsing history and cookies from time to time.

How to Clear Browsing Data:

  1. Go to Settings > Safari.
  2. Scroll down and tap Clear History and Website Data.
  3. Confirm by selecting Clear History and Data.

✅ This removes stored website data that could track your online activity.

Final Thoughts

Apple makes privacy a priority, and Safari has built-in tools to help you stay safe while browsing. By enabling these settings, you can protect your personal data and enjoy a more private online experience.

Got questions? Let us know in the comments below!

🔒 Stay safe and happy browsing!